


Overview - Army Compositions - General Tips - Calldowns - Units - In-depth - Commander Synergies - Map-Specific Tips - Replays
Overview
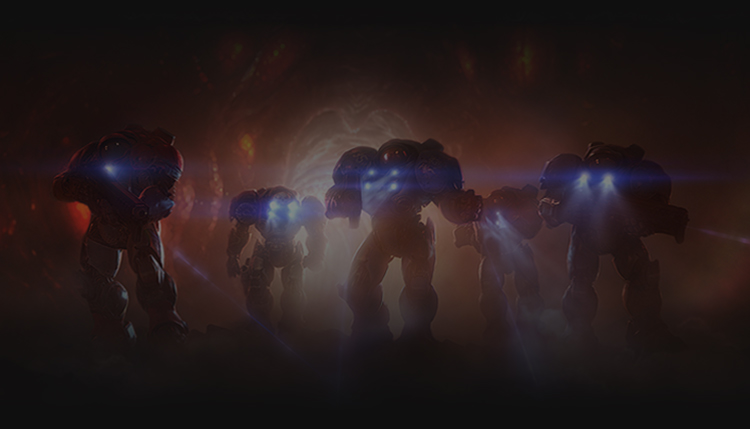
James Raynor, Renegade Commander, is one of the most played commanders in the game. With access to most of the standard Terran units from Wings of Liberty, Raynor also resembles Terran ladder play more than any other commander. Raynor is also one of the most difficult commanders to play well, mirroring the difficulty of Terran play typically found in Versus.
Raynor has access to a wide variety of strategies, which commonly fall into two categories: an aggressive bio-based style of play, and a slower approach focusing on a variety of mech units . When using an army comprised of fragile bio units, it’s up to the player to keep Raynor’s forces alive and push to victory. With mechanical units, Raynor can defend a position indefinitely, or he can call in the fleet and strafe the enemy with durable Battlecruisers.
Raynor bio compositions have the smoothest power curve in the game. He is carried by his two calldowns in the early game and gradually powers up throughout the game. Eventually, Raynor’s Bio composition becomes powerful enough to shred through all enemy units and buildings that stand before them. Mech play has a slightly bumpier ride as Raynor needs a few more minutes to deploy his forces. He’ll also have a hard time dealing with air compositions early on.
[Last Updated: June 6th, 2019]
Strengths
Mid Game Pushing Power: Raynor excels at pushing into enemy encampments with his bio during the mid game. A core composition of Marines and Medics provide the necessary damage output and sustainability required for these pushes, enabling Raynor to push very aggressively for much of the match.
Unlimited Mineral Income: The extra income provided by Mules allow Raynor to resupply his bio force rapidly, as well as to ramp up quickly. This also enables him to afford an excess of static defenses in the form of Spider Mines or Missile Turrets.
Weaknesses
Area of Effect Damage/Mutators: Raynor’s bio gets torn up by area damage effects, which can be particularly painful in certain mutators such as Blizzard, Twister, and Self Destruction. In the hands of a less-skilled player, he also has a weakness against enemy waves with heavy area damage, such as the Reaver/Disruptor composition, or Terran Mech.
Difficult to Master: Raynor is one of the hardest commanders to play well. Due to the diverse set of skills that Raynor’s playstyle demands, newer players without existing Starcraft experience will struggle to do well with Raynor on the higher difficulties.
Suggested Unit Compositions
![[image loading]](https://tl.net/staff/monk/Coopguides/Raynor/Bio.jpg)
Bio (Marine/Medic/Marauder/Firebat)
Generally recommended on offense-oriented maps where you push into an enemy base. Bio-based play consists entirely of a mix of Marine/Medic with circumstantial Firebat/Marauder support. Marauders survive area damage attacks better than Marines, and do well against armored ground compositions. Firebats are generally a very good choice against Zergling-based enemy, compositions, as well as on Miner Evacuation and Dead of Night, but should otherwise not be employed.
![[image loading]](https://tl.net/staff/monk/Coopguides/Raynor/BioMine.jpg)
Bio/Mine
Similar to the bio composition, with a few Vultures added in on a separate control group in order to cover attacks from all sides. Spider Mines are laid at key locations around the map to cover alternate enemy attack paths while you push into objectives with your army. This composition is useful for larger maps where you have to be in more than one place at a time, such as on Mist Opportunities, Oblivion Express, and Vermillion Problem.
![[image loading]](https://tl.net/staff/Chimaron/Guides/Raynor/MechComp.jpg)
Mech (Vulture/Siege Tank/Viking OR Vulture/Banshee/Viking)
Raynor can effectively utilize a defensive mechanical composition consisting of Vultures to keep the ground clear, and Vikings plus Missile Turrets for air. Siege Tanks or Banshees can be supplemented in order to clean up anything that the Spider Mines miss. One or two Medics should also be added into this composition in order to keep your mechanical units healed. The goal of this composition is defense, so it’ll fare poorly on more offensive maps.
![[image loading]](https://tl.net/staff/Chimaron/Guides/Raynor/BCcomp.jpg)
Fleet Rush (Battlecruiser/Marine OR Vulture)
By relying on calldowns to survive the early game, Raynor can safely tech rush to Battlecruisers. Two Starports can pump out a fleet of Battlecruisers, and excess minerals should be used to build supporting Marines or Vultures, depending on the enemy composition. While this strategy has lower damage output and game impact than a bio-oriented build, a fleet of Battlecruisers provides a more sustainable map presence, particularly in mutations that favor attrition.
General Tips
- You should aim to construct multiple Orbital Commands to increase your income. Refer to the Orbitals and Macro section for details.
- Opening almost exclusively a 3CC or 4CC build (three to four Command Centers before any units) is completely safe in most situations with the help of your two calldowns. This gives you a booming initial economy, which allows you to snowball through the rest of the game.
- Spider Mines are a powerful option in Raynor’s arsenal, being able to annihilate ground armies. They are best used against ground waves on any map with a defensive component where you can ensure that you have access to the enemy spawn point.
- Improve your multitasking. Multitasking bio, Vultures, Mules, unit production, calldowns, and upgrades can be tricky for newer players. Raynor is a very demanding commander to play, so get practice and improve.
- Use calldowns when they’re available instead of leaving them for emergencies. This especially applies to Dusk Wings with a full Mastery upgrade as you can have them on the field 50% of the time thanks to their short 2 minute cooldown.
- Do not leave the Hyperion idle. It is a very powerful calldown with both its active abilities and can take out key objectives practically on its own.
- Mech weapon and armor upgrades affect both of Raynor’s calldowns.
- Set up your bio in a concave before engagements. This lets all of your army start firing more quickly, and mitigates splash damage.
- Raynor fares better against Protoss defenses than against Terran or Zerg defenses. Specifically, Siege Tanks and Vipers will give Raynor a lot of trouble when he’s assaulting an enemy base. Additionally, many Terran and Zerg encampments tend to feature cloaked or burrowed units, forcing Raynor to waste Orbital Command energy to Scan for them.
- Every level of armor upgrades provides a 10% health increase to the units affected. This is a huge deal for Raynor’s bio, providing them with important additional survivability.
- Learning the stutter-step technique will slightly improve the efficiency of your Bio army.
- Learning the rapidfire technique will help you plant Spider Mines more quickly and greatly improve the effectiveness of these units.
Calldown and Unit Overview
Calldowns:
33.02 DPS x 5
With full mastery points, you’ll be able to call down the Dusk Wings every 240 seconds (120 with mastery) starting at the four-minute mark. Dusk Wings last for 60 seconds, are fully cloaked, and possess immense area of effect damage. They are powerful enough to take down almost all ground-based attack waves until the very late stages of the game, allowing your armies to push into enemy bases without having to retreat and defend. They’re also useful for destroying the initial Rocks at the expansion and for repelling the first attack wave. When first called down, the Dusk Wings will deal 50 damage to all enemies at the location they are summoned.
76.92 DPS
The Hyperion is Raynor’s second, more robust calldown that you can summon once every 360 seconds (240 with masery), with an initial coolup of 300 seconds. Once summoned, the Hyperion lasts for 60 seconds, and provides a significant advantage over the Dusk Wings by being able to attack air units. It also has much better survivability, making it your best tool for breaking into fortified areas. Its abilities include:
- Hyperjump: Teleports the Hyperion to any location on the map, even unexplored areas. 15 second cooldown.
- Yamato Cannon: Deals 600 damage to a single target and all enemies within a small area of the target. 15 second cooldown. You’ll most often want to target enemy units that are a threat to Raynor’s fragile bio with your Yamato. This includes all units with splash damage, as well as Hybrid and capital ships.
- Point Defense Drone: Prevents enemy projectiles from dealing damage within an area of the Point Defense Drone. Comes with 4 charges, a 5 second cooldown, and lasts 3 minutes. Each projectile stopped by the Point Defense Drone consumes 10 energy, and they each have 500 energy. Make sure to use all of the charges during the Hyperion’s duration.
- Advanced Targeting Systems: Friendly units near the Hyperion gain +2 damage. This lets the Hyperion scale with your army, as it highly increases the damage output from a group of Marines.
Units and Buildings
No Stim: 8.00 DPS
Stimpack: 13.95 DPS
Drop Pod Haste: 12.76 DPS
Stimpack and Drop Pod Haste: 22.22
The bread and butter of your bio force, Marines are an all-purpose unit that deals immense single target damage for its mineral and supply costs. They are very susceptible to area damage, however, and must be supplemented with other bio units when necessary.
Without Stabilizer Medpacks: 9.00 HPS
With Stabilizer Medpacks: 12.00 HPS
Medics significantly increase the expected lifespan of your Marines. Once upgraded with Stabilizer Medpacks, they become able to heal both biological and mechanical units, and reduces the damage taken by any unit being healed by 25%. This damage reduction also applies to any additional target of the Medic Heal mastery, granting damage reduction to two units rather than one. Generally you’ll want one Medic for every four non-Medic bio units. Against heavy area damage mutators, you’ll want to increase this number. For a mechanical force, a total of about two Medics are sufficient to heal up between fights—they’re not there to let the mech units trade, which you should avoid, but merely to stay repaired. Get your Medics on the field before you need them, allowing them to generate energy for upcoming healing.
No Stim: 7.69 (15.38 vs armored) DPS
Stimpack: 13.51 (27.02 vs armored) DPS
Premier bio composition support. They are mainly used to prevent your bio ball from being too vulnerable to area-of-effect damage, such as against High Templar and Colossi. When playing bio, it is essential that you mix in a number of Marauders. Although you should make them against all enemy compositions when pursuing a bio composition, you should only prioritize them against ground-only compositions.
No Stim: 6.55 (9.83 vs light) DPS
Stimpack: 11.42 (17.14 vs light) DPS
Firebats are a lot more durable than the other bio units, but they’re also much more situational than Marines or Marauders, as their short attack range and low single-target damage output render them inefficient against any enemy that doesn’t come to you. Firebats are only ideal in only two situations: against the two Zerg compositions that start with Zerglings, and on maps with Infested, such as Miner Evacuation and Dead of Night. They are also viable, though not necessary, against certain Protoss compositions that don’t feature Immortals.
6.80 (17.00 vs light) DPS
Though they’re not powerful attacking units, the ability to lay an unlimited number of Spider Mines supported by masses of Orbital Commands and Mules makes Vultures one of the most powerful units in the game. Spider Mines in a mech composition can render defensive missions such as Temple of the Past, Oblivion Express, and Mist Opportunities trivial.
Spider Mines can be attacked by the enemy if they are either detected or when they unburrow to attack. Because of this, Spider Mines are best placed right on top of an enemy spawn point in overwhelming numbers, such that the Spider Mines obliterate the enemy before they can retaliate and destroy the Mines.
Tank Mode: 16.66 (27.77 vs armored) DPS
Siege Mode: 13.40 (19.16 vs armored) DPS
On the ground, the Siege Tank is mostly outclassed by either a bio ball or the Vulture’s Spider Mines. Even with the Advanced Siege Tech upgrade, Siege Tanks don’t provide enough of a benefit when mixed with bio units. The main use for them is as supplementary units in addition to Spider Mines on a defensive mission such as Temple of the Past or Oblivion Express. On these maps, Siege Tanks will be able to clean up stray units that have slipped through your field of Spider Mines. Siege Tanks can also work on maps where you are faced with a prolonged defense, such as Miner Evacuation and Dead of Night—just don’t rely on them as your only unit type.
Vs Air: 11.49 (16.09 vs armored) DPS
Vs Ground: 13.79 DPS
The counterpart to the Vulture’s Spider Mines, Vikings are used to clean everything up in the air that Vultures do on the ground. Once upgraded, they deal area damage and can be very effective in a hit-and-run role against air attack waves. Note that because Vikings are fragile units, you’ll need Missile Turret support to deal with heavy air waves without taking significant losses. In most cases, adding Vikings to a bio army for anti-air purposes isn’t as effective as simply adding more Marines.
22.01 DPS
Best used in combination with Vultures and Vikings to provide additional support to Spider Mines on the ground. As an alternative to Siege Tanks, Banshees are more mobile and can more easily deal with some bonus objectives. However, the tradeoff is that Banshees are incredibly fragile and vulnerable to area damage effects. Banshees can also be used against certain compositions that lack solid anti-air such as the Protoss Gateway composition, especially in cases where mutators such as Blizzard hinder the usage of Spider Mines, or against Terran Bio-Tank and Protoss Disruptor/Reaver to clean up leftover enemy Siege Tanks and Reavers once the bulk of the enemy force has been dealt with.
Banshees receive a +2 range increase while cloaked. You can use this to your advantage to avoid enemy retaliation. Use your Marines to screen for them while the Banshees take out key enemy units that could threaten your Marines.
Ground: 40.00 DPS
Air: 30.00 DPS
Battlecruisers are outclassed by most of Raynor’s other units in terms of damage output for their resource investment, but they have good mobility and survivability—as well as a strong alpha strike in the form of their Yamato Cannon, which deals 300 damage to a single target after a 3 second cast time. Their Tactical Jump also allows them to respond to enemy attacks very quickly, moving across the map in an instant—although this should not be used as a crutch for poor map routing, since the Battlecruisers will have to slowly make their way back to the front lines.
Battlecruisers can be used as late game support for mineral-focused armies, to help offset the vulnerability to heavy-hitting late game enemies. However, the investment of tech-switching is quite high and is only recommended for drawn-out missions (such as mutations) in which late game survivability becomes a major problem.
A Battlecruiser rush is doable and is actually a better strategy than a late game tech switch if you wish to build Battlecruisers at all. Calldowns can keep the base safe until Battlecruiser production begins. With a proper build order, you can get the first few Battlecruisers out by around 7 minutes. Two Starports are enough for continuous production from two bases’ worth of gas income.
When using a Battlecruiser rush strategy, you should be using Marines or Spider Mines as support to your Battlecruisers in order to help you better deal damage to the enemy. The Battlecruisers are still your main army, but they require support in order to be at their best. This build is generally less effective than others, except on long maps where the enemy heavily counters bio play.
SCVs are recommended over Medics for repairing Battlecruisers. Compared to the Battlecruiser’s large health pool, Medics have a rather slow healing rate and cannot be stacked like SCVs can, and they tend to get killed off very easily if they are healing in-battle, resulting in a greater gas loss than the loss from SCV repairs.
You may want to rebind the Tactical Jump and Yamato keys to better matter with the Hyperion’s, else you risk getting them confused during battle. Both of these abilities have a 60 second cooldown.
6.98 DPS (Empty)
62.78 DPS (4 marines with Stimpack)
90.68 DPS (6 marines with Stimpack)
Bunkers are generally not a good defensive option outside of early game due to their low damage output and poor DPS density. In the early game, it can sometimes be wise to produce one Bunker as a defensive measure against the first wave if you either don’t have Dusk Wings unlocked or you’re playing on a map where Dusk Wings aren’t available before the first wave, such as Rifts to Korhal. The best example of Bunker use is on Dead of Night, where a few Bunkers are an essential part of a strong defense.
27.91 DPS
In addition to Spider Mines and bio, Missile Turrets are another good mineral dump for when you have massive numbers of Orbital Commands. They can be especially handy when you’re going mech and are relying on Vikings as your anti-air, as Vikings will often need support against enemy attack waves. Missile Turrets are especially useful on maps such as Void Launch and Temple of the Past where you have to defend against waves of predictable air units.
In-depth
Problematic Enemy Compositions
Raynor’s forces can have a tough time against particular types of enemy units. For this reason, it is important to keep on eye on the enemy attack wave composition so that you can properly identify and counter it with a unit selection of your own.
Sky Terran/Shadowtech
- Battlecruisers have lots of armor, and are tough for Marines to take down. Vikings are advised.
- Liberators prioritize sniping Medics, so try to shoot them down first, especially using Vikings. Also keep in mind that other units tend to draw fire away from Marines, so you may want to target-fire.
- Ravens will accompany the later waves, so watch out for Seeker Missiles targeting groups of your units.
Zerg Swarmy
- Early Banelings lack speed upgrades, so it is feasible to split your Marines in order to minimize losses, meaning you do not have to rush anti-Baneling tech.
- Later attack waves come with speed Banelings as well as Vipers whose Disabling Clouds will hinder attempts at splitting. You should pre-spread your forces with Firebats at the front to tank, as well as bait Disabling Clouds by running small groups of bio forward.
- Siege Tanks can help kill Banelings, but relying on them requires baiting the Vipers due to their Disabling Clouds.
If using Vultures, it is advised to spread out the minefield along the attack paths rather than in groups as usual, since Baneling splash will destroy clumped groups of mines. - Saving Dusk Wing for attack waves might be a good idea due to their wide AoE upon summoning, if you are willing to give up Dusk Wing support for pushing. They also serve as bait for Vipers, since Vipers will waste their Parasitic Bombs on the Dusk Wings, which will quickly die to Scourge regardless.
Protoss Robo Colossus
- Spider Mine spawn camping recommended.
- If spawn camping is not possible, it is still advised to lay some Spider Mines along attack paths to destroy accompanying Zealots.
- Vikings are very valuable, since they can deal with both the Colossi and the accompanying Scouts, which are a danger to Marines—among the Protoss ground compositions, this one comes with the greatest number of Scouts.
- Bio with plenty of Marauders can still do fairly well against this composition in a straight-up fight, save for the largest of attack waves.
Protoss Robo Reaver/Disruptor
- Spider Mine spawn camping highly recommended.
- If spawn camping is not possible, Spider Mines along attack paths can help by wasting Disruptor and Reaver shots.
Avoid engaging Reavers in a straight up fight ground to ground fight. - Banshee support is fairly sustainable against this composition, since this composition comes with the weakest anti-air. However, you should still make a good number of Marines to act as a shield against Adepts, which can take out Banshees quickly. Make a few Vikings to help with the Scouts, but be aware that Scouts come in fairly low numbers for this composition.
- For similar reasons, massing Battlecruisers can also work, and they have the added bonus of being able to snipe Reavers with Yamato Cannon.
Protoss Gateway
- Spider Mine spawn camping highly recommended.
- If spawn camping is not possible, Spider Mines along attack paths can help by wasting Psionic Storms.
When a High Templar uses Psionic Storm, there is a short cooldown before another Storm can be used. Use that time to focus fire the High Templar, particularly for earlier attack waves in which the High Templar are low in number. - High Templar have low health and shields, so a good number of Siege Tanks can take them out from out of range. Be sure to Scan ahead for vision and manually target with the Siege Tanks, which may prioritize other units.
- Psionic Storms don’t become available until about 10 minutes—if you see a High Templar in an attack wave around that time, snipe it quickly, even if it seems like the Templar isn’t doing anything.
- Battlecruisers can deal with this composition, provided you do not stack them against Psionic Storms and Archons. Banshees are not recommended as they are fragile, especially against Storms.
- This composition has absolutely no air units, so you can go very Marauder heavy. Marauders are also better at tanking Psionic Storms, which may be useful for later waves that come with lots of High Templar. The Marauders can slow and snipe the High Templar while being stormed.
Dealing with Mutators
While Raynor is fairly strong in regular missions, his relative power compared to other commanders tends to go down in mutations. This is because of the fragile nature of his forces, and despite his ability to reinforce quickly, many mutators can overwhelm even a powerful economy. Raynor cannot afford to brute-force his way through mutations with a careless raining-men strategy and must take some care to conserve his numbers. This section will cover how to handle some categories of mutators, as well as some specific ones.
“Dodge-This” Mutators
- These include Blizzard, Fireworks, Going Nuclear, Lava Burst, Orbital Strike, Scorched Earth, Self Destruction, Temporal Field, Time Warp, and Twister.
- The damage is not trivial for bio forces, so you should definitely prioritize getting out of the effects. Bio also tends to clump together very tightly, so it is very easy to have a large portion of your forces wiped out or crowd controlled if you are not careful.
- Stim is very helpful for getting units out of the affected areas, but remember that Medics cannot make use of them and will be left behind—you should train yourself to simply react more quickly rather than relying too much on Stimpacks.
Temporal Field and Time Warp seem fairly benign, but they can actually be quite devastating if enough forces get caught inside during a battle. - These mutators severely hinder multitasking efficiency, so you are advised not to split forces.
“Enemy Buff” Mutators
- These include Avenger, Barrier, Hardened Will, Inspiration, Just Die, Life Leech, Long Range, Power Overwhelming, Speed Freaks, Transmutation, and We Move Unseen.
- Raynor is relatively well-balanced for dealing with regular attack waves. However, once the enemies are buffed beyond that, Raynor tends to get overwhelmed. With these mutators, Raynor does not fare very well in direct combat.
- Spawn camping is very strongly recommended. Even if you cannot destroy all enemies, the free damage from spawn camping is critical in making sure Raynor’s fragile forces can finish off the attack wave before too many are killed.
It is important to note that Spider Mines work especially well against Speed Freaks due to the fact that enemies tend to get into range of Spidermines well before attacking the Mines, even without spawn camping. - Just Die is extremely difficult to deal with, since revived spellcasters have another full energy bar. Siege Tank support is recommended for taking out spellcasters (at least the first life) from out of range in order to effectively remove the double energy bar.
- Avenger tends to leave the high-tech, high-armored enemy units at full Avenger stacks at the end. Marines are heavily-countered by high armor, made even worse by Avenger. This means you should support your forces with high-damage units such as Siege Tanks, Spider Mines, or Vikings.
- We Move Unseen obviously requires more Orbital Commands, but in defensive scenarios, you should be building Missile Turrets in key locations in order to save the MULEs.
- Spider Mines somewhat work against air compositions with Transmutation involved. Air units (particularly Hybrid Nemeses) will kill a few Spider Mines, turn into ground units, and get destroyed by the Mines.
“Nerfing” Mutators
- These include Black Death, Concussive Attacks, Diffusion, Double Edged, Fear, and Moment of Silence.
Concussive Attacks is clearly the least dangerous of them all, but be aware that splash damage affects all the units hit by the splash damage, meaning once they are hit, they are harder to split to avoid additional splash. - Diffusion severely hurts bio play, as bio have too low of a range to avoid Diffusion damage, meaning they lose their DPS to hitting themselves. Diffusion also hurts Stimpack usage due to the Medics’ difficulty in keeping up their healing, and it hinders target-firing. Lastly, Diffusion is problematic for Spider Mines, even when spawn-camping, although it does let them hit air units through the Diffused damage. Long-range burst units like Siege Tanks and Vikings are recommended to deal with Diffusion, though you should still leave Spider Mines to help slow enemies down from getting too close.
- Double Edged hinders Stimpack usage and essentially nullifies calldowns. Raynor relies on glass-cannon type units, so practically all of his army is affected. The best bet here is to use bio without Stim (though you can still Stim small groups to burst something down as needed), and perhaps build some Battlecruisers (no Yamato), and put mastery points into Hyperion since it can get one or two Yamato shots down before it kills itself.
- Fear, Moment of Silence, and Black Death will trigger on bio forces very often. For Fear and Black Death, treat them as losses and try to build up “waves” of reinforcements to send in after the previous wave is killed off. For Moment of Silence, try to Stim before it goes off so that your army can make use of the movement speed to retreat. You can also try to preemptively move your forces back while running a small group forward to deal the finishing blow on the Heroic unit. For Black Death, go a little lighter on Medics since they become next to useless once they get the plague and turn to healing each other instead of your forces. Long-range support units would also be useful here.
“Map Control” Mutators
- These include Aggressive Deployment, Mag-nificent, Minesweeper, Outbreak, Propagators, Void Reanimators, and Void Rifts.
- Raynor is quite good against these due to a combination of his global Drop Pods and his short-cooldown Dusk Wings. His ability to split his forces reasonably well also assists in covering a wide area efficiently.
- A combination of Spider Mines and Siege Tanks provide fairly sustainable defense against any trickle of units, while calldowns (and Drop Pods in the case of Void Rifts and Mag-nificent) can assist in clearing out dangers that are out of reach of most forces.
- Against Mag-nificent and Minesweeper, note that the Hyperion’s Point Defense Drone can block the Mag-Mines and Widow Mines.
- Siege Tanks are recommended for Minesweeper, but in a pinch you can run lone Marines forward to trigger the Mines. This is highly unethical and is approved by neither the Dominion nor the Union for Raynor’s Raiders Marines.
- Remember that Raynor is at his best as a highly aggressive commander, so try not to fall back on being overly defensive. A lot of these mutators can be heavily mitigated and controlled by using Raynor’s aggression to clear out key areas, so that you don’t have to invest as much into defenses. It is very easy to slip into a spiral of overspending on defenses, only to be holed up into defending even more as the mutator steadily increases in power.
“Economic” Mutators
- These include Microtransactions, Mineral Shields, and Slim Pickings.
- Raynor’s standard play relies heavily on using his economy to maintain his army, so economic mutators tend to hit him very hard. This means he needs to build an army that is more durable than bio, making mech generally preferred against these mutators, either as the core force or at least as support for bio forces.
- It is still possible to use Bio against Microtransactions and Mineral Shields—one trick is to use MULEs in waves, holding the MULEs back until after a micro-heavy battle or until after Mineral Shields have disappeared.
“Miscellaneous” Mutators
- Afraid of the Dark and Shortsighted: Make extra Orbital Commands for Scans, since Scans are not affected by these mutators.
- Fatal Attraction: Siege Tanks don’t get pulled, so make use of those. Bio will see a lot of losses from being pulled around.
- Heroes From the Storm: Against ground compositions, Raynor can spawn camp with Spider Mines to eliminate the attack wave while also dealing heavy damage to the heroes. In general, spawn camping the heroes with Spider Mines is the best option, since his bio will suffer great losses against most of the heroes’ splash damage. Spider Mines can also bait ultimate attacks from the heroes. Be sure to spread the Mines out along attack paths to minimize the impact of the heroes’ splash damage.
- Kill Bots: The bots cannot target spidermines. While Marines seem expendable, keep in mind that the demands from the bots towards the lategame, in addition to the losses from battles, can overpower Raynor’s economic power. Because of this, it is heavily advised to clear the map of buildings to stop the Kill Bots from spawning if at all possible.
- Laser Drill: Calldowns can keep the Laser Drill down, depending on the location of the Drill. Be warned that the Drill is not a trivial threat in the early stages of the game, since bio numbers are low, such that losses from the Drill can seriously hinder Raynor from snowballing. Play defensive until you can take it out with calldowns, or build up your forces to a point where you can afford to ignore it during pushing.
- Missile Command: It is all too easy to overinvest into defenses. Bunkers should be your preferred method of defense, as they bypass the accompanying Point Defense Drones. You do NOT have to build any Bunkers until about 8 minutes into the game; repairing is sufficient until that point. After 8 minutes, one Bunker at the expansion and three in the main will keep you safe until around 13-14 minutes, when you should add two more at the main and at the expansion. You only have to fill the Bunkers halfway with Marines for them to reliably shoot down the missiles. Meanwhile, the rest of your forces out on the field will contribute greatly to missile defense. Drop Pods are also useful for catching incoming nukes. In general, Raynor is very strong against this mutator, given the relatively small investment he needs.
Build Order
Raynor’s build doesn’t change much as he levels up. For players at level 1, you’ll either have to rely on your ally to defend the first wave or skip the third Command Center in favor of a Bunker to defend the first wave. The ability to instantly build Supply Depots marginally speeds up this build. The following is a generic build for Raynor on maps with Rocks. This build must be adjusted on maps with contested expansions, requiring the use of Dusk Wings or even the Hyperion in order to effectively claim your expansion. Refer to the attached replay pack for additional details.
- 14 Supply Depot
- 16 2nd Command Center (at Rocks if available)
- 19 Barracks
- 20 Orbital Command on first CC
- 20 3rd Command Center (at Rocks if available)
- 21 Orbital Command on second CC
- 21 Refinery
- 22 Refinery
- 25 4th Command Center (at main base, optional)
Orbitals and Macro
Figuring out the right number of Orbital Commands and production structures can be tricky. Having more Orbital Commands will allow you to have greater income later in the game, but they cost time and money to build early on, leading to delayed army production and greater vulnerability in the early game. If you build too few Orbital Commands, then the reduced income will make it difficult to maintain your army when faced with later attack waves as well as when pushing into the more heavily guarded enemy bases. However, If you build too many you will not only risk being unable to contribute to the match in the early game — meaning that your ally will have to cover for you — but you will also prolong the mission, forcing you to face more dangerous attack waves that could otherwise have been avoided. A good example is when speedrunning Lock and Load, in which case the optimal number is 3 Orbital Commands - building just 2 makes it very difficult to assault the fourth Celestial Lock, while building more than 3 means will likely cause you to be unable to finish before the double attack waves begin spawning, thus adding additional difficulty that may quickly snowball out of control. Therefore, balancing the early game opportunity cost with the long term economic advantage is a very important aspect of playing Raynor optimally.
A good general rule of thumb for deciding upon the right number of Orbital Commands is to simply add one extra Orbital Command for every 5 minutes of the expected game length. If a mission will last between 10 and 15 minutes, build 3; if the mission will last between 15 and 20 minutes, build 4. If you will be using Vultures and their Spider Mines, add one more. If facing Terran or Zerg, you may also be advised to add an additional Orbital Command. One exception is Oblivion Express, on which 6-8 is recommended. For mutations, add up to 4 more depending on the circumstances - easy mutations may only require one more than usual, while medium difficulty mutations or mutators such as We Move Unseen or Shortsighted may call for 2-3 more than usual, and very difficult mutations may need 4 more than usual.
Keep in mind that any Orbital Commands you decide to build must be built as soon as possible to maximize their effectiveness. It is usually safe to build up to 4 before adding additional Barracks beyond the first, but anything beyond that will require you to wait until you find a breather between objectives and attack waves. Usually, one will use the 4CC opener, followed by going up to 3 Barracks to get a small bio force going. The 5th+ Orbital Commands will then be added after the first objective and the following attack wave. Exactly when to add additional Orbital Commands beyond the 4th will be heavily dependent upon the map and how you (and your partner) are faring and thus will have to be determined based on experience.
Now that you have the Orbital Commands, how many Barracks should you build to support the income? A good general rule is to build one Barracks per Orbital Command, and then add 1-2 more after finishing worker production. The first three Barracks should have Tech Lab, Reactor, and Reactor. Afterwards, you should alternate between Tech Lab and Reactor. If you intend to build Firebats, your first three Barracks should instead use Tech Lab, Tech Lab, and Reactor, after which you alternate. Naturally, this assumes a certain level of macro skill, so if your macro is not optimal you may want to add additional Barracks as necessary. If you find yourself floating a lot of resources with the Barracks’ queues full, build more; if your Barracks are idle too often, reduce how many you build. Practice this macro thoroughly.
In conclusion, we have provided what we consider to be the optimal macro setup for Raynor, but it is important to consider your own limitations and adjust as necessary. However, no matter the skill level, we would not recommend building over 8 Orbitals in regular brutal missions, and no more than 12-14 Barracks. 6 Orbitals and 6-8 Barracks makes for a good spot for most general purposes for those who do not care about tweaking builds individually for each map.
Utilizing Calldowns
Dusk Wings
The Dusk Wings may seem fragile and not very useful past the early stages of the game - many players simply summon them into the middle of enemies, often without bio support, and completely forget about them; this results in the Dusk Wings quickly getting shot down.
One should remember that the Dusk Wings have quite good damage output and, assuming that they survive for their full duration, can be active for 50% of the time with max mastery, which is by far the best uptime out of all unit calldowns in Co-op. Since Raynor has access to such a constant source of damage, it would be a shame to let that go to waste.
To make full use of the Dusk Wings, one need merely follow a general rule that actually applies to all calldowns: always try to use them as soon as they are available if the situation allows. While it feels reassuring to have calldowns ready for emergency situations, one should also consider the opportunity cost of not using the calldowns. By using the calldowns right away, pushing a base could have been much easier or done much sooner, and perhaps using them earlier would have meant you could have fit one more use of the calldown into that game. This consideration is especially important for the Dusk Wings due to the sheer amount of time they can be on the field. In a 15-minute game, for example, you can fit 6 uses of the Dusk Wings — translating to 6 minutes of high damage air support for your forces. Holding off on using just one cast of Dusk Wings means that you lose out on about 17% of their total effectiveness. But you certainly don’t want to call them down when there are no enemies to kill simply for the sake of calling them down. Try to familiarize yourself with the maps so that you can better coordinate your use of Dusk Wings and minimize any wasted downtime.
Though the Dusk Wings have good damage output, they are also very fragile, unlike many other calldowns. If there is a large amount of anti-air, the Dusk Wings by themselves will be shot down long before their 1-minute duration is over. Though they are uncontested in the early game, they may be more easily threatened by the enemy as the game progresses, you may want to summon them behind your primary forces even though this means wasting the 50 damage area of effect that occurs during the summoning animation. If the Dusk Wings are too far forward, many anti-air units, especially air-to-air-only units, will focus on them and quickly destroy them, so it is much better to keep them slightly behind your front line while your ground forces target down enemies that are actively attacking the Dusk Wings. In general, the Dusk Wings will begin as targeted strikes on weak enemy groups and then transition into serving as damage support for your army.
Instead of A-moving the Dusk Wings, you can hotkey them and use them to target fire dangerous enemy units. They can take out Colossi and other ground units that threaten your Marines very quickly. If you spot a clumped group of enemy units, take advantage of the Dusk Wings’ splash damage. This can be particularly useful against approaching Zealots or Zerglings/Banelings. When sniping key enemies, it is worth noting that a lot of the enemy units with splash have long range, and you will have to bring the Dusk Wings forward to deal with them. You can either snipe them and dart back to safety with your Dusk Wings, or you can snipe and then stutter-step your army forward to provide cover. Against Hybrid Dominators, a Dusk Wing must be sacrificed as the Hybrid will prioritize using its Plasma Blast on one if it has not yet cast Psionic Storm - this actually makes for a great way to take out Hybrid Dominators without suffering significant losses, since the Hybrid cannot use Psionic Storm for a few moments after casting Plasma Blast, giving you a good opportunity to kill it before it can cast Psionic Storm on your Marines. Keep in mind that the Plasma Blast deals some splash damage, so you should separate your Dusk Wings when you see the Plasma Shot being charged. Additionally, you should not expect the Dusk Wings to be smart about which units they automatically attack, since they will prioritize units with anti-air attacks, meaning you may for example find them attacking a single Photon Cannon while a Colossus destroys your Marines. Also, refrain from stutterstepping your Dusk Wings together with your Marines as their attacks do not sync well. With proper management of Dusk Wings, they can add quite a punch to your army, giving them a lot more pushing power than you might expect.
Hyperion
The Hyperion isn’t a consistent source of support for Raynor due to its long cooldown, but its raw strength means that one should absolutely try to make the most out of the Hyperion’s lifespan.
We recommend that you dedicate a large portion of your APM to the Hyperion whenever it is available, even if it means that your macro may slip a little. You want to make sure to use the Yamato Cannon as soon as the cooldown is ready, and you want to spend every single Point Defense Drone.
When using the Hyperion, look out for units that its PDD cannot negate. This includes Marines, Void Rays, and even Thors to an extent due to their multiple projectiles. Marines are particularly dangerous due to their high numbers and DPS - you should be cautious when moving the Hyperion over a location fortified by Bunkers. You also do not want to summon the Hyperion in the middle of the enemy; due to the Yamato’s Cannon’s splash effect, it is better to summon it off to the side, aggroing the enemies such that they bunch up as they try to attack the Hyperion. Finally, when you deploy PDD, try to deploy them a short distance away from enemies, as they may draw fire from any non-projectile attackers and be destroyed as a result.
The Hyperion is very useful for punching holes into fortified areas. It can clear an area entirely on its own, or severely weaken multiple areas, allowing you to clear them out much easier with Dusk Wings or your bio. If you plan to later call down the Dusk Wings, your main goal with the Hyperion will be to get rid of as much enemy anti-air as possible, particularly air units that the Dusk Wings cannot fight against, and leave a PDD behind to provide vision for summoning the Dusk Wings. If you plan to clean up with bio forces, then you want to target splash-dealing units such as Colossi, Siege Tanks and casters. With Hyperjump, the Hyperion can weaken multiple enemy locations, and it may therefore be wise to plan out your intended pattern of attack to make full use of its duration. One neat trick is to use one last jump near the end of the Hyperion’s timer to warp to another location and use the Yamato Cannon to snipe one final unit. A good example of the Hyperion’s amazing early power is its use on Lock and Load, where it can severely cripple the defenses at two Celestial Locks and then take out a Colossus or Carrier guarding the northeastern Celestial Lock as well.
Later Hyperion usages will include handling attack waves while bio forces push forward, since later attack waves tend to get more dangerous for your bio. The Hyperion can then Hyperjump to join the rest of the army as support as you push into enemy territory. Unlike the Dusk Wings, the Hyperion should be placed in front of your army in order to draw enemy fire. The Hyperion can act as a tank by blocking enemy fire with the PDD and boosting the damage of your Marines with its Advanced Targeting Systems aura, giving you tremendous pushing power.
Using Vultures and Spider Mines
Spidermines can be mass-produced at a small cost - you typically want around 8 to 12. Through their Spider Mines, they are capable of wiping out entire ground attack waves, no matter how large they may be. However, due to the extremely low health of each Spider Mine and the fact that the enemy can attack them if they have detection, you may find that their use is a little trickier towards the end of the mission when the enemy comes with plenty of splash or raw firepower from the sheer number of units.
This huge weakness makes laying Spider Mines in the path of attack waves more and more impractical as the enemy wave size increases. You’d need an overwhelming number of Spider Mines that are sufficiently spread out such that the enemy attack wave cannot shoot enough of them down before the Spider Mines connect. Early on, this is perfectly manageable, which is good as you have no other options at that stage, but later on, the number of Spider Mines needed to take out each wave grows impractical, even when using rapidfire and lots of Vultures. This problem is made worse by late-game waves that include splash damage. One notable exception is the Zerg ground composition, whose units aren’t very well equipped to deal with Spider Mines.
For other late-game ground compositions, you will have to resort to laying Spider Mines at enemy spawn points in order to continue using them effectively. Enemy forces have a short delay when they are spawned, and with Spider Mines covering the enemy landing zone, they have very little ground to cover before activation, leading to total annihilation of enemy forces before they can respond. The only problem is that enemy spawn points tend to be defended by enemy encampments and thus require a fighting force to secure those spawn points.
Fortunately, Raynor is a highly-aggressive commander and shouldn’t have many problems pushing to secure these spawn points. With enough map knowledge and planning, one can secure spawn points before the attack waves reach a size that is problematic for Spider Mines when used normally. Some spawn points are extremely easy to secure, such as with Void Launch and Malwarfare. Others such as Temple of the Past and Oblivion Express are a bit more challenging. Many players tend to be quite timid in their play, but we encourage all players to try to be more confident and aggressive with Raynor’s army. The provided replays and VODs show how spawn points are secured and used for maps where they are applicable, particularly defensive maps. On offense-oriented maps, you will probably not need to secure spawn points since Raynor can end those maps before late-game waves become problematic, but it is still useful to practice doing so every once in a while in case the game drags on.
That being said, spawn camping will not solve all of your late-game ground wave scenarios. Maps like Chain of Ascension have spawn points (reinforcements) that are constantly pushed back as you progress, and you may have to mine the attack paths until you can secure the newly-designated spawn point. The spawn points on The Vermillion Problem and Lock and Load require clearing out the enemy bases, which is quite a detour. On mutations, spawn camping may not be viable at all due to environmental mutators. In those situations, you will simply have to deal with the Spider Mines’ weakness. One exception is the Speed Freaks mutator, which actually helps your Spider Mines due to the fact that the enemy just runs right into them before stopping to attack the Spider Mines, making them even better when placed on attack paths.
One last point to make about Spider Mines is that there is no need to rush them in most situations. Often a Raynor player planning to make use of Vultures gets very early Refineries to rush out the Factory and a few early Vultures. Raynor has powerful calldowns to carry his early game, so Raynor should first focus on getting a decent mineral income both in the short term and the long term by constructing Orbital Commands and saturating mineral lines, even when going for a mech-oriented build - Spider Mines cost a lot of minerals, after all. When mining spawn points, there is absolutely no need to go over 8-12 Vultures, since they can easily produce enough Spider Mines to destroy any attack wave, and the remainder of your resources are better spent on bio forces that have the pushing power that Vultures lack. In a game like Starcraft that is so economy-oriented, you want to only put up defenses you need while your economy is growing - and a Spider Mine defense is definitely not necessary early on.
Refer to the Replay Pack for more specific examples.
Masteries
Power Set 1:
- Research Cost Reduction -2%-60% (-2% cost per level)
- Speed Increases for Drop Pod Units: +2%-60% (+2% speed per level)
However, for the bio player, this choice is not such a straightforward one. The scenario depicted above involving constantly replacing your losses makes for an ideal scenario in which constant battling would require constant reinforcement. There are many reasons why the player will not see this ideal scenario very often.
First, during the early-mid game, the player does not want to be losing and replacing every bio unit, since that would mean no growth in army size. Until the player is maxed out, the player wants to be producing more units than he loses, such that the player will accumulate units that no longer benefit from the drop pod boost. Only during the late game and with a strong economy and infrastructure already in place does the player want to trade his non-boosted forces into the enemy and replace them with new, boosted ones. A skilled Raynor will also focus heavily on unit retention and rely on a smaller economy, further reducing the advantages of drop pod haste. While many bio players like to use the raining-men strategy, it is actually not the most optimal—and besides, it makes for an unethical practice in regards to all those Marines and their families.
Secondly, the player will most likely not be constantly fighting. This is especially true on defensive maps, where the pauses between attacks make for moments where the drop pod boost is being wasted. Even on offensive maps, the drop pod boost is wasted during travel time—movement speed bonus doesn’t really matter when the rest of your army has to catch up with them in any case—and some pushes into fortified enemy bases may have to wait until certain timings are met to allow you to use Dusk Wings or the Hyperion. Enemy attack waves likewise tend to waste much of the benefit of the boost, since battles with attack waves are typically very short, and the reinforcements will likely not see much of the battle, only arriving to contribute to the post-battle recovery.
Lastly, a bio style has uses for the upgrade cost reduction, even if bio tends to have a surplus of gas. Bio is actually gas-starved in the early game, when the gas must be invested into upgrades and Medics, usually off 2-gas income. The mineral cost of upgrades is also not negligible, especially for low-economy speedrun style play. For example, consider a player who is planning to get 2/2 upgrades. Without cost reduction, the player needs to account for not only the 200/200 for 1/1 as well as the 250 minerals for double Engineering Bays, but also the 250/250 of the Tech Lab upgrades before even thinking about adding a Factory and Armory to prepare for 2/2. With the minerals saved from the cost reduction mastery, the player can put down double Engineering Bays much earlier and get started on 1/1 all the sooner, while at the same time researching the Tech Lab upgrades before branching into Factory & Armory in time for 2/2. There is an even more extreme case involving 1-gas speedrun play, in which case the mastery makes getting 1/1 even possible. Given that 1/1 is a 12% increase in dps alongside improved survivability, there should come a point in which having these upgrades earlier will surpass the Drop Pod Haste’s average increase in damage output—remember that each individual application of the 60% haste buff only applies for a limited time—throughout the course of the game.
A more specific example can be seen on Temple of the Past, using Vulture-Bio play. Against ground-based attack wave compositions, it is highly advised to begin laying Spider Mines at the enemy spawn points in the three lanes as soon as possible, by dropping Vultures directly onto the spawn points. It is also in Raynor’s best interest to clear out the lanes, ideally before the second Void Thrasher arrives. In order to do both, one needs to get Bio upgrades as well as a Factory and Vulture upgrades, while also producing Medics. The cost reduction mastery makes it possible to spend the first 100 gas on the Factory so that Vulture production can begin in a timely manner, while having enough gas to also get the add-ons and upgrades going simultaneously. Even though Temple of the Past is long and gives you plenty of time to gather resources, the ability to claim a commanding lead through efficient use of precious, early game resources makes the upgrade cost reduction mastery much more useful, and can allow you to dominate the rest of the game.
Therefore, for the bio player, how the points are allocated in this mastery set should depend greatly on the player’s style, skill level, and plans for the specific map. A 15/15 split might be a good general-case allocation (assumes 15+ minute games which is enough time to benefit from 2/2), allowing for faster upgrades while still having a reinforcement-boost for battles, but the player should consider the above points and try to think critically about what they are trying to achieve. Speedruns tend to go full cost reduction, but speedrunning is a very extreme case.
Power Set 2:
- Hyperion Cooldown: -4s - 120s (360s down to a minimum of 240s)
- Banshee Airstrike Cooldown: -4s - 120s (240s down to a minimum of 120s)
That being said, if you are the type to form specific plans for a particular mission, it is beneficial to plan to have the Hyperion a little bit earlier. For example, if you plan to attack a heavily-fortified location at 10 minutes into the game (such as in the case of Scythe of Amon any%—refer to the Replays section), then it is very beneficial to have the Hyperion ready to participate in that push. In this situation, you will want to allocate 15 points into Hyperion Cooldown, thereby sacrificing what amounts to 1-2 uses of Dusk Wings. In some mutations (especially those involving Diffusion or Double-Edged), it is also beneficial to allocate points into Hyperion Cooldown, as its tanky nature will allow it to survive a lot longer than the Dusk Wings would.
Power Set 3:
- Medic Heal Additional Target: +3% - 90% (-3% heal per level)
- Mech Attack Speed: +0.5%-15% (+0.5% attack speed per level)
Synergies
Kerrigan
Utilizing Kerrigan’s Omega Worms allows Raynor a more mobile ground force. Medics can heal Kerrigan’s units, which is particularly useful in the case of Ultralisks and Kerrigan herself. Malignant Creep also offers a flat health regeneration bonus to all units it affects, so it benefits Marines greatly. Kerrigan herself is useful for sniping enemies that pose a danger to Raynor with their splash damage.Swann
Raynor doesn’t especially appreciate Swann’s extra gas income unless he’s going mech, and even then it’s not a necessity. Scans can synergize well with Swann’s Laser Drill. Raynor can use Swann’s Tech Reactor, but it’s generally not worth Swann’s time to create extra add-ons for Raynor.Zagara
Zagara’s Mass Frenzy greatly increases the effectiveness of Raynor’s units more than she does any other commander. At the same time, Raynor’s Hyperion buffs Zagara’s Zerglings more than any other unit in the game. Zagara’s Baneling and Scourge help to decimate most of the threatening units in a heavily-fortified base, before Raynor’s high-DPS biological army takes over to clear up the remnants.Vorazun
Vorazun’s Emergency Recall can save cloaked Banshees and Dusk Wings, but this is generally not a huge draw. The Dark Pylon’s Recall can help Raynor’s army greatly with mobility. Raynor also benefits greatly from Vorazun’s crowd-control abilities, since his fragile but high-dps army can safely and quickly destroy the enemies that Vorazun renders helpless.Karax
Raynor greatly appreciates Unity Barrier, which can allow his bio forces to shrug off a high damage hit that would otherwise kill them. Also, Karax can snipe dangerous AoE units with his Spear of Adun abilities to prevent them from dealing devastating damage to Raynor’s army. An interesting strategy to note is that Raynor can easily provide vision for Karax with the use of drop pods, Scan or the Hyperion’s Hyperjump, so that Karax can instantly kill dangerous units or structures, such as Void Rifts.Abathur
Mend tends to help Raynor’s mech more than his bio compositions. Medics help heal Abathur’s units—especially Brutalisks, which Abathur’s Queens can be slow to heal. Abathur’s Ultimate Evolutions can also serve as forward tanks so that Raynor’s fragile units can safely provide damage support, which is an excellent benefit to Abathur, who generally has poor damage output.Alarak
Alarak can Overcharge Raynor’s floating structures, which represents about as much power as the Hyperion. Raynor’s compact army can serve to boost Empower Me greatly.Nova
Defensive Drone has great synergy with Raynor’s bio army as its main issue is survivability. Tactical Airlift can also ferry Raynor’s units across the map instantly. Raynor can help give vision for Nova’s powerful abilities. Medics provide another layer of survivability to Nova’s already robust units, and can be helpful during the leveling process before attaining sufficient mastery points for Unit Life Regeneration.Stukov
Raynor and Stukov’s calldowns can tag team down enemy waves and encampments. Stukov’s durable Infested make for excellent tanks for Raynor’s fragile, high-dps army.Fenix
Fenix is able to Recall Raynor’s Bio force, greatly increasing Raynor’s mobility. Conservators are an excellent aid to Raynor’s forces, and Medics can likewise help Fenix. Talis’ Ricochet Glaive can provide a significant increase in damage for Raynor’s Marines.Dehaka
Dehaka’s hero unit acts as an effective tank for Raynor's army, while Raynor’s great clean-up DPS can quickly lay waste to the empty bases Dehaka leaves behind him. In addition, the two commanders’ calldowns can bring significant amounts of firepower to the map when used in tandem, and can be combined to clear entire late game bases very early into the game.Han and Horner
Strike Fighters can provide vision for Dusk Wings for use on distant targets. The Hyperion can increase the damage output of Reapers, while Ravens and Hellions can do likewise for Marines. Han and Horner and Raynor all have calldowns with high offensive power, making it feasible to use top bars alone to power through entire sections of some maps while both commanders build up a critical mass of Reapers and Marines. Medics can keep Galleons and Battlecruisers efficiently repaired.Tychus
Raynor provides global vision with his Scanner Sweep and expendable drop pod Marines, which can grant Tychus global mobility via his Medivacs. Raynor’s high sustained damage output is very beneficial to Tychus, who can struggle with tanky objectives, while Tychus’ team of elites can serve as a vanguard for Raynor’s forces when breaking into a fortified position. Tychus also provides armor shred, which is amazing for Raynor’s Marines and Battlecruisers, and bursty area damage, which Raynor otherwise lacks. Raynor also has a few options for defense, which can save Tychus a lot of trouble on certain maps.Zeratul
Raynor’s global vision allows both commanders to use their calldowns aggressively early in the game. Zeratul’s high mobility can cover for Raynor’s inability to move his army quickly across the map. Zeratul’s various calldowns can all be used to cover for Raynor’s fragile army by drawing enemy fire or crowd controlling threats.Map-Specific Tips
Chain of Ascension
- Building a Bunker near Ji’nara can hold off the enemy reinforcements while you power up and build CCs. Build it after the third CC is started, and it will be up in time for the first wave.
- The first Dusk Wings can handle first attack wave and the expansion. If there are air units, you will have to lure them to the Bunker.
- Save the first Hyperion for the large second attack wave. Most of the time, you should still have time left at the end to Hyperjump it to the second fortified base and clear out a few dangerous enemy units. With a 3CC opener, you can get Vultures out in time to place some Spider Mines for the second wave, if it’s a ground composition. This way, you can use the Hyperion elsewhere, such as for the second fortified area.
- Use Vultures to trap the areas where Hybrid waves spawn, giving you a much easier time in dealing with them.
- Dusk Wings should be used to clear out the first, second, and third Hybrid spawn areas while Bio forces push forward. You should be able to get Vultures out before the 9-minute spawn trigger for the first set of Hybrids.
- Vultures can sneak past the last fortified base to the final Hybrid area by moving below the base.
- Don’t forget to place Spider Mines in the way of the enemies who come to push Ji’nara back.
Cradle of Death
- The Dusk Wings can handle the first objective, and the Hyperion can handle the first attack wave and then warp elsewhere to take out key targets or finish off the first objective if the Dusk Wings were unable to do so.
- It may be useful to build Command Centers near the ramps into your main base in order to draw enemy fire (don’t forget to repair), since the attack paths run very close to the mineral lines, and the enemy attack waves are often drawn to the workers.
- The Artifact Trucks draw surprising amount of aggro and do a good job of blocking melee units. Use that to your advantage and try to keep your Truck just in front of your forces, especially at ramps, to hinder the enemy.
The Gatekeeper Constructs tend to draw aggro from your forces when disabled, who will happily shoot them instead of other enemy units—including enemies with long range and splash damage. Make sure your forces are targeting those before they fire on the Constructs. - Scout the direction of the final objective early in the game with a Marine or SCV. If the final objective is the bottom-right, you will be facing a lot of anti-bio defenses, which will require lots of Orbital Commands or teching up to something more suitable, such as Banshees and Vikings or Battlecruiser support.
- Do NOT use calldowns or Drop Pods in isolated areas, since the Gatekeeper Constructs will make short work of anything that does not have an Artifact Truck to support it. Calldowns are strictly to be used as support during pushes, not as an independent force.
Lock & Load
- Dusk Wings can take care of expansion Rocks and still be able to attack the first attack wave plut the central Celestial Lock, though they but may not be able to clear everything out if you command them to destroy the Vespene Rocks.
- The first Hyperion can accomplish a lot. Delay it for about 20s and then call it down on top of the enemies guarding the western Celestial Lock, and drop Point Defense Drones as necessary while destroying high priority units and using a Scan to target down any cloaked or burrowed units. Once the dangerous units are taken out, Hyperjump it to the southern Celestial Lock, and target the anti-air there so that your Dusk Wings can clean up. With the remainder of the Hyperion’s time, Hyperjump it into the base guarding the eastern Celestial Lock and use one last Yamato to take out another dangerous unit. Once the Dusk Wings are done clearing out the southern Lock, they can be used to clear out additional targets in the eastern base. If done right, your forces should be able to easily claim the western and southern Celestial Locks, while the eastern is left with slightly weakened defenses.
- Vultures can be useful for defending against the late game double waves that spawn if the game drags on for too long.
- The second Hyperion will be out in time to deal with the first double wave.
Malwarfare
- With a 4CC opener, the first Security Terminal can be defended by the first Hyperion, or by a couple of Bunkers right under the Terminal if you have the multitasking skills to send the Hyperion elsewhere. Make sure to build bio forces even after Bunkers are full, as you’ll need the extra forces for the first Suppression Tower.
- Save the second set of Dusk Wings until the first Suppression Tower, which spawns at 7 minutes—though you can summon them as early as 6:30 and attack nearby encampments while waiting. Afterwards, unload and salvage one Bunker, and leave the other Bunker full in case an attack comes from behind.
- Recommended use of gas in the early game: 1 Tech Lab, 2 Reactors, Combat Shields, +1 Weapon upgrade, and then a Factory. This should get 5-6 Vultures out in time for the second wave, with both Vulture upgrades going.
- One round of Dusk Wings can clear a bonus area on their own. This applies to both the first and second bonus areas. Do not summon them right on top of the bonus area, but rather summon them a short distance away and A-move.
- Your Vultures should be lagging behind your main forces, laying Spider Mines as each spawn point is cleared out. About 24-36 Spider Mines at each spawn point should be sufficient to start, after which you can reinforce each spawn point with further Spider Mines as necessary.
- Some spawn points cannot be mined up early on, unless you really make the effort to clear them out quickly. This includes a spawn just past the ramp to the right of the second Security Terminal, as well as the bonus area just below the third Terminal. Because of this, expect many attacks to come from those directions, and place extra Spider Mines accordingly.
- Against heavy air enemy compositions, it’s better to go full bio instead of splitting your attention with Vultures. Unfortunately, against Zerg and Protoss, you won’t know what exactly you are facing until the second wave arrives.
- If against a ground composition, then you won’t need a large bio force to take down each Suppression Tower. If you have the APM, split off a chunk of your forces to attack ahead towards the next Security Terminal.
Miner Evacuation
- Marines, Medics, and Firebats should be your core units for this mission. Firebats are an ideal supportive unit for your Marines to hide behind against the hordes of Infested.
- You can open with 4CCs and still produce enough Marines to defend the first Evacuation Ship. Do not begin Marine production until the first use of Dusk Wings is ready, as they can clear the path to the first Evacuation Ship. Send a few SCVs in to build two Bunkers, and with the help from your first Hyperion (or your ally), you should hold without much difficulty. Keep the Bunkers filled after the first Evacuation Ship leaves in order to handle the first attack wave.
- Target-firing the Volatile Infested with small groups of Marines is highly recommended. Don’t use F2 to target fire.
- One of the Eradicators can attack air targets, and is capable of taking out the Dusk Wings. It is recommended that you use the Hyperion to take it out first. Do not attempt to kill off Eradicators with bio forces, as you’ll suffer heavy losses.
- Send an SCV or two with your bio force to build Missile Turrets at each Evacuation Ship, in order to save on Scans against Infested Banshees.
- Try to have a second bio force moving around the map clearing out stuff, as you don’t need a full army to defend Evacuation Ships.
- Feel free to build some Siege Tanks for the last Evacuation Ship. You could use Siege Tanks for the other Evacuation Ships for additional safety as well, but they will hinder your mobility.
- Dusk Wings are great for preemptively clearing various Evacuation Ship staging areas if they aren’t needed for defense.
Mist Opportunities
- The Hyperion can protect the first Harvesting Bot as well as clear some of the second and third Terrazine areas. The 6-minute Dusk Wings can further clear out the third Terrazine area. With a 3CC opener, you can build a Bunker to defend the first Harvesting Bot, allowing you to use the first cast of the Hyperion to be used to clear out the air units at the third Terrazine area before Hyperjumping to another area, such as the fifth. Leave behind a Point Defense Drone for your Dusk Wings at the third area, letting them clean any leftover enemies up with impunity.
- You should be able to get a few Vultures out by the second wave of Harvesting Bots, even with a 5 or 6CC opening. Dusk Wings will help until you can start laying Spider Mines. However, against Protoss, you should wait until you’ve seen the attack waves going for the second Harvesting Bot, in order to verify that it is a ground composition.
- Lay Spider Mines all over the map, especially at enemy spawn points. Building Missile Turrets at the final set of spawn points helps against masses of air units as well. You can defend without resorting to spawn camping fairly well up until the third wave of Harvesting Bots, but afterwards the amount of splash damage from ground compositions may grow to be too difficult to handle without Spider Mines at enemy spawn points.
- The second Hyperion can be Hyperjumped in behind the first Terrazine Extraction Device bonus objective and be used to clear out the enemy air units, so that the 12-minute Dusk Wings can finish off the bonus. This is useful if a mutation makes it difficult for you to push into the first bonus area. It is also possible to do this for the second bonus, but it is a lot less forgiving.
Oblivion Express
- The Hyperion can take out the first Train on its own, as well as Hyperjump over to take out the attack wave that follows shortly after.
- Due to the late first attack wave as well as the late first objective, you can build up to 6 Orbital Commands before adding additional Barracks.
- It’s useful to push into the Train spawning locations to lay Spider Mines at the spawn areas where the Train’s escorts spawn in. If you can’t push both, then at least push into the upper Train location, since a number of attack waves will also spawn there.
- It may be helpful to build a Bunker and Missile Turret at the locations that the AI builds on, so that you can maintain control over those areas. The other option is to just fully-clear the map in order to stop the AI from bothering you.
- You will need to focus a lot more on laying Spider Mines, as well as maintain a slightly larger force of Vultures than normal. Due to the sheer number of Spider Mines that are needed to take down Trains, it is advised to build 7-8 Orbital Commands on this map, and 16-20 Vultures.
- If going against air compositions—particularly Terran air—it can be useful to have a moderate fleet of Vikings, since Marines that are out of range tend to attack the Train instead of moving up to attack enemy air units.
Part and Parcel
- When facing Terran or Protoss, you will find a number of undefended Parts in the western area. You can build a Marine or two with your first Barracks and get a bunch of free Parts while you work on your infrastructure. Against Zerg, this is not possible due to the Defense Bots that defend this area. There are also a number of Parts around the map that can be easily accessed by air units (particularly Dusk Wings) for easy pickup without having to go through the defenses that guard them with your main force; this is useful for mutations that hinder your ability to push.
- The Dusk Wings can clear out some enemy forces between the main and expansion, as well as much of the expansion itself. You may need a final cleanup crew for the upper expansion, though.
- The first Hyperion can defend against the first attack wave, but you may need to distract the enemy or let them attack a structure while you repair it for a short while. After destroying the attack wave, Hyperjump it over just to the east of the expansion area, where you can use it to take out a Hybrid Reaver. You can then move it elsewhere to clear out even more units—the defenses near the second Hybrid Experiment make for a good choice.
- It is recommended to use a 3CC opener instead of the 4CC, even if you plan to build more CCs later on, since you need to build an early force to roam around the map for Parts. Go up to 3 Barracks after the 3rd CC, and add the 4th CC around the second attack wave.
- Your army can output more than enough damage to make it feasible to wait with taking on the first bonus Train near the end of the tracks. You can gather enough Parts to trigger the first Hybrid Experiment objective before you engage the bonus Train if you route your movements correctly.
- You should tech up to Spider Mines and begin Vulture production around the time you engage the first Hybrid Experiment. Spider Mines will make the second and third fights very easy with their burst damage; make sure to spread them out, so that they can hit the Hybrids Experiments’ Shades. You can also place Spider Mines at enemy spawn points if you are facing a ground composition.
- The southeastern area has very few anti-air defenses, making it a perfect target for Dusk Wings if you have nothing better to spend them on.
- The Hybrid Experiments’ abilities are fairly dangerous to Raynor’s fragile bio units, including the stasis which is paired with enemy summons that can shred through your non-frozen forces.
- Try to finish before the 24-minute mark—a very powerful wave will spawn at this time, so it is best to avoid that if possible.
Rifts to Korhal
- You will need a Bunker and Marines to deal with the first wave on this map, but your Marines can be rallied to the Rocks until 2:20 before they have to get to the Bunker. Against enemy waves with slow movement speed (Protoss), you can actually break the expansion Rocks with diligent use of Stim before the Marines are needed at the Bunker.
- Delay the first Hyperion for about 20s and spawn it on top of the second attack wave, after which you should target down the various high priority units guarding the second set of Void Shards. Dusk Wings will then be able to clear out even more units.
- Enemy attacks always come from the same direction—after finishing off the second set of Void Shards, push into the minibase that guards the spawn point and trap it with Spider Mines.
- Dusk Wings are able to take out about one and a half Void Shards, so you can clear out the Void Shard defenders and move your bio forces out after dealing enough damage to the Shards.
Scythe of Amon
- Dusk Wings can take out the first attack wave. Send them to the mini-base between the main and the expansion Void Sliver to clear the area, and then to the mini-base between the expansion Void Sliver and the southeastern Sliver. Make sure to float an Orbital Command over to the cleared-out mini-base, as well as a number of newly-constructed SCVs, since you will be taking the expansion very soon.
- Summon the first Hyperion just below the first bonus area and begin attacking it. With careful control, you should be able to clear everything and have some time left over to warp it to the expansion Void Sliver.
- While the first Hyperion is active, rally Marines right outside range of the Void Sliver at the expansion area. The Hyperion can take out the Void Rift upon Hyperjumping over, and once your second use of Dusk Wings become available, summon them to help the small Marine force to take out the Void Sliver. Make sure to move your Orbital Command into place during the attack.
- Doing a 15/15 split on the Hyperion/Banshee cooldown mastery will give you an extra use of the Hyperion in a typical run, at the cost of 2 uses of Dusk Wings. This may be worth it since the Hyperion is a great tool for pushing into Void Slivers.
- Your third cast of Dusk Wings can help repel the second attack wave, but if the first enemy wave came from the north, you may want to delay expanding since the second attack will then pass through the expansion and will hit it before Dusk Wings are available.
- Dusk Wings can help greatly during attacks on Void Slivers by taking out dangerous enemy units with splash, as well as for sniping Void Rifts and Death Grip Crystals—but make sure they don’t get too far ahead of your bio as they can be shot down by the enemy very quickly. They also tend to aggro on the Void Slivers over the other high-value targets, so it’s good to have them on a control group to manually choose your targets.
- The map is big. Raynor wants to minimize travel time. The recommended map route, accounting for bonuses, is as follows: the expansion Void Sliver -> first bonus area (Hyperion) -> eastern Void Sliver -> second bonus area -> northern Void Sliver -> third bonus area -> northwestern Void Sliver -> western Void Sliver.
- PAY ATTENTION TO THE BLUE CIRCLE OF DEATH
- SERIOUSLY, PAY ATTENTION TO THE BLUE CIRCLE OF DEATH
- SERIOUSLY
Temple of the Past
- Float your starting Barracks to the top of the main ramp to stall enemies until Dusk Wings come online. Against Zealots or Reapers, add a few SCVs to repair.
- Use the Hyperion for the second attack wave and Hyperjump to the southwestern enemy base at the end of the lane to take out the enemy CC/Hatchery/Nexus and the nearby workers. Leave some Point Defense Drones in the area to provide vision for summoning the Dusk Wings on the third attack wave.
- With a 4CC opener, you should be able to get out a Factory in time to make some Vultures to assist with the fourth and fifth attack waves. Against air compositions, you can delay the Factory, but it is still useful to have a force of Vultures to kill ground Hybrids and Void Thrashers.
- After the first Void Thrasher, you can add two more OCs for additional income, or push into the side lanes if you are rushing for a full map clear.
- Clearing out the lanes is very important for laying Spider Mines at Void Thrasher locations, and for giving yourself more room to respond to enemy attacks.
- The first few Dusk Wings are best used right on top of the enemy CC/Nexus/Hatchery, using either a Scan or a dropped Marine to provide vision. Getting rid of all the workers and worker production will not only prevent the AI from starting to build defensive structures in the lanes, but it also clears a drop point for your Vultures to trap the enemy spawn up.
By the end of the game, you can have your entire base covered with Spider Mines and Missile Turrets, providing an impenetrable defense. - It is highly advised to clear out all the lanes in order to place Spider Mines at the enemy spawn points. If spawn points cannot be secured, you will need to lay a lot more Spider Mines to overwhelm the enemy forces before they can shoot the Mines.
- You can drop Vultures at the spawn points behind enemy lines, even if you haven’t cleared the defensive structures. You should aim to drop 4 Vultures at each lane before the 8-minute mark in order to lay enough Spider Mines to deal with the attacks from the sides. You will still have to clear out the lanes so that the Vultures will have room to hide from the enemy air units that will eventually come.
- Full mech is also very viable on this map if the goal is not to clear the map. Vultures, Tanks, Banshees, Missile Turrets, and Vikings are all excellent choices for defense.
The Vermillion Problem
- Dusk Wings can defend against the first attack wave and then move directly to the expansion area. If you can take out the enemy detection quickly enough, the Dusk Wings can take out the enemy CC/Nexus/Hatchery, or at least severely damage it. The Hyperion can clear out dangerous units and then Hyperjump to another area—when versus Protoss, the central isle just to the east of the expansion features Disruptors that you’ll want to destroy. Against Terran, you may want to clear out the Siege Tanks on the western isle , and for Zerg, choose anywhere that has Vipers. Don’t forget to float your CC into place.
- Your second cast of Dusk Wings can finish clearing out the expansion while you rally Marines to intercept the second attack wave—the enemy will try to land transports in your main base, so don’t let them. You can also choose to save your Dusk Wings to defend against this attack if you aren’t sure if you have enough Marines.
- If you have Xenon Crystals spawned far apart from each other, just get the closest one and use Dusk Wings to deal with the other one while dropping a few Marines if there are any air units present.
- Use Spider Mines for defense, especially once you have access to the two AI bases at the northeast and southeast, since those will be the enemy spawn points towards the end of the game.
- Raynor can benefit from splitting his forces to reduce response time and improve his base-clearing efficiency. Aside from the central base and later attack waves, the enemy density should be low enough that you can handle it with split groups.
Void Launch
- Placing a Barracks near the main ramp can hold off the first attack wave until Dusk Wings become available, but it will need to be repaired for a while. If this makes you nervous, build a Bunker after your Barracks is finished.
- The Hyperion can solo the first Shuttle wave, as well as the second attack wave that follows shortly after.
- If you use a 3CC opening and begin unit production early, you can then use the Hyperion to instead handle the second attack wave, before moving on to clearing out a lot of either the second or third bonus areas. With this approach, you will still have enough forces available to handle the first Shuttle wave even without needing the Hyperion.
- Vultures can be out by the time you need to defend the first bonus and destroy the second Shuttle wave, even with a 5-6CC opening. Be warned, however, that the Hybrids spawn in a little after the main enemy units, meaning that after the Spidermines kill the main attack force, the Hybrids may be able to AoE the Spider Mines as they try to reburrow. If you summon the Dusk Wings slightly before the attack wave, the Dusk Wings will distract the Hybrids so that the remaining Spider Mines can connect.
- Try to clear out the enemy bases as quickly as you can, then build Missile Turrets around the Shuttle Launch Bays.
- Towards the end of the match, after you’ve sufficiently mined up the attack spawn points, you can destroy all your Vultures and Marauders in order to build more Marines.
- Vikings may seem like a logical choice for this mission, but since the Shuttles are not armored, and since the Shuttle escorts are relatively few in number compared to the actual attack waves, Marines and Spider Mines are more important unless the enemy composition is heavy air. That being said, Vulture-Viking works reasonably well if your goal isn’t to clear the enemy bases, since the attack wave spawn points are so easy to access.
Void Thrashing
- You can summon the Hyperion at the right edge of the third Void Thrasher area can take out most of the anti-air there, in order to enable your Dusk Wings to safely take out two of the three Void Thrashers. A second cast of Dusk Wings will handle the third Thrasher and some of the remaining ground forces. Try to leave the Hyperion’s final Point Defense Drone in a safe area, so that you retain vision for the second cast of Dusk Wings.
- The second Hyperion can Hyperjump directly to the Archangel and take it out, which is useful if you’ve cleared the third Void Thrasher area with the first Hyperion and subsequent Dusk Wings and don’t want to push through that area again.
- Try to skirt around the edges of the final area to avoid aggroing all the dangerous units at once; for Protoss, the final area features 4 Colossi, 2 Tempests, and 2 Carriers that are placed very close to the front. There are also two Hybrid Dominators that can be aggroed too early if you are not careful.
- You can safely drop Vultures onto the spawn point on the right side, which is particularly useful if you’re taking a while to clear the third area.
Replay Pack
Attached is a replay pack of the record speed runs for Raynor on each map. These replays provide a demonstration on how to play Raynor. In addition, we have broken down which compositions you'll be able to find on each run:- Marine/Marauder/Medic: Lock & Load, Rifts to Korhal, Scythe of Amon, The Vermillion Problem, Void Thrashing, Cradle of Death
- Marine/Marauder/Firebat/Medic: Dead of Night
- Marine/Marauder/Medic/Vulture: Chain of Ascension, Malwarfare, Mist Opportunity, Oblivion Express, Temple of the Past, Vermillion Problem, Void Launch
- Marine/Firebat/Medic/Siege Tank: Miner Evacuation
![[image loading]](http://wiki.teamliquid.net/starcraft/images2/7/73/Replay_Icon14.png)
![[image loading]](http://wiki.teamliquid.net/starcraft/images2/0/0b/Vod.png)
Other Commander Guides


Writer: LilArrin, monk
Graphics: v1, Kat
Editors: Aron, LilArrin, Maguro, monk, Raincamp, T.Chosen, Yuriprime
Graphics: v1, Kat
Editors: Aron, LilArrin, Maguro, monk, Raincamp, T.Chosen, Yuriprime


 .Hope next commander is kerrigan because people seems like they have no clue how to play her.....Zerg already needs more APM to macro than other races but you also need to control a hero unit at the same time seems too much for most of casual players