


Overview
Artanis is the “basic” Protoss commander, which reflects itself in his playstyle. As the leader of the Daelaam, Artanis features the most basic unit mechanics out of all his Protoss brethren. His units are straightforward in their controls as well as being extremely resilient due to his powerful defensive passive, Guardian Shell. Therefore, Artanis is the perfect choice of commander for a Starcraft novice due to his straightforward playstyle and being very forgiving to mistakes. He is also a great boon to your ally as Guardian Shell is the single best support ability in the game.
As the representative of all Protoss factions, Artanis’ own units are all mostly at the same power level. All of his units have good uses, but at the same time, none of them truly stand out from the rest. There is a price to pay for so much durability and ease-of-use - although Artanis can be played well by just about anyone, it is conversely very difficult for one player to stand out from other Artanis players, and as a result, Artanis is often considered by top players to rank among the weakest commanders in the game.
Strengths
Guardian Shell: Guardian Shell is the signature ability of Artanis and for good reason. Losing fewer units allows for a much more aggressive playstyle from certain commanders, and can save an army when it’s outmatched. As most of Artanis’ power is invested in Guardian Shell rather than in the strength of his army, this means that a large portion of Artanis’ kit lies in empowering his ally. Guardian Shell is so good that it changes the way some allied commanders play the game and provides an invaluable safety-net for certain mutations.
Weaknesses
Low Army Power Level: Artanis’ units are all capable in their intended roles, but none of them really stand out as an overpowered unit in any way. Barring only the suicidal Zagara, Artanis generally has the weakest max supply army in the game.
Weak Calldowns: Compared to the calldowns of other commanders, Artanis’ Orbital Strike and Shield Overcharge are two of the least impactful calldowns in the game. Orbital Strike is by a large margin the absolute worst calldown in the game and Shield Overcharge has an unnecessarily long cooldown. And while Solar Bombardment is an excellent ability, it is also inhibited by a long cooldown. His last calldown, the Power Field, is an extremely useful ability that allows Artanis to reinforce from anywhere, but doesn’t let you avoid taking losses like many other calldowns
Weak Anti-air: Artanis is not completely helpless against an enemy air composition, but he certainly struggles more than many other commanders. Dragoons are weak relative to equivalent units of other commanders, while Phoenix struggle against armored air, and both Archons and Tempests have significant range and DPS issues. Perhaps most importantly, Artanis is often forced to use his entire army to repel enemy air waves whereas against ground, he can easily warp in a few Zealots and Reavers across the map.
Suggested Unit Compositions
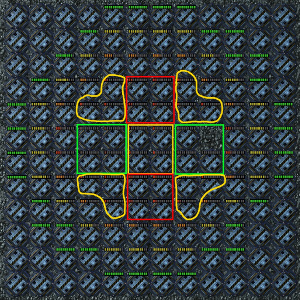
![[image loading]](http://www.teamliquid.net/staff/monk/Coopguides/Artanis/Unit_Comp1.jpg)
Tempest + Zealot:
Tempest/Zealot is the most robust of Artanis’ possible compositions and the one that performs the best against air overall due to their superior HP, even though Tempests have a short anti-air range. Tempests are great for slowly picking off bases/objectives and for building up a persistent army that rarely, if ever, takes any losses. Meanwhile, Zealots act as a mineral dump and a quick means to dispatch grouped ground troops. Don’t put both units in the same control group as it’s best to control them separately. For instance, when pushing a base with this composition, push into it only with Tempests and use Zealots to clean up once the majority of the enemy defenders have been killed. For this composition, Gas is at a premium in ensuring that you can reach a critical mass of Tempests fast.
![[image loading]](http://www.teamliquid.net/staff/monk/Coopguides/Artanis/Unit_Comp2.jpg)
Immortal/Reaver/Dragoon + Zealot:
This composition is overall the strongest against ground forces, including wave compositions such as Zerg Ground and Terran Mech. Note that while Tempest/Zealot also accomplishes the same thing, and quite possibly with lower casualties, this composition does it faster in most cases. Its main weakness is air units since Dragoons generally don’t excel against large numbers of air units. Using this composition, open up with a few Immortals and add Reavers as needed. Focus on getting more Immortals instead of Reavers as the main core unit, typically with at least a 2:1 ratio. With more Immortals, it’s less likely that each Immortal’s Barrier or Guardian Shell is activated, thus increasing the overall longevity of the entire army by spreading the damage around, while even a few Reavers can already provide sufficient splash damage against most ground units on the frontline. As with the Tempest + Zealot composition, Zealots are best used as a mineral dump in the mid-game. You shouldn’t aim to research Whirlwind or build any Zealots past your first two or three until around ten minutes into the game - instead, prioritize teching up to Reavers. In addition, make sure to control your Zealots separately from the rest of your army when using this composition.
![[image loading]](http://www.teamliquid.net/staff/monk/Coopguides/Artanis/Unit_Comp3.jpg)
Archon/Zealot + Immortal/Dragoon:
The core of this composition is Archons and Zealots, a combination that while fragile, does pack a punch and has niche uses against certain compositions. Specifically, it’s powerful against all Zerg compositions, especially the Zerg suicide composition and the Zerg air composition due to the Archon’s Psionic Storms, which can devastate most low-health Zerg units. It also has utility against ShadowTech and Sky Terran since the combination of Psionic Storm and Feedback is very powerful against the likes of Banshees, Ravens, and Battlecruisers. Immortals are optional in this composition, but they add durability and good damage against structures. Dragoons are also optional and should only be added when heavy air forces such as Brood Lords and Liberators come into play. While this composition can deal well with certain attack waves, it is not as strong as the Tempest or Reaver compositions when it comes to assaulting heavily fortified bases without Solar Bombardment, due to the lack of range or burst damage. Unlike all the other compositions described here, you should be controlling Zealots with your main army.
Niche Compositions
![[image loading]](http://www.teamliquid.net/staff/monk/Coopguides/Artanis/Unit_Comp4.jpg)
Phoenix + Zealot:
What this composition lacks in brute strength, it makes up for in mobility. When used correctly, a Phoenix fleet can clean up many waves without taking any losses. They’re also able to quickly respond to any unexpected threats, as their movespeed are one of the fastest in the game. However, they struggle against certain AoE effects from units such as Vipers (Parasitic Bomb), armored air units such as Battlecruisers, Thors, and especially the almighty Hybrid Dominator. Additionally, their Graviton Beam ability does not work against structures, map objectives, or massive ground units. Generally, this is never the most powerful composition and should be used very specifically for situations that require high mobility or when you do not require much DPS against ground-based objectives. Due to their hit-and-run play-style and ability to crowd-control entire enemy ground waves, Phoenixes tend to benefit greatly from an ally with healing effects, even more so than any of Artanis’ other unit builds. As with other compositions, control your Phoenixes separately from your ground-based army.
General Tips
- If you have access to Robotics Bay, warp in Reavers along with Zealots to fend off enemy ground waves. Reavers benefit greatly from the speed increases from the Warp Speed mastery while the damage from Zealots mainly comes from the Whirlwind ability, a burst-oriented AoE cooldown.
- Pick your unit composition based on the enemy composition. For Protoss compositions, you will often not be able to tell the enemy composition (air or ground) based on the first wave, in which case the Tempest composition is generally your safest option.
- No matter which composition you go for, it is useful to build a Twilight Council and research the Whirlwind upgrade for your Zealots, as they serve as a powerful mineral dump in any part of the game.
- You’ll notice that we often recommend controlling Zealots separately from the rest of your army. This is because most composition are deathballs that can take out entire enemy waves without losses. Adding in Zealots would only marginally speed up this destruction, but at the same time incur significant losses on these Zealots, essentially wasting minerals.
- In maps where it is necessary to intercept attack waves coming from different directions (e.g. Mist Opportunities and Temple of the Past), it is useful to refrain from maxing out on supply, so that you can warp in appropriate units in order to intercept attack waves far from your main army.
- A major part of Artanis’ army power comes from instantly warping in units with +60% speed increase from the Warp Speed mastery. As such, it is best to warp in units just before the engagement - not while your army is standing idle.
- Warping in a solo Zealot and sending him to the middle of a base can provide vision for the use of Solar Bombardment, as the Guardian Shell ability extends his lifespan long enough to use your calldown.
- Learn how to get the most out of your Pylons. It’s possible to fit 16 buildings into a single power field, and as such it is generally not necessary to build more than one Pylon per game.

- Project Power Field can be used to power up your or Protoss ally’s defensive structures, should they be put into stasis by Hybrids.
- Try to micro your expensive units whose Guardian Shell passive has been triggered, by moving them to the back of your army in order to preserve their lives.
Calldown and Unit Overview
Calldowns
Provides a Pylon power field anywhere on the map. Has a short 30 second cooldown. Use this ability to power your first buildings and later on to warp in units on the front lines. Preferably, you should be using this ability for nearly every engagement.
Fires five 50 (100 vs armored) Orbital Strikes, each dealing their damage in a small radius. 60 second cooldown. Generally a weak spell that can supplement your army in taking out problematic units, but never as an ability to take out an entire enemy wave on its own. Use it in combination with your first Zealots to deal with the first wave if necessary, and later on to take out dangerous or cloaked enemy units. Don’t overuse it - you want to save energy for Shield Overcharge whenever possible.
Gives your units and structures 200 extra Shields for 20 seconds. 300 second cooldown. Use it before charging into bases when Solar Bombardment is on cooldown. This ability provides extra utility to commanders that have many low-HP units, such as Raynor, Kerrigan, and Zagara. A more efficient use of SoA energy than Orbital Strike, but not by much.
Units and Buildings
13.33 DPS at 0/0
The Zealot is your basic anti-ground AoE unit and one of the best tech tier-1 units in the game. Combined with your Project Pylon Power ability, Zealots essentially act as an anti-ground AoE calldown when warped in on top of groups of enemies. They do very well against low hp units such as Zerglings and Marines, but struggle against higher HP units like Thors and Hybrids.
7.00/(14.00 vs armored) DPS
Dragoons have poor stats compared to other options, but they happen to serve a niche, providing an all-purpose ranged unit option that can attack air. However, it does not possess good DPS and its large size further reduces its effective DPS when Dragoons are massed. Build only enough of them to clean up problematic air units - don’t ever use them as a core unit of any build.
5.14 DPS
The main purpose of the High Templar is to be merged into Archons, which are much more durable and have better DPS. Provided that you have the Khaydarin Amulet upgrade, Archon’s will always have full energy once merged. Waiting to use offensive Psionic Storms before merging your High Templar usually isn’t worth the benefit unless you can do so immediately. However, warping in Templar for defensive Psionic Storms can be a powerful tool when combined with Zealots.
14.29/20.00(vs biological) DPS
Archons are short-ranged units that excel at dealing with tightly clustered enemies and Biological threats. Most people focus on Psionic Storm, but Feedback is an underrated spell that can snipe key units such as Vipers, Infestors, Oracles, Banshees, Ravens, Phoenix, Battlecruisers, and especially Hybrid Dominators.
13.79/34.48(vs armored) DPS
The tank of the Immortal/Reaver composition, the Immortal is a very hardy unit that can decimate armored ground targets when initially warped in. With proper control, Immortals can actually become immortal, never dying as long as you can manage their Barrier and Guardian Shell.
50.00/75.00(vs structure) DPS
Reavers are the long-range, high splash-damage siege unit for Artanis, and they are capable of decimating clumped-up ground units easily. However, there are a few problems with Reavers that are not typical of other splash-damage units. Since each Scarab has a travel-time before reaching their target, Reavers often waste their shots on enemies that are already dead - spacing out your Reavers from one another will help alleviate this, making them less likely to target the same enemy units. In addition, it’s possible for Reavers to run out of Scarabs in prolonged engagements such as in Dead of Night and Oblivion Express.
Your mobile detection. In order to keep your Observers protected, have them follow a key unit in your army that isn’t likely to die. You should also warp in a single Observer only when detection is actually needed.
9.09/18.18(vs light) DPS
An extremely mobile fighter that deals well with Light units, both in the air and on the ground. It is worth noting that Phoenixes are able to attack while on the move, which allows them to kite certain enemy units or deal more damage than usual, such as against the Shuttles on Void Launch. Oddly enough, Phoenixes are stronger against ground enemies than air enemies due to their ability to crowd-control large quantities of enemies. However, they need a lot of support in order to work when faced with certain enemy units that can deal splash damage to them or can’t be picked up by their Graviton Beam.
21.43 DPS
A long-ranged anti-ground siege unit that has less range against enemy air. Unlike their multiplayer counterparts, Tempests don’t do extra damage against massive targets. Tempests also kill things relatively slowly due to their low DPS and a tendency to overkill enemies - they will typically need help in the form of Zealots to deal with masses of weak ground units.
16.00 DPS
Generally a useless investment for Artanis since Zealots are usually the superior mineral dump and it is unnecessary for Artanis to build extra Pylons in most cases. Photon Cannons can be used if you absolutely need extra anti-air, such as in the case of Void Launch, or if you really have too many Minerals on your hands. They are also useful for detection against Terran enemies as a prevention against Ghosts or when the gas cost of Observers is otherwise prohibitive.
In-depth
Build Order
The following build is recommended on maps with Rocks at your natural. For all other maps, refer to the map-specific section and the attached replays.
Build Order
- 15 Gateway (Use Project Power Field to power Gateway and Chrono Boost it when done)
- 17 Assimilator
- 18 Assimilator
- 21 Zealot (Break Rocks)
- 24 Zealot (Break Rocks, Chrono Boost Nexus after)
- 31 Nexus
- 33 Cybernetics Core
- 34 Pylon (You may also request one from a Protoss ally)
- 35 Assimilator
- 39 Assimilator
- On some maps, you’ll want 3 Zealots instead of 2 Zealots to break the Rocks so that you can defend the first wave more efficiently. Keep Chrono Boosting the Gateway until your final Zealot is finished.
- On other maps, you’ll want to delay your Nexus in favor of a faster Cybernetics Core and faster tech in order to defend against the second wave on that map.
Masteries
Power Set 1:
- Shield Overcharge Cooldown (-2s - 60s (down to a minimum of 240s))
- Guardian Shell Life and Shield Restoration (+1%-30%)
Power Set 2
- Warp Charge Cooldown Reduction (+2% - 60%)
- Speed Increases for Warped In Units (+2% - 60%)
Power Set 3:
- Chrono Boost Efficiency (+1% - 30%)
- Initial and Maximum Spear of Adun Energy (+3 - 90)
Synergies
Raynor
Artanis is Raynor’s favorite partner. His Guardian Shell grants Raynor’s bio units much better survivability. Meanwhile, Raynor lends Artanis some much-needed healing in turn. Shield Overcharge is also fairly useful on Raynor’s numerous low-HP units. That being said, both commanders’ ground armies take up a lot of space and tend to trip over each other, unless Artanis goes for an air-based armyZagara
Zagara’s Zerglings benefit greatly from Guardian Shell, but Banelings and Scourge do not receive the protection of Guardian Shell. Zagara’s Baneling Nest will also produce Banelings faster when Chrono Boosted, allowing Zagara far greater aggression than normal.Vorazun
When paired with Artanis, Vorazun gets two layers of protection for her cloaked units, giving them incredible sustainability. Vorazun can also make use of Artanis’ Projected Power Field.Karax
Repair Beam, Unity Barrier, and Guardian Shell together turn especially mechanical units into nigh-unkillable juggernauts, with two layers of protection and automated repairs. Artanis’ Phoenixes and Karax’s Sentinels in particular both benefit greatly from this arrangement.Abathur
Abathur can cover Artanis’ air weakness as well as heal his units. Meanwhile, Guardian Shell is effective on Abathur’s 0 Biomass units, potentially saving them along their road to becoming invincible 100 Biomass behemoths.Alarak
Alarak can make use of Artanis’ Projected Power Field and cover for Artanis’ air weakness and lack of damage-output.Nova
Artanis will appreciate a timely use of Griffin Airlift from Nova for his relatively immobile army. Artanis can offer Chrono Boost on Nova’s production buildings in order to reduce the cooldown of her key units, letting her build any army of her choosing.Stukov
Artanis’ Guardian Shield does not trigger on Stukov’s Infested. However, his Shield Overcharge does, which temporarily provides his Infested a lot more durability. Also note that Guardian Shield does trigger on Stukov’s Bunkers, but only when uprooted. Artanis’ Chrono Boost is greatly appreciated on Stukov’s Infested Colonist Compound to both increase its research rate and production rate.Fenix
All of Fenix’s suits have an individual Guardian Shell cooldown, so Guardian Shell is especially useful for Fenix the hero. Guardian Shell also mitigates the greatest weakness of Fenix’s Gateway units: their low survivability. Meanwhile, Fenix can reposition Artanis’ slow army as needed.Dehaka
Artanis’ Guardian Shell allows Dehaka’s lesser-used units such as Zerglings and Hydralisks to shine. After their Guardian Shells have triggered, they can engage in Primal Combat, effectively gaining a fresh Guardian Shell as they evolve. Dehaka himself will appreciate the Guardian Shell too, as he can be prone to dying at inopportune times.Map-Specific Tips
Chain of Ascension
- Tempests are recommended on this map because of the high density of anti-ground units in enemy bases, including Disruptors, Siege Tanks, and Lurkers/Swarm Hosts, as well as the need of a strong anti-air army to take out the Slayn Elementals quickly.
- Use ~5 Zealots in addition to your Orbital Strike in order to consistently clear the first wave. You may need to add a few Dragoons in case of enemy air units in the first wave. Clear your expansion afterwards. Stay on Zealot/Dragoon tech until you expand and then tech to your advanced unit of choice - preferably Tempests, but it may be worth it to mix it up depending on enemy composition.
- Save the first Solar Bombardment for the second wave, which will be very difficult otherwise.
- The first Hybrid wave can usually be done with just your Tempests without help from your ally or any calldowns.
- Push bases with just your Tempests from now on. Save Solar Bombardment and Shield Overcharge for Hybrid spawns. Try not to engage these waves without at least one of these calldowns.
- The bonuses are quite difficult for Artanis since all his anti-air units have such low damage output. You may have to expend your calldowns on the Slayn Elementals in order to safely kill them.
Lock & Load
- Build a Pylon at each lock you control in order to have an easy warp-in point. Consider building a few Cannons as well to handle the trickle of enemy units that try to capture each Celestial Lock.
- If you are using Reavers in your army composition, position them just below the ramp and have a few Zealots lure the base defenders to the ramp. The heavy splash damage eliminates them quickly.
Malwarfare
- Tempests work especially well here due to the low density of anti-air units on this map, and they are able to fly over terrain which is otherwise hard to traverse by foot. Immortal-based compositions are faster at taking out the Suppression Towers, but struggle later on against air enemies near the last Security Terminal. Archon compositions also work fine against Zerg, but may struggle with unit retention near the final Security Terminal.
- Solar Bombardment is an effective tool for taking out Suppression Towers. Because Suppression Towers are so large, you can aim Solar Bombardment in the middle for full effect.
- If you’re not familiar with the exact patterns of all the Suppression Tower spawns, it can be useful to place Pylons at each Tower in order to quickly warp in units if they activate.
Miner Evacuation
- You’ll want to end up with an unusual composition of Immortals, Reavers, Phoenixes, and Zealots. Immortals tank for the others and are great for taking down Aberrations. Reavers take out hordes of Infested. Phoenixes act as your anti-air against Infested Banshees and Nemesis Hybrids - and they’re also a help in dealing with the Infested hordes. Zealots are your usual mineral dump and also help to tank against the Infested, but try to keep them as close to your ranged units as possible.
- The most efficient way to defend the first Evacuation Ship is with 3 Dragoons and mass Immortals - Chrono Boost your Robotics Facility and warp in Immortals at every opportunity.
- Use the first (5-minute) Solar Bombardment to clear out the Infested defenses guarding your expansion.
- Defend the second Evacuation Ship with a combination of Immortals and Reavers. The maximum number of Banshees that spawn at the second Ship is four, so a single cast of Orbital Strike should be able to take care of them.
- By the third Evacuation Ship, you’ll need Phoenixes and Whirlwind Zealots. Air units will become more plentiful and Phoenixes will be your most cost-efficient answer.
- Try to max out on Immortals, Reavers, and Phoenixes while saving your last 20 or so supply for Zealot warp-ins as needed.
- Research upgrades for all your units, even Plasma Shield upgrades when you have the extra gas.
- Blightbringer can be taken out with a combination of your main army, Solar Bombardment, and any spare Zealots you have lying around.
- Eradicators are a bit more tricky; don’t engage with your main army. Instead, Solar Bombardment the one with the flamethrower (the one that is patrolling in circles, not the one that is standing still) and warp in suicidal Zealots to clean up.
- Do not rely on Cannons at all for defense against Infested when defending Shuttles. Whirlwind Zealots are much more cost-efficient.
Mist Opportunites
- Open with 3 Zealots instead of the usual 2. Send them to clear out your rocks and then use them to defend against the first wave.
- Tech up faster than you normally would on this map. If you build your Cybernetics Core right after your Gateway, you’ll be able to reach a high enough tech level to defend your first Harvesting Bot effectively. Choose either Whirlwind Zealots, a Reaver, or a Tempest.
- At five minutes into the game, suicide a Zealot into an entrenched enemy position and unleash Solar Bombardment.
- The first bonus area or any of the bases in the middle of the map are all good choices.
- At ten minutes into the game, a relatively large enemy wave will head towards one of your expansions. If you can intercept it in time, you can use Solar Bombardment on it while it’s in the middle of a small enemy base.
- There is a very difficult wave that spawns at 15:30 from near the top right of the map. Save your third Solar Bombardment for this wave.
- As attack waves spawn very frequently, your Project Power Field may not always be off cooldown. It can be useful to set up a few Pylons at certain chokepoints in order to warp in units to intercept attack waves.
Oblivion Express
- Both Immortal-based armies and Tempest-based armies are viable on this map. Immortals destroy the Trains much faster and are a strong choice against ground compositions, while Tempests are better suited for countering air compositions and can still destroy the Trains within a reasonable timeframe. However, note that Archons and Phoenixes do either pitiful or no damage at all to Trains.
- The Tempests’ Disintegration ability is very effective against Trains because you can target each individual Train segment, essentially stacking the Disintegration effect.
- Solar Bombardment should be used on the first Train as you generally don’t have the army damage to kill it otherwise.
- It is recommended to save it for the double Trains that spawn at 14:00 and 20:00.
- Build Photon Cannons between the bottom track and the bottom bonus track in order to deal additional damage to the bonus Train.
Rifts to Korhal
- Tempests excel on this map, as the large gaps in the terrain give them an excellent position from which to siege up enemy bases, even allowing you to skip some enemy defenses. Also, they deal well the the airborne Pirate Ships.
- Open with 3 Zealots instead of 2 in order to help fend off the first wave that hits at around 2:50. You’ll be able to kill your natural Rock, but not your gas Rocks before you’ll need to defend this wave.
- Suicide a Zealot into the second Void Shard area at 5 minutes to unleash your first Solar Bombardment. Many Artanis players choose to use it on the first Void Shard, but the base is too lightly defended to warrant the use of such a powerful ability.
- Suicide a Zealot into the base on the ramp between the second Void Shard objective and third Void Shard objective at 10 minutes to unleash your second Solar Bombardment.
- Suicide a Zealot into the south-eastern area that contains the second Pirate Ship at 15 minutes to unleash your third Solar Bombardment.
- Use your final Solar Bombardment at 20 minutes in the last base to finish the game.
- If opting for a ground-based composition, you’ll need a lot of Dragoons to kill each Pirate Ship.
- If opting for Tempests, you can directly fly from the third Shard area to the final Shard area, saving yourself a lot of time if you don’t care about the bonus objective.
Scythe of Amon
- Tempests are recommended due to the high density of air-based capital ships found on the map. Tempests also deal better with the later Void Slivers’ multiple abilities than other options.
- Suicide a Zealot into the expansion Void Sliver at 5 minutes to unleash your first Solar Bombardment.
- Meanwhile, warp in Tempests to clear the first bonus area.
- If the enemy composition is Zerg, you won’t be able to clear the first bonus area on your own since it contains too much anti-air, unless you reserve the Solar Bombardment for this base instead.
- Save Solar Bombardment for Void Slivers as Solar Bombardment excels at dealing damage to stationary targets. Solar Bombardment can destroy the first two Slivers by itself.
Temple of the Past
- As the match progresses, build Pylons at each of the four entrances to the Temple. That way you’ll be able warp in emergency reinforcements without waiting on your Project Power Field cooldown.
- With Project Power Field, you can reinforce a struggling ally’s army at any time. Warp in Dragoons to help counter air units or Zealots/Reavers against ground units.
- Save your Shield Overcharge for the double waves that spawn simultaneously at opposite lanes in order to reap maximum benefit for both your- and your ally’s armies.
The Vermillion Problem
- Archon/Zealot is especially powerful against Zerg on this map since you’ll often need to split your forces. In addition, the density of units in enemy bases is relatively low, which benefits both Archons and Zealots.
- Use your first Solar Bombardment on your expansion in order to speedily clear it out.
- Guardian Shell is especially useful for your workers as they gather Xenon Crystals, giving them an extra life if enemies intercept them. It may be worth it to let your crystal-gathering Probes run through the lava rather than seek high ground immediately, but remember that Guardian Shell only lasts 5 seconds.
- Enemy forces guarding the Xenon Crystals are usually weak in strength, and can be defeated by warping in a few Zealots/Dragoons/Reavers. However, the attack waves heading for your bases are usually much stronger and will most likely require your main army or the use of Solar Bombardment to hold them off.
Void Launch
- Tempests are recommended due to the high density of air escorts that come with each Shuttle wave, especially the last wave. Disintegration is especially useful as it can chip away at Shuttles while your Tempests take care of the enemy army.
- Open with 3 Zealots instead of 2 in order to help fend off the first wave.
- An early Cybernetics Core is recommended to help get your tech up and ready for the second wave.
- Use Solar Bombardment on particularly troublesome waves. You can use an Observer to camp the two possible spawn points, then unleash Solar Bombardment as they arrive.
- Expand as fast as you can to the third base in enemy territory in order to mass even more Tempests, Zealots and Photon Cannons.
- Using your excess minerals, surround the Shuttle Launch Bays with Photon Cannons. If you have difficulty pushing into the enemy bases, defend the Warp Conduits with Photon Cannons instead.
Void Thrashing
- Open with 3 Zealots instead of 2 in order to help fend off the first wave.
- Suicide a Zealot into the second Void Thrasher area at 5 minutes to unleash your first Solar Bombardment.
- Suicide a Zealot into the third Void Thrasher area at 10 minutes to unleash your second Solar Bombardment.
- Suicide a Zealot into the final Void Thrasher area at 15 minutes to unleash your third Solar Bombardment.
- Tempests can navigate the chasms surrounding the enemy bases, allowing you to siege them up while outranging enemy ground units
Replay Pack
Attached is a replay pack of the record speed runs for Artanis on each map. These replays provide a demonstration on how to play Artanis to the utmost efficiency. In addition, we have broken down which compositions you'll be able to find on each run:- Tempest/Zealot: Chain of Ascension, Malwarfare, Rifts to Korhal(any%), Scythe of Amon, Temple of the Past, Void Launch, Void Thrashing
- Reaver/Immortal/Dragoon/Zealot: Dead of Night, Oblivion Express, Rifts to Korhal(100%)
- Archon/Zealot: Lock & Load, Mist Opportunities, Vermilion Problem
- Reaver/Immortal/Phoenix/Zealot: Miner Evacuation
![[image loading]](http://wiki.teamliquid.net/starcraft/images2/7/73/Replay_Icon14.png)
Other Commander Guides


Writers: monk, Raincamp
Graphics: Jester, Kat, v1
Editors: Aron, Axiom, Maguro, monk, Raincamp, T.Chosen, Yuriprime
Graphics: Jester, Kat, v1
Editors: Aron, Axiom, Maguro, monk, Raincamp, T.Chosen, Yuriprime


