TL Strategy Presents
Through the Eyes of a HerO
HerO's Perspective of HerO v. TaeJa at DreamHack
by SC2 John
 HerO TaeJa
Through the Eyes of a HerO
by SC2 John
DreamHack Winter proved to be one of the more interesting tournaments of the year and put a bow on the DreamHack season. Several clear favorites to win were eliminated in surprising upsets throughout the tournament: the under-appreciated JYP knocked out both Jaedong and Naniwa; and the newcomer Azubu.Patience blew through several SC2 champions including Naniwa, sOs, Polt, MMA, and Innovation. TaeJa proved, however, that he was immune to upsets and tore through the tournament losing only a handful of games and grabbed his second DreamHack win of the year.
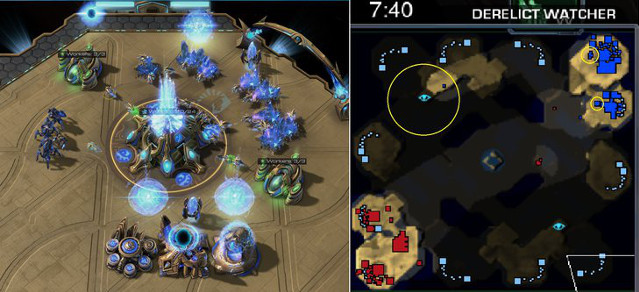
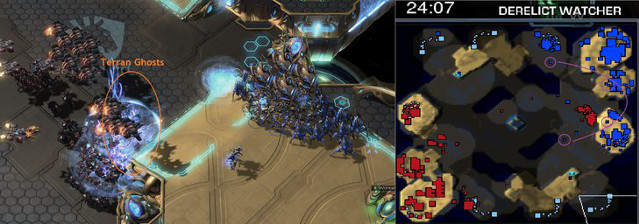
Currently on a hot streak, TaeJa has been shredding opposition decisively both mechanically and strategically. When most could not touch him, HerO was the exception. Known to grow stronger as the cold winds of winter blow, HerO was able to stand his own in his series against TaeJa: particularly in the game on Derelict Watcher. In this game, HerO uses brilliant decision making and excellent army control to deflect all of TaeJa's pressure and spar with the titan in a maxed army scenario.
 Replay
 VOD
VODBuilding a Flexible Opening (0:00-8:30)
HerO opens, like most Protosses, with a fast expansion while relying on good scouting and positioning to deflect any sorts of aggression. He manages to continually keep himself flexible and adaptable to his opponent's build by scouting at specific divergent points in his build. His scouting is based off of three specific timings:
- Initial probe scout on 13;
- Stalker poke;
- Follow up observer scout.
Probe Scout (2:30)
HerO sends a probe across the map after building a gateway, which arrives at the Terran's expansion by about 2:30. This timing is guaranteed to get into the main base unless the Terran walled off prematurely. HerO checks for a CC first before popping into the main base to check for gas timings. Based on the gas timing, HerO can narrow down the Terran options considerably:
- CC first;
- 1-rax gasless FE;
- gas first;
- early gas (on 12 or 13) meaning reaper expand, early factory;
- delayed gas (on 15) meaning reactor expand;
- Proxy rax/cheese.
The gas timing can be checked out simply by clicking on the gas and seeing how much has been mined. Often times Protoss players will also double back around after spotting a 12/13 gas in order to scout the second supply depot: no depot means a reaper expand.
In this particular scenario, HerO scouts no expansion and a late gas; therefore, he knows TaeJa can't have a fast reaper and assumes that TaeJa will expand soon. This means it is safe to take a nexus and no early units are needed to deflect pressure. HerO's scout timing lines up exactly with his gateway finishing at 2:40, allowing him to immediately respond by skipping his cybernetics core, pulling two probes off of gas, and getting his nexus slightly earlier. Against a reaper opening, HerO would probably continue with his normal build to make sure he had a MSC and/or stalker out in time to deal with the reaper.
Stalker Poke
HerO's initial stalker would normally be able to out poke around 5:00. His rearrangement and later cybernetics core, however, makes it so that his initial stalker poke doesn't actually end up arriving until close to 6:15. This is fine because TaeJa can't realistically hit with drops or a marine/mine push until at least 7:00 given his opening. The purpose of this poke is to identify his opponent's composition and spot any signs of pressure. Based on HerO's earlier scouting, there are certain things he is looking for:
- 1-1-1 with drops incoming;
- marine/mine passive play;
- marine/tank (unlikely);
- 1-1-1 with a banshee incoming (very unlikely);
- Late reactor hellions (very unlikely).
Luckily, HerO manages to spot TaeJa moving out for aggression with marine/mine. Again, this scout timing lines up beautifully with a divergent point in his build: at 6:30 he can choose to either get extra gateways or be greedier and get his natural gases. After spotting pressure on the way and assuming drops, HerO decides to play more conservatively and get two extra gateways for a total of three. He positions his his stalkers/zealot in the main and his MSC at the natural with nexus cannon: he also rallies an observer to both places. Meanwhile, he sends a probe along the north side of the map to scout spot the area outside his main for drops.
HerO positions himself defensively to deal with drop play.
Once HerO defends the pressure, he immediately starts double forge knowing that TaeJa's medivac aggression will be delayed. To follow up, HerO begins colossus production and blink when he has the resources to do so.
Mid Game Decision-Making (8:30-19:00)
Followup Observer Scout
In the average game, the observer would arrive at around 7:30-8:00 on most maps. Due to TaeJa's aggressive variation, however, HerO is unable to scout with an observer until around 8:30. Taeja's build is also delayed so the observer scout arrives as stim is just starting. This observer is crucial to HerO's game plan as it allows him to scout his opponent's full tech path and check for the third CC timing while adjusting his build accordingly. HerO's observer scouting revolves around three distinct timings:
- Initial scout (@7:30-8:00);
- Scouting for third CC vs. extra rax (@9:00);
- Scouting for third CC again (10:30).
Both players' builds are delayed by about a minute due to TaeJa's aggressive opening. HerO's scout timings, therefore, are adjusted by about a minute: checking at 8:30, 10:00, and 11:30, respectively. The initial scout is primarily to check the Terran's tech, barracks count, add-ons, upgrades, and saturation. Afterward, HerO is looking for an early third CC: an early third CC means that TaeJa's pressure going into the mid game will not be as powerful, but a maxed out timing later in the game can be devastating. This scout timing comes at another divergent point in HerO's build: as he reaches two-base saturation around 9:00, he'll start to pool minerals that can either be spent on three to four additional gateways or a faster nexus. In this game, HerO happens to scout the second starport as well as no third CC, indicating a two-base all-in with several vikings. HerO also notices that TaeJa isn't committing with his drops but instead saving as many units as possible and just trying out exploit HerO's positioning: this is another indication that TaeJa may be going for a two-base play. To respond, HerO cuts his upgrades, delays his third, and heads into storm much faster. The third observer scout timing is generally to check for a third CC again in games where barracks number four and five are added first. With his final scout, HerO sees no third CC still, confirming that TaeJa is fully committed to a two-base attack.
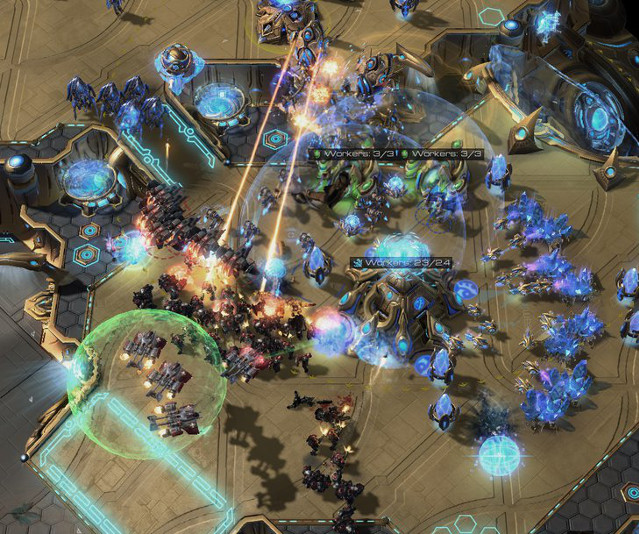
HerO holds his natural against TaeJa's sharp timing.
Realizing this position, HerO continues to warp in gateway units constantly while further delaying the third. When the aggression hits, he pulls his army all the way back in his natural and holds out for storm as long as possible while also hallucinating a colossus to draw some viking fire. In the end, his decision to cut upgrades and focus purely on unit production allows him to smash TaeJa's timing, despite not actually having storm for the engagement. With excellent scouting and preparation from as far back as 8:30, HerO is able to deflect the attack and head into the later parts of the mid game.
Transitioning
After his failed aggression, TaeJa begins to power back up by starting +2/+2, a third CC, and emphasizing medivac production. HerO is able to identify TaeJa's transition period by progressively poking out further and further with his main army and gauging the size of his opponent's army. During this time period, HerO is forced to play very conservatively due to his lack of observers: he is unable to spot the middle of the map, possible drop locations, or the location of the third baseall at once. Once he can comfortably control the area between his natural and third, he starts single upgrades and a third base and sends a zealot to spot TaeJa's pocket expansion.
After a handful of engagements, HerO manages to reach a maxed-out army consisting of mostly zealots and stalkers with a number of high-energy templar and two colossus. HerO pushes out across the map with this force in an attempt to gain map control and take his fourth. When he feels comfortable on three bases, he starts double upgrades again and begins to actively trade zealots as much as possible. To defend from drops, HerO uses a few well-placed cannons, a handful of zealots, and a few templar positioned in his main and third base.
It's important to note that HerO is looking to gain map control but not commit to a direct engagement at this stage of the game. He can always trade zealots by engaging then pulling back behind storms or by splitting off zealots for harassment, but he wants to retain his stalker and colossus count. His overall goal is to use his large army -- with both templar and colossi -- to secure a fourth base while making it much harder for the Terran to take his fourth.
Controlling a Maxed Army (19:00-End Game)
The late game can be difficult for a variety of reasons. One of the top issues for players in the late game is maxed army control, especially in lower leagues. Luckily, HerO puts on a workshop for army control in this game. The main points of HerO's army control is highlighted in a number of ways:
- the way he splits his army up;
- the usage of taking an aggressive stance and retreating;
- how he uses positioning to flank with storm.
Part 1: How to split up your army
The way a player hotkeys units is defined by how they effectively want to split up their units. HerO splits his army so that each piece is fully functional and easy to access in a big battle:
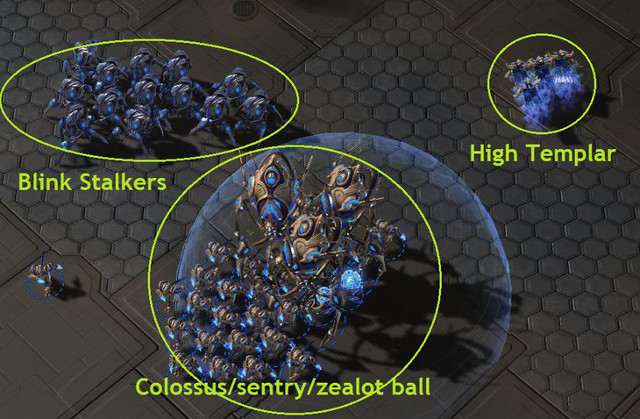
HerO's army in hotkeys.
HerO groups his army into three hotkeys: Colossus/zealot/sentry, blink stalkers, and high templar. This allows him to independently move his army pieces around with ease and also gives him access to each important unit and their ability: blink, guardian shield, and storms.
In addition to his hotkey setup, HerO has very particular positioning when moving his army around. He endeavors to always keep his stalkers out in front poaching for vikings and ghosts. If the Terran player attempts to rush up with his bio army -- or flank with vikings -- HerO can quickly blink back and avoid any losses. This not only gives HerO the opportunity to pick off units for free, but also gives him extended vision in front of his army.
Behind his stalkers, HerO keeps his colossi, zealots, and sentries grouped together. It makes sense to group these units together as the zealots protect the colossi and the sentries are always close to the zealots when using guardian shield. This split is essentially the meaty, “a-move” portion of HerO's army which he uses mainly to threaten a direct engagement, and the force whittling down his opponent with blink stalkers and storms. Occasionally, he will split off zealots to attack undefended expansions or to spot in areas where he lacks vision.
The final hotkey grouping is high templar. This is a more obvious choice as high templar are much more vulnerable, move more slowly than the rest of the army, and need fast access to in order to storm properly. HerO keeps his templar back behind the main bulk of his army most of the time, protecting them from almost all danger.
Part 2: Taking an aggressive stance
HerO excels in placing his units aggressively. He generally does so for map control and vision, but rarely actually engages in a direct fight. By setting his units in a forward position, he is able to threaten his opponent and force a certain type of response while using harassment tools to whittle down his opponent. This allows him freedom to take extra bases and gives him a lot more room against a maxed out Terran push with lots of ghosts and vikings.
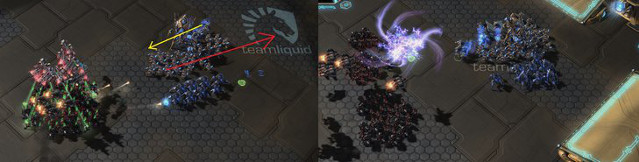
HerO pushes forward with his army, then runs behind storm as the Terran attempts to engage.
In this game, HerO pushes all the way up to TaeJa's base to lock down map control. He takes a free fourth behind this and splits off some zealots to hit TaeJa's economy while he's out of position. Once TaeJa amasses a healthy number of ghosts and vikings, however, HerO is no longer able to directly engage and must take chip away at TaeJa's army before attempting to take it on. Fortunately, the map control HerO has allows him plenty of time and space to retreat and pick off units with stalkers and storm. TaeJa takes almost no damage while crossing the map due to his excellent army control, but most lesser players would lose quite a lot.
Part 3: Storm Flanks
HerO's army retreats from the front of TaeJa's base, all the way back to the pocket of his own third sniping units and landing storms wherever possible. While TaeJa manages to avoid taking any damage moving across the map, HerO still has a healthy number of storms at his disposal and uses brilliant positioning to make sure they all land. By pulling all the way back, HerO creates a natural concave and forces TaeJa's ghosts out of position.
HerO's concave makes it impossible for TaeJa to spot every incoming storm
The first storms land as HerO retreats over his templar into the third base. The second wave of storms hits TaeJa's army from the south while TaeJa is distracted at HerO's front. Identifying that TaeJa's ghosts were all pressuring the army at the third, HerO sends templar from his natural expansion in the north for the final, devastating storms. With almost no army left and no fourth expansion, TaeJa is forced to tap out. In the event that the storms hadn't been that devastating, they would have at least brought the Terran army low enough to allow HerO's main army to directly engage.
Conclusion
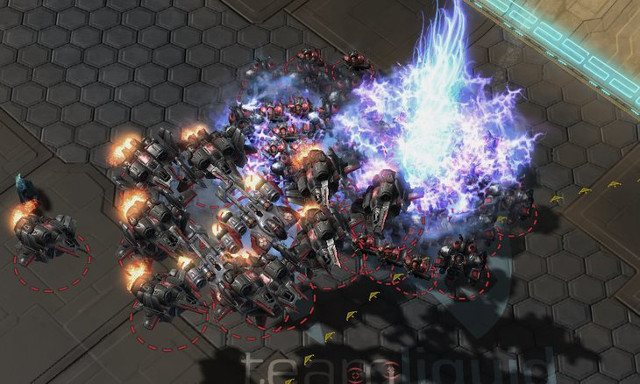
The red mist descends and fellow Terrans mourn their fallen comrades.
All in all, HerO's win was a mixture of three key components: a flexible build that allowed him to adjust to TaeJa; a series of good scout timings decision making in the mid game; and excellent maxed army control. Together, all of these components to supplied HerO with a collection of small advantages which eventually tipped the final engagement in his favor. By shutting down all of TaeJa's attacks and using his army control to be maintain cost efficiency, HerO never gave TaeJa an edge and was able to slowly force his marginal advantages into a huge lead in order to take the game. HerO's emphasis on aggressive scouting with his army offered him tons of map control and a position which in turn forced TaeJa to play more cautiously and allowed HerO to land amazing storms in the late game to take a game off of arguably the best Terran vs. Protoss player in the world.


