Bomber vs Scarlett: Breaking Down the Madness
by Jer99
Habitation Station was the runner up of the Team Liquid Map Contest. This map features a close by air structure similar to Newkirk Precinct and an easy to secure natural; however, additional bases are harder to secure. The gold base is the maps standout feature and was a central point of contention in this game. On one side of the map we had Bomber, a player known for his monster macro mechanics and pristine army control; on the other side there was Scarlett, a player with a ZvT style all her own revolving around mutalisks and creep spread. A heated rivalry started between these two players during the WCS Season 2 finals: when these players clash, it always produces spectacular games to watch. Kicking off with unorthodox openers, this game went on to be one of the most memorable games of 2013.
Before we get into the game analysis, let's take a look at the features of this map:
Given that this is a smaller map, the Terran player has many options: they can do a proxy two rax and try to get bunkers up at the Zerg natural; they can do a hellion/banshee build due to how long it takes for creep to spread; or they can just go the standard 4M and apply more pressure later. This map, however, does not leave the Zerg many options. Due to the high amount of choke points, they can’t be aggressive with Zergling/Baneling and have to rely on Mutalisks to do any sort of harassment.
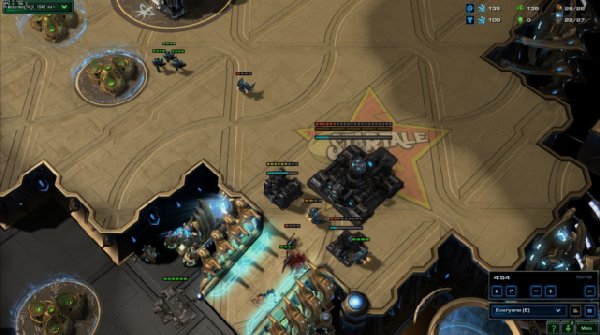
StarTale Bomber vs Acer Scarlett RO8, Match 3. From Red Bull Battle Grounds New York 2013
 Replay |
  VOD
VOD
Replay | VODBefore we get into the game analysis, let's take a look at the features of this map:
- Easy to take natural expansion;
- A relatively easy to take adjacent 3rd base;
- A riskier to take gold base;
- Short by air distance to opposing bases;
- Lots of choke points.
Given that this is a smaller map, the Terran player has many options: they can do a proxy two rax and try to get bunkers up at the Zerg natural; they can do a hellion/banshee build due to how long it takes for creep to spread; or they can just go the standard 4M and apply more pressure later. This map, however, does not leave the Zerg many options. Due to the high amount of choke points, they can’t be aggressive with Zergling/Baneling and have to rely on Mutalisks to do any sort of harassment.
Openings (0:00-5:00)
Bomber - 12/14 Proxy Rax
Bomber opened this game with proxy play. Given the map, this was not a bad a choice. With a relatively short rush distance -- and only two spawn points -- it's quite possible to complete some bunkers at the Zerg natural and rally marines for constant pressure. Unluckily for Bomber, he was greeted with early zerglings when he arrived at Scarlett's natural and had to abandon his aggression. He was only able to squeeze out a total of five marines before having to float his barracks back to the main. Meanwhile, he finished walling off with a CC and got up a bunker for extra defense.
The ever fragile wall.
Scarlett - 14/14 Speedling
Scarlett chose to open with speedling expand. This build is designed to counter any potential cheeses from Terran while giving plenty of transition options to Zerg. That said, this build is very unorthodox and hasn't been a "standard" opener since early WoL. She confirmed there would be some sort of proxy play when her overlord scouted no wall off and no expansion. The option to go for a baneling bust was open, but she decided to cancel the nest and instead start an expansion. She had lings in Bomber's base, a limited amount of gas for banelings, and Bomber already had a decent wall coming up with a couple of bunkers, so a one base baneling bust wasn't guaranteed to do game ending damage. Additionally, Scarlett always prefers going for long macro games whenever possible.
Progression to the mid game (5:00-13:00)
Bomber - 3CC into 4M
With Bomber proxying the barracks and then floating them back to his base, he saved his minerals and decided to go into the standard the 3CC opening. This is a great map for the quick three base style because the watchtower is easily securable. Since Scarlett took the gold base, the watchtower gives vision of both the high ground at the gold base and the choke point leading up to the watchtower, which gives vision of a potential runby path. This vision gives an advantage in engagements as it forces Zergs to attack through the choke point making any flanks impossible. Bomber continued with the traditional 4M opening by adding his factory, engineering bays, 1/1 upgrades, starport, and stimpack/combat shields. With hellion production only starting at 7:55, he wasn't able to scout the base of Scarlett and had no idea that she was rushing for mutas off 2 bases. Despite being caught off guard, Bomber had enough marines to hold off the mutas and eventually added turrets to help defend.
Scarlett - Mutalisk Harass
Scarlett rushed out her mutalisks before even starting zergling upgrades. As a result of Bomber's proxied barracks, he was set back on his build and Scarlett planned to use the mutalisks to get damage done early: reducing the SCV count, picking off stray buildings or addons, as well as any straggling marines. The inherent risk of the fast muta play while Bomber powers is, of course, that she must do a good amount of damage to recover her investment. She also intended to keep Bomber pinned while increasing her drone count and establishing her other bases. She dropped the spire at 7:15 and started six mutalisks with +1 air weapons as soon as it finished. While her spire was building, she established her third base at the gold and saturated it.
One thing to note was Scarlett's lack of gas income. After cancelling the baneling nest, she forgot to put additional drones into the 2nd gas in her main base, leaving only 1 drone in that gas geyser. Furthermore, one of thegases in her natural only had two drones, and for a short time both geysers at her gold base were also undersaturated with only two drones. This led to an imbalanced income; she had a large amount of minerals but almost no gas to spend.
When the mutalisks finished, she sent them to Bomber's base and started to harass the mineral lines, killing off six SCVs and a handful of marines. She also built around 30 zerglings expecting some hellion harass. When the hellions never came, she used them aggressively and tried to pick off even more SCVs in the natural together with the inital batch of mutas; however this move didn't get much done. Due to going mutalisks first, her baneling nest was very late and her 1/1 upgrades are only starting when Bomber's 1/1 was nearly done.

Mutalisk raid Bomber's mineral line.
The Parade Push (13:00-28:00)
Bomber - Three Base Aggression
After Bomber's 1/1 finished, he goes for the push out and lays siege to Scarlett's gold base. Instead of clearing creep between Scarlett's natural and gold base, he decided to do some fancy drop play on the high ground behind the gold minerals. Ironically, this drop play gave Scarlett enough time to finish her upgrades and get into a better defensive position. By clearing the creep instead of doing the drops, Bomber could have been able to establish a much better position for when his upgrades finished later on.
Rather than taking the third base at the gold, Bomber decided to take it at the adjacent expansion to his natural, which is much further away from Scarlett's base. As such, it would have allowed him more time to recover if his push got knocked back. Another benefit of this base is that blue minerals have a longer lifespan than a gold base. By taking this base, Bomber must accept that it is out of the way of his reinforcement path and can be abused by runbys. He continued to make non-stop 4M while cutting SCV production entirely at 59 and maintained his upgrade lead over Scarlett, essentially deciding to finish the game with a 3 base semi all-in.
His main base eventually ran out of minerals, so he was forced to float his OC over to the gold base. Due to his low SCV count, he chose to pull almost all his SCVs off gas to maximise his mineral income and invested every resource into marines. This move trades sustainability for damage output: he had more marines to get something done quickly, but they could have died much faster; again, Bomber's plan at this point was to get the game over with as quickly as possible. He was relying on Scarlett not being able to hold on against the endless pressure of the Terran parade push. The medivac count was already low, and when Scarlett was eventually able to pick off the last of them, Bomber was left with only lethal but fragile marines.

Baneling runby
Scarlett - Muta/ling/bling
After the Muta harassment, Scarlett continued to go with the standard Zerg macro play by adding a fourth base adjacent to her natural. She also positioned herself defensively to face the Terran's impending 1/1 and medivac push. Scarlett started to power the creep spread heavily as is her style, began researching baneling speed, and morphed some defensive banelings as well. She did a great job of not overreacting to the drop play behind her gold mineral base, picked off a decent amount of bio, and evenly traded with the Terran army.
While all this was going on, Scarlett was able to sneak an army around the map and massacred the mineral line at Bomber's exposed third base. Scarlett's gold base does eventually fall, but when it did, it was already nearly mined out and additional bases were on the way. Scarlett continued to send in ling runbys to the third of Bomber while increasing her own drone count. Scarlett was now able to get aggressive with the mutalisks again. She cut into the reinforcement line of the marines and picked off a good number of them. She then moved on to pick off SCVs in the gold mineral line. Eventually though, Bomber was able to out-muscle Scarlett and killed all the expansions save her fourth base.
Low Economy (28:00-34:00)
Bomber - Marines, Marines, Marines
Now fully committed to a three base all-in, Bomber continued to pump out marines and tried to land the killing blow. However, without medivac support the marines died easily to a drone pull. He also found his mineral line being assaulted once again by mutalisks, so he was forced into pushing Scarlett's only mining base, succesfully picking it off. Bomber -- now ahead in economy -- still had the gold base mining while Scarlett was forced to long distance mine. Unfortunately, by committing to the attack on the fourth he was caught out of position and lost his third orbital together with most of his gold base. Bomber decided to mine out the rest of the gold base and make one final push to end the game.

Mutas picking off the 3rd OC
Scarlett - Burrowed Banelings
Despite having a massive amount of drones, Scarlett was down to only a single mining base. With the endless stream of marines assaulting the hatch, she called on some drones to aid in the defense, and barely held on. She was able however to retain a solid amount of mutalisks while keeping this final base alive. During this time, Scarlett bought enough time to morph some banelings to hold off the next push. When this push eventually came, Bomber attacked with no medivacs and the marines disappeared to the banelings. Meanwhile, she continued counterattacking with zerglings while using her mutalisks to pick off SCVs at the gold base. Unfortunately for Scarlett, Bomber recognized this timing where her units were out of position and sniped the last mining base. Due to her immaculate creep spread, Scarlett saw the majority of Bomber's army and took this opportunity to trade yet another blow with Bomber, killing his third orbital. She also continued to be active with the flock of mutas, ravaging the gold base, killing off all of the marines and leaving all but five SCVs. She was even able to get into the main base of Bomber, sniping structures to the best of her ability.
Burrowed Banelings (34:00-end game)
Scarlett used her flawless muta micro to keep Bomber pinned to his base while the crucial burrow upgrade finished. When Bomber moved out with his massive marine ball, he lifted his orbital -- meaning no scans available -- and fell into a baneling trap which killed almost half of the active marines. Scarlett used this opportunity to pick off one of the two remaining orbitals. At this point, the game was finally hers.

Marines watch their brothers die
The utility of burrowed banelings cannot be understated; especially, in the (albeit extreme) situation exemplified by this game between Scarlett and Bomber. One MULE can produce around 6 marines -- and since Bomber was down to a single orbital -- at the end of the game he can only make an extra six marines every 90 seconds. The combination of a super low SCV count, burrow from Scarlett, and no ravens from Bomber forced him into ditching his MULE income for scans, halting all marine production. It only takes two burrowed banelings to kill a marine; and in an ideal situation, you can kill 30+ marines if they are clumped. There is always the potential for burrowed banelings, and this game was decided by it. In the final moments of the game, Bomber dropped his last scan and saw nothing. He eventually got baited into the final baneling bomb: GG.


