
A lot of mapmakers were tired, and maybe even a little bit burnt out, after the hectic summer schedule with back to back map contests. At first, we feared that might've scared some of them off but boy were we wrong. For TLMC 14, the mapmaking community was back at full force. Not only did we recieve 163(!!!) submissions, the interest in the contest was insane. During the last two days of the contest alone, we received, and replied to, 150+ PM's that all either contained map updates or new submissions.
While we're ready to announce the results, please note that the maps are not yet uploaded! We are still finishing off QA for the TLnet Map Contest Tournament that will start tomorrow, Tuesday, the 11th of February. Make sure you tune in!
Ok, we've delayed this for long enough. Time to announce the results! Just remember that the order the maps are listed in is not the same as the order they finished in the voting. We took the list of the category finalists and randomized it.
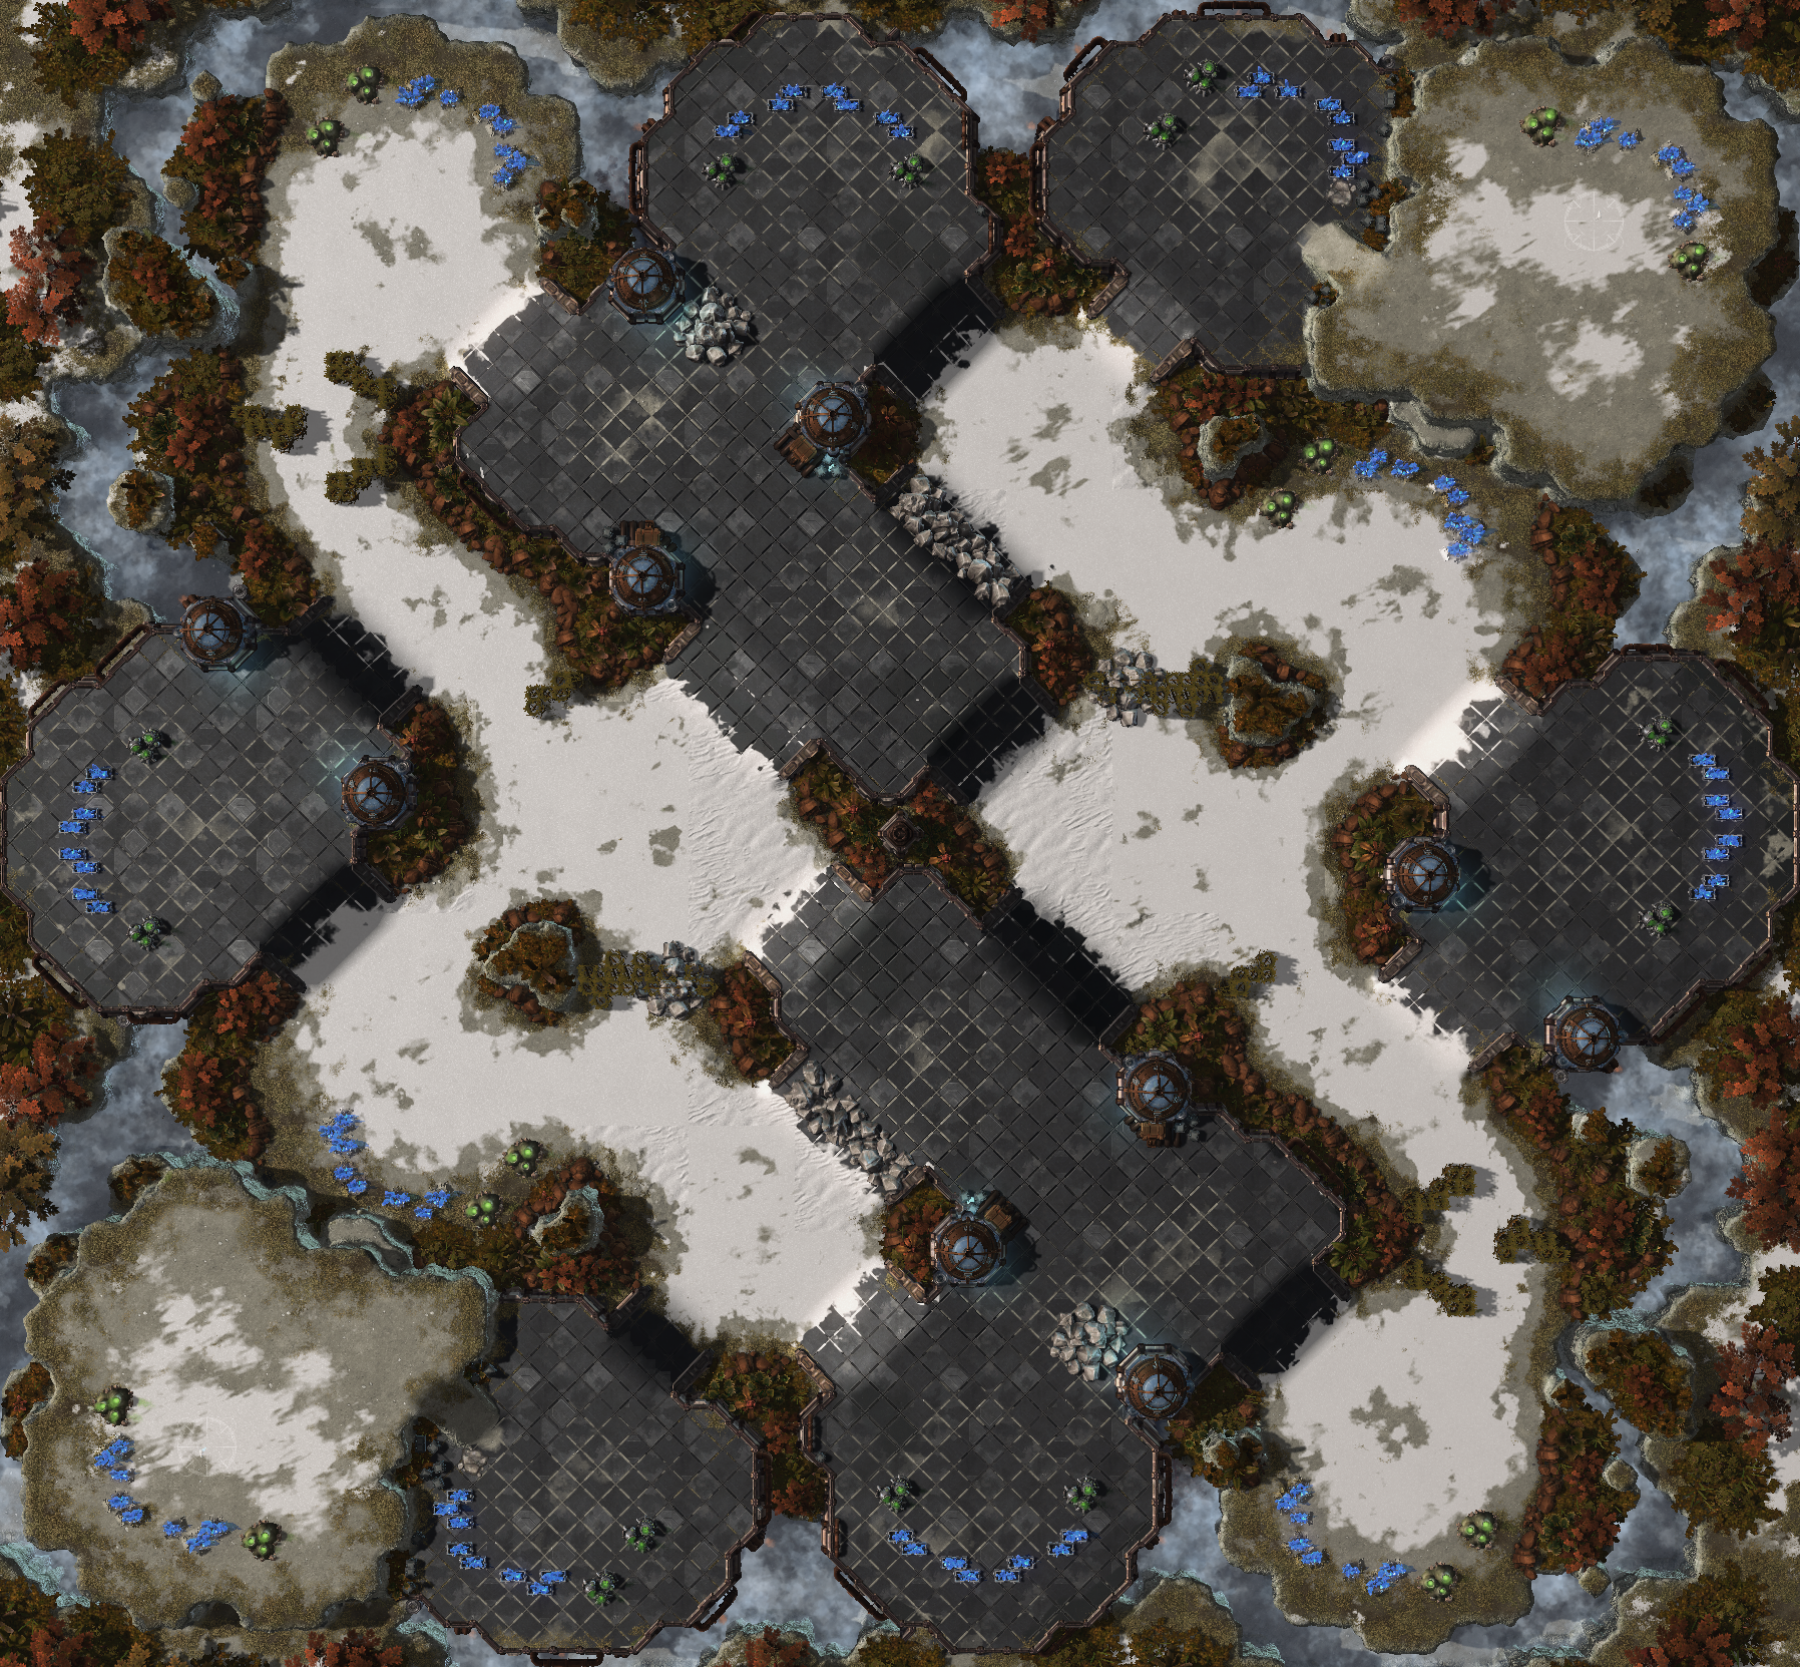
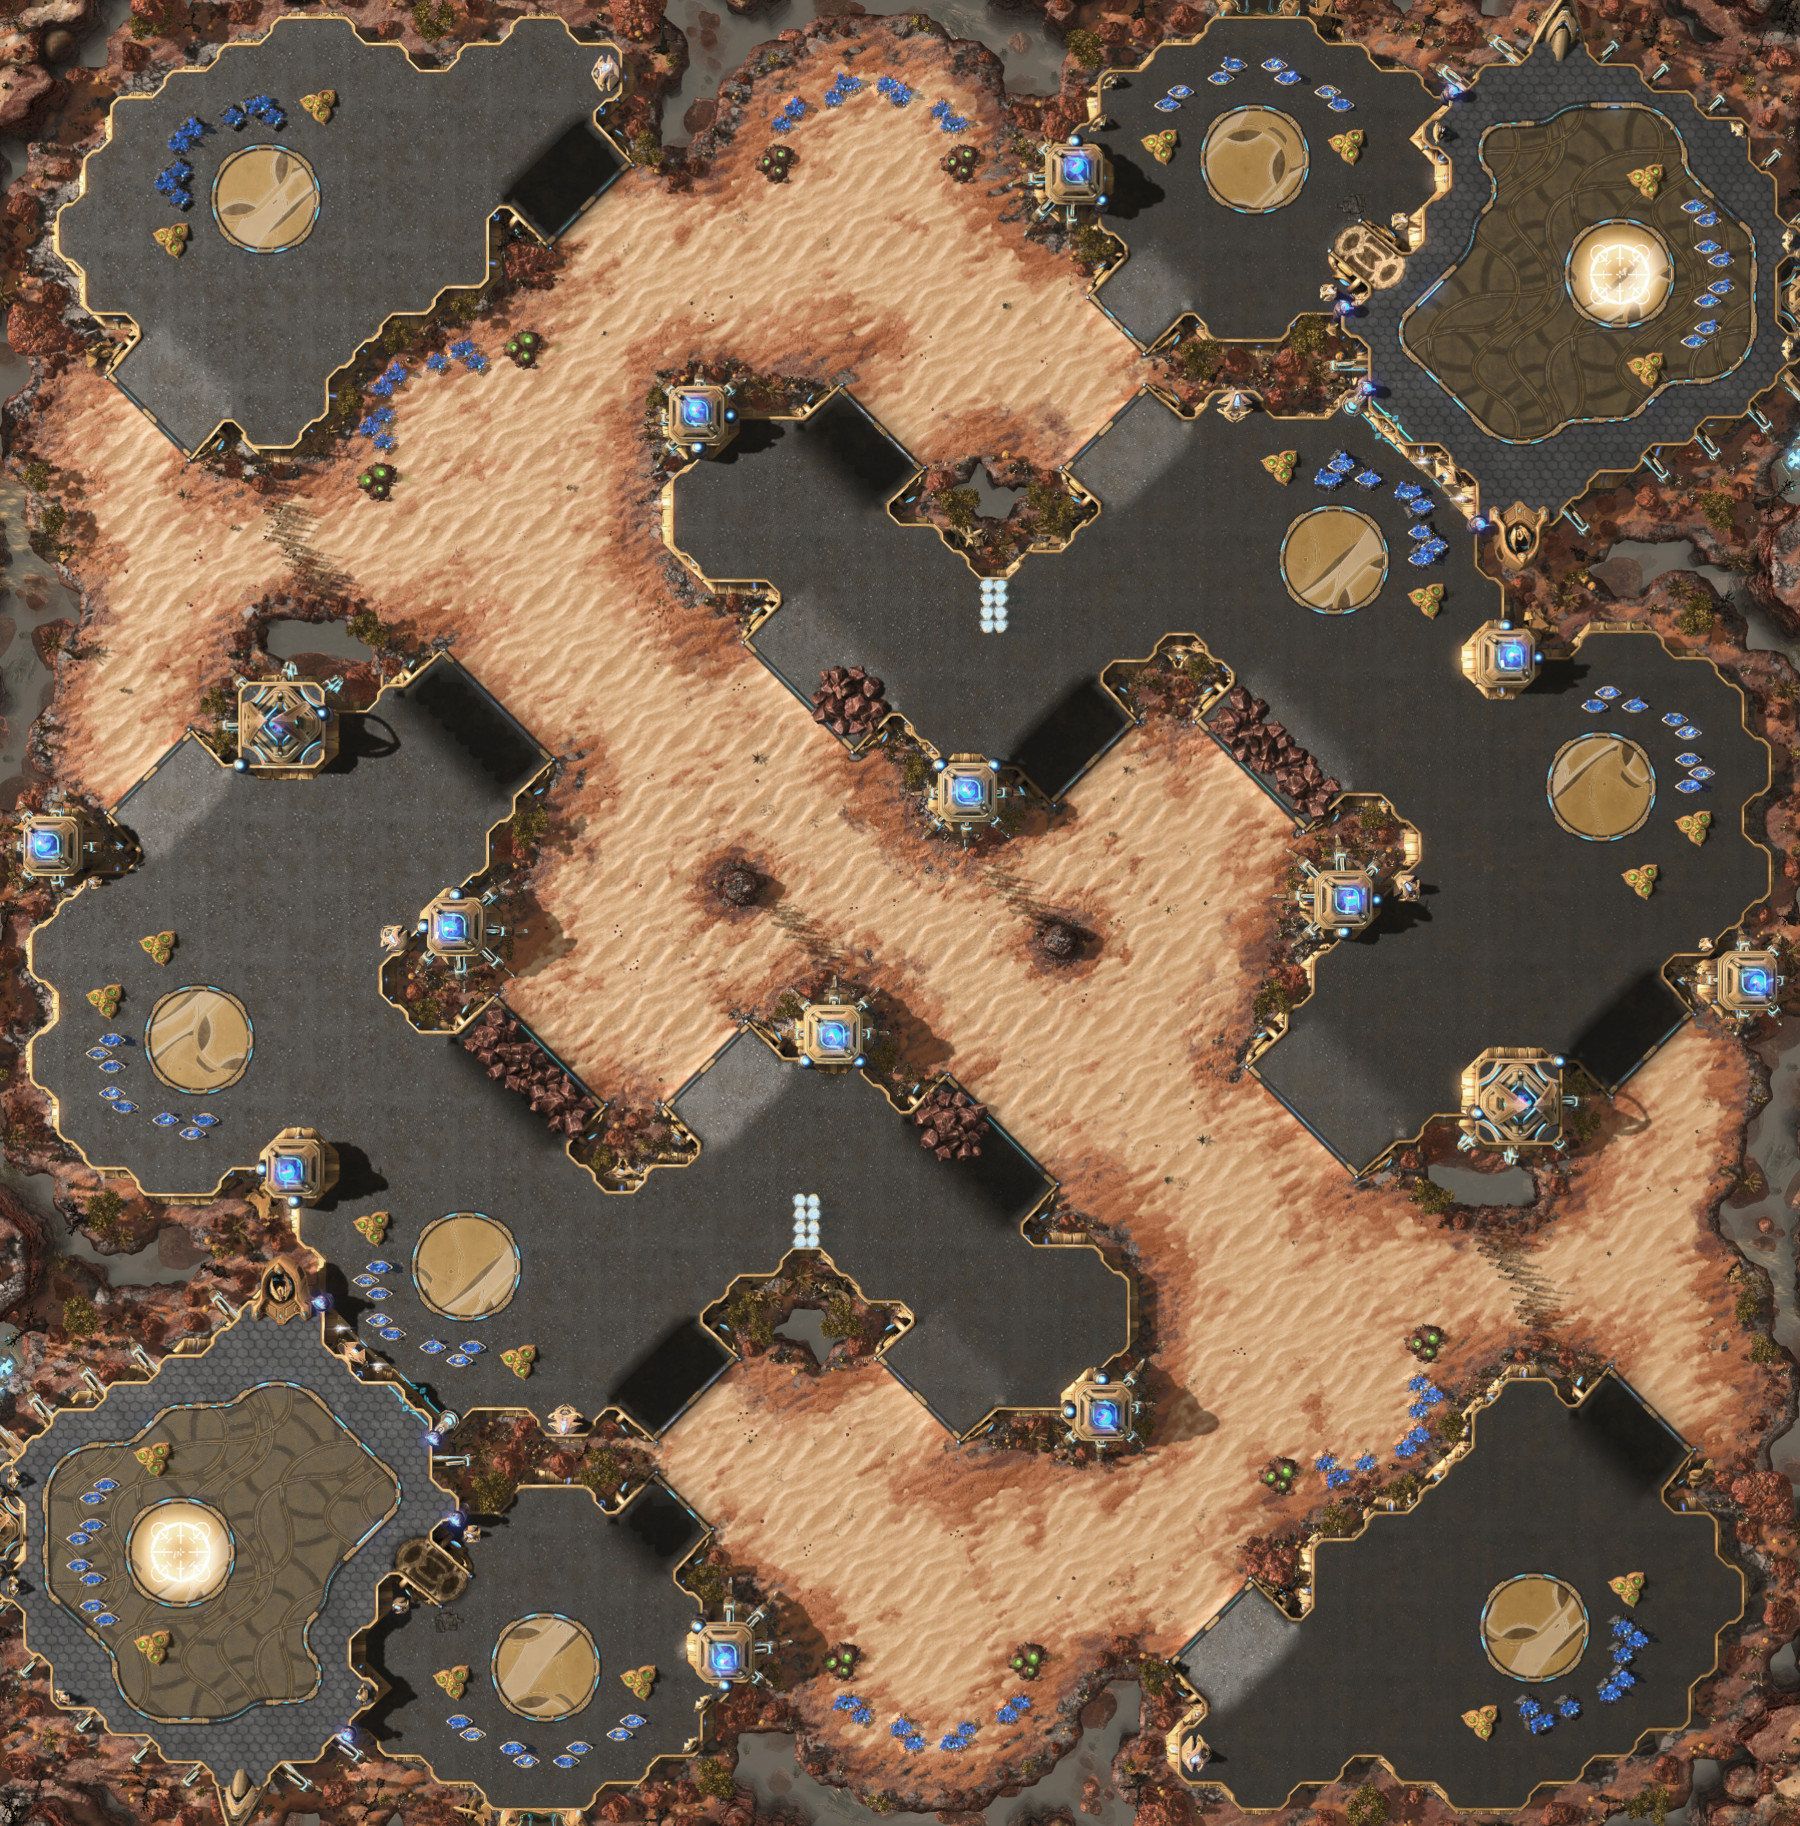 Terran prospectors have reported that they’ve seen structures in the distance that soared up to the sky like pillars of gold. The Protoss settlement consists of 14 bases, where the linear third is further away from the opponent compared to the triangular third but in return, the high grounds surrounding it must be taken into consideration. No matter in which direction you go, there’ll be a fourth waiting for you. The corner bases will prove valuable as vantage points and to help control the base located below it.
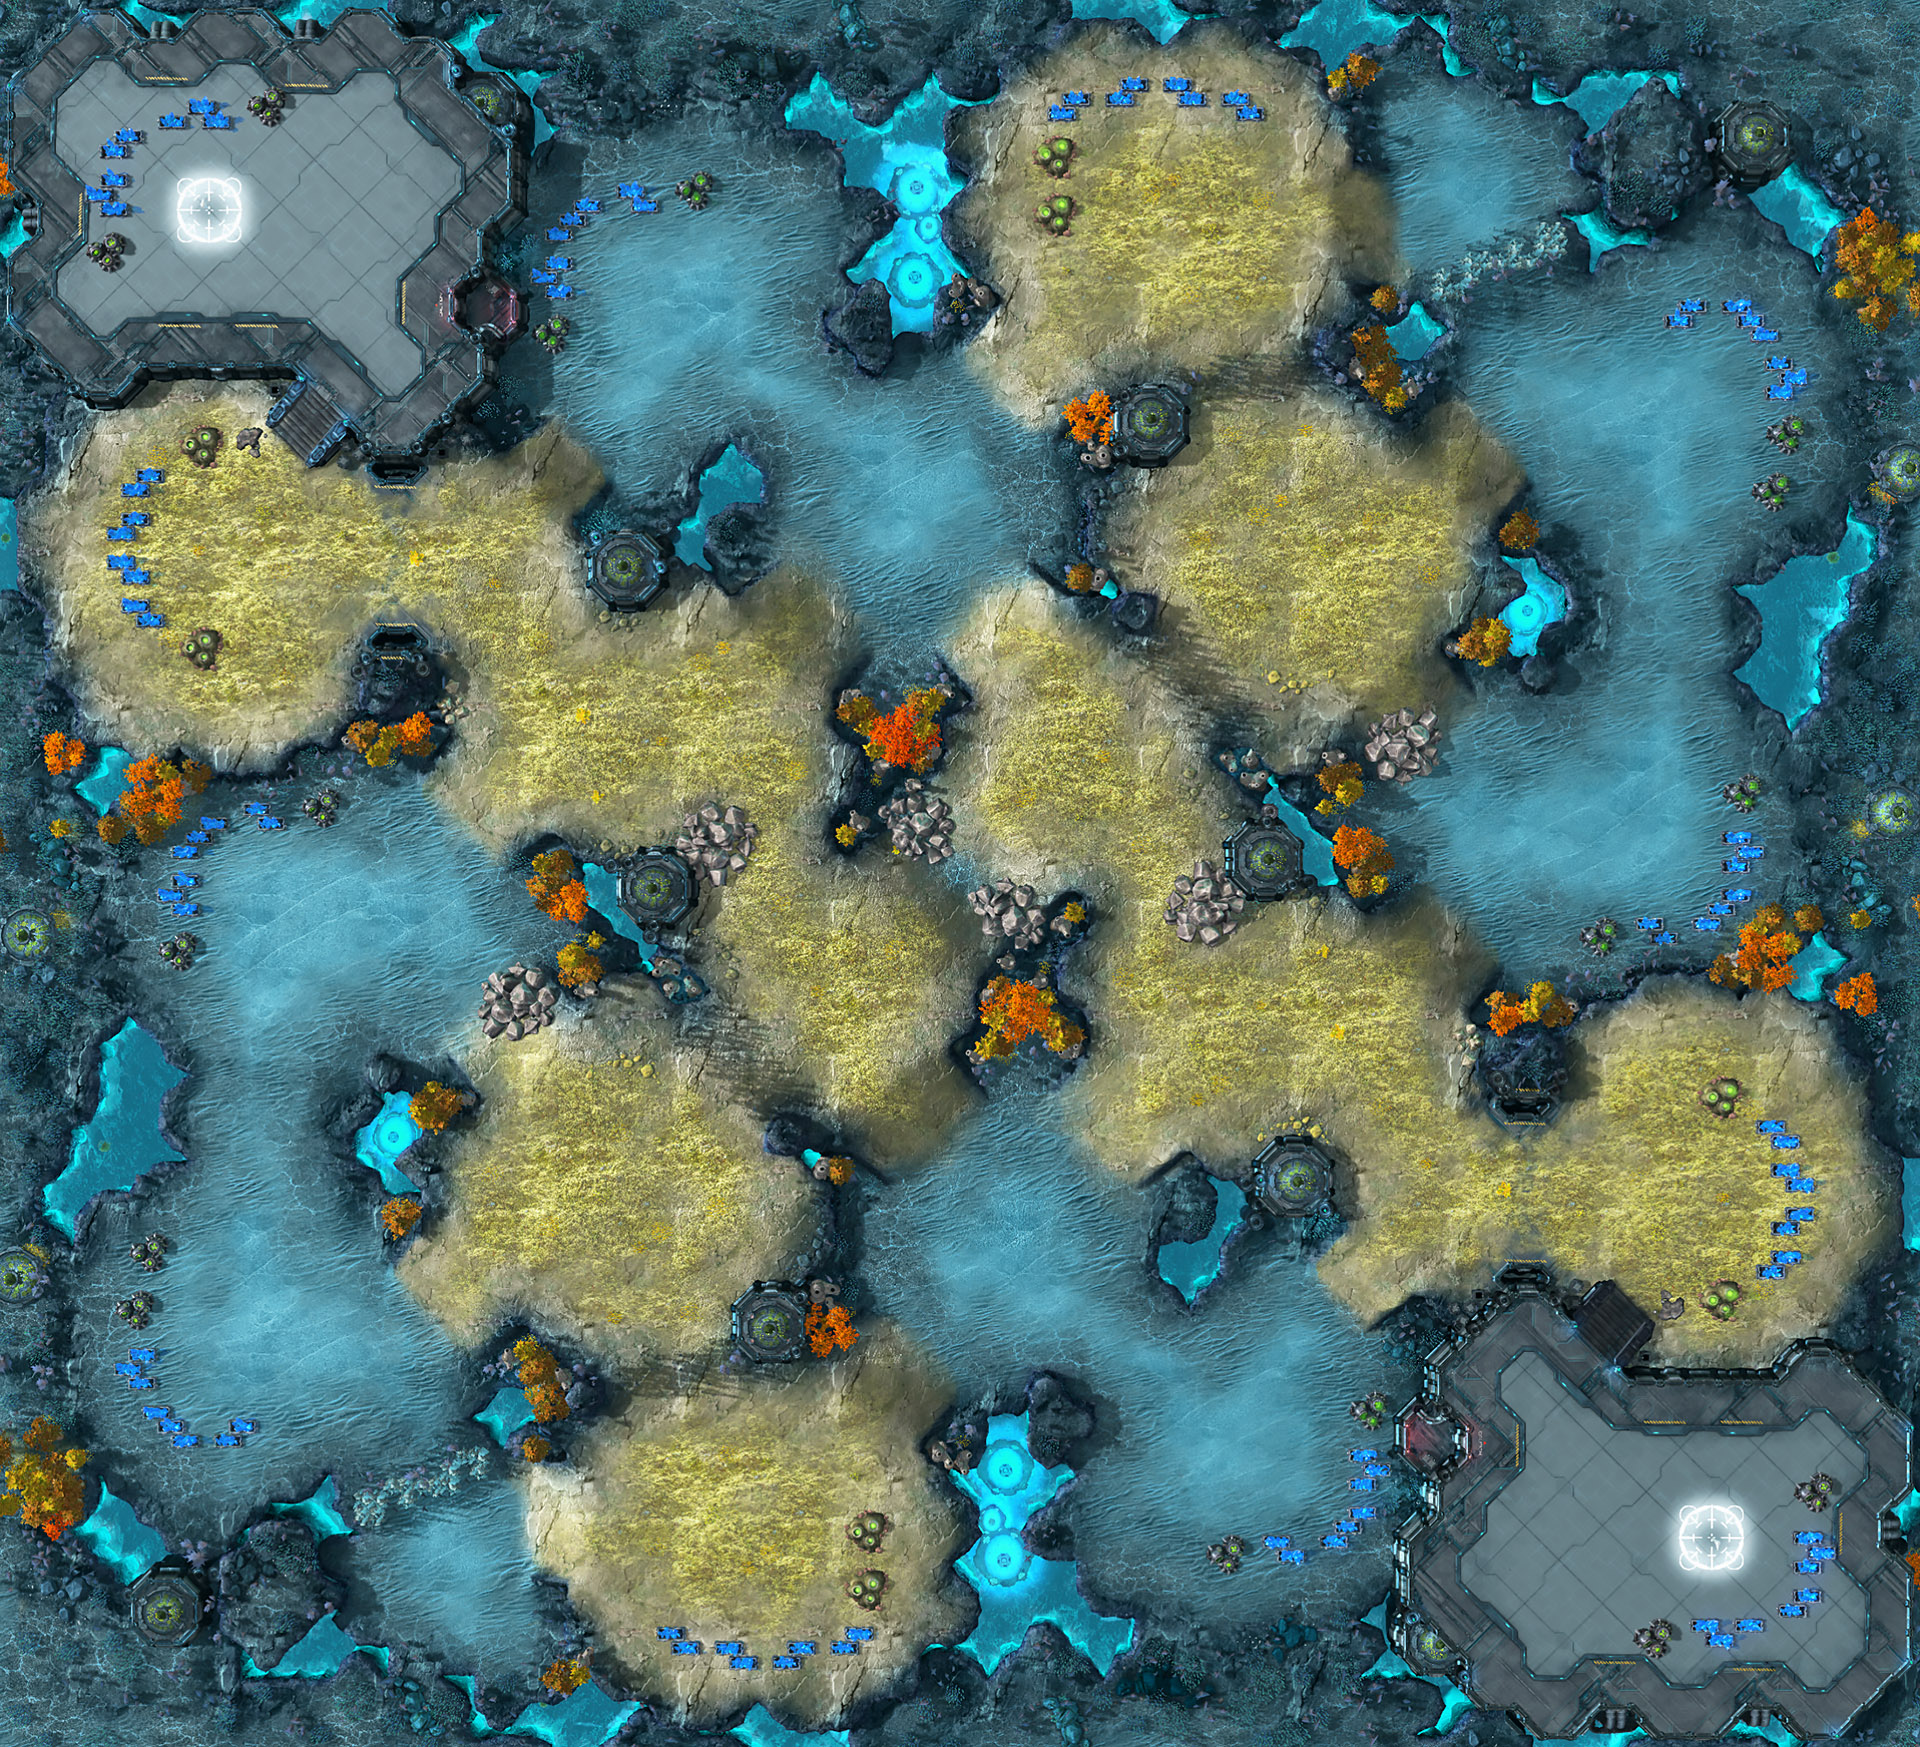
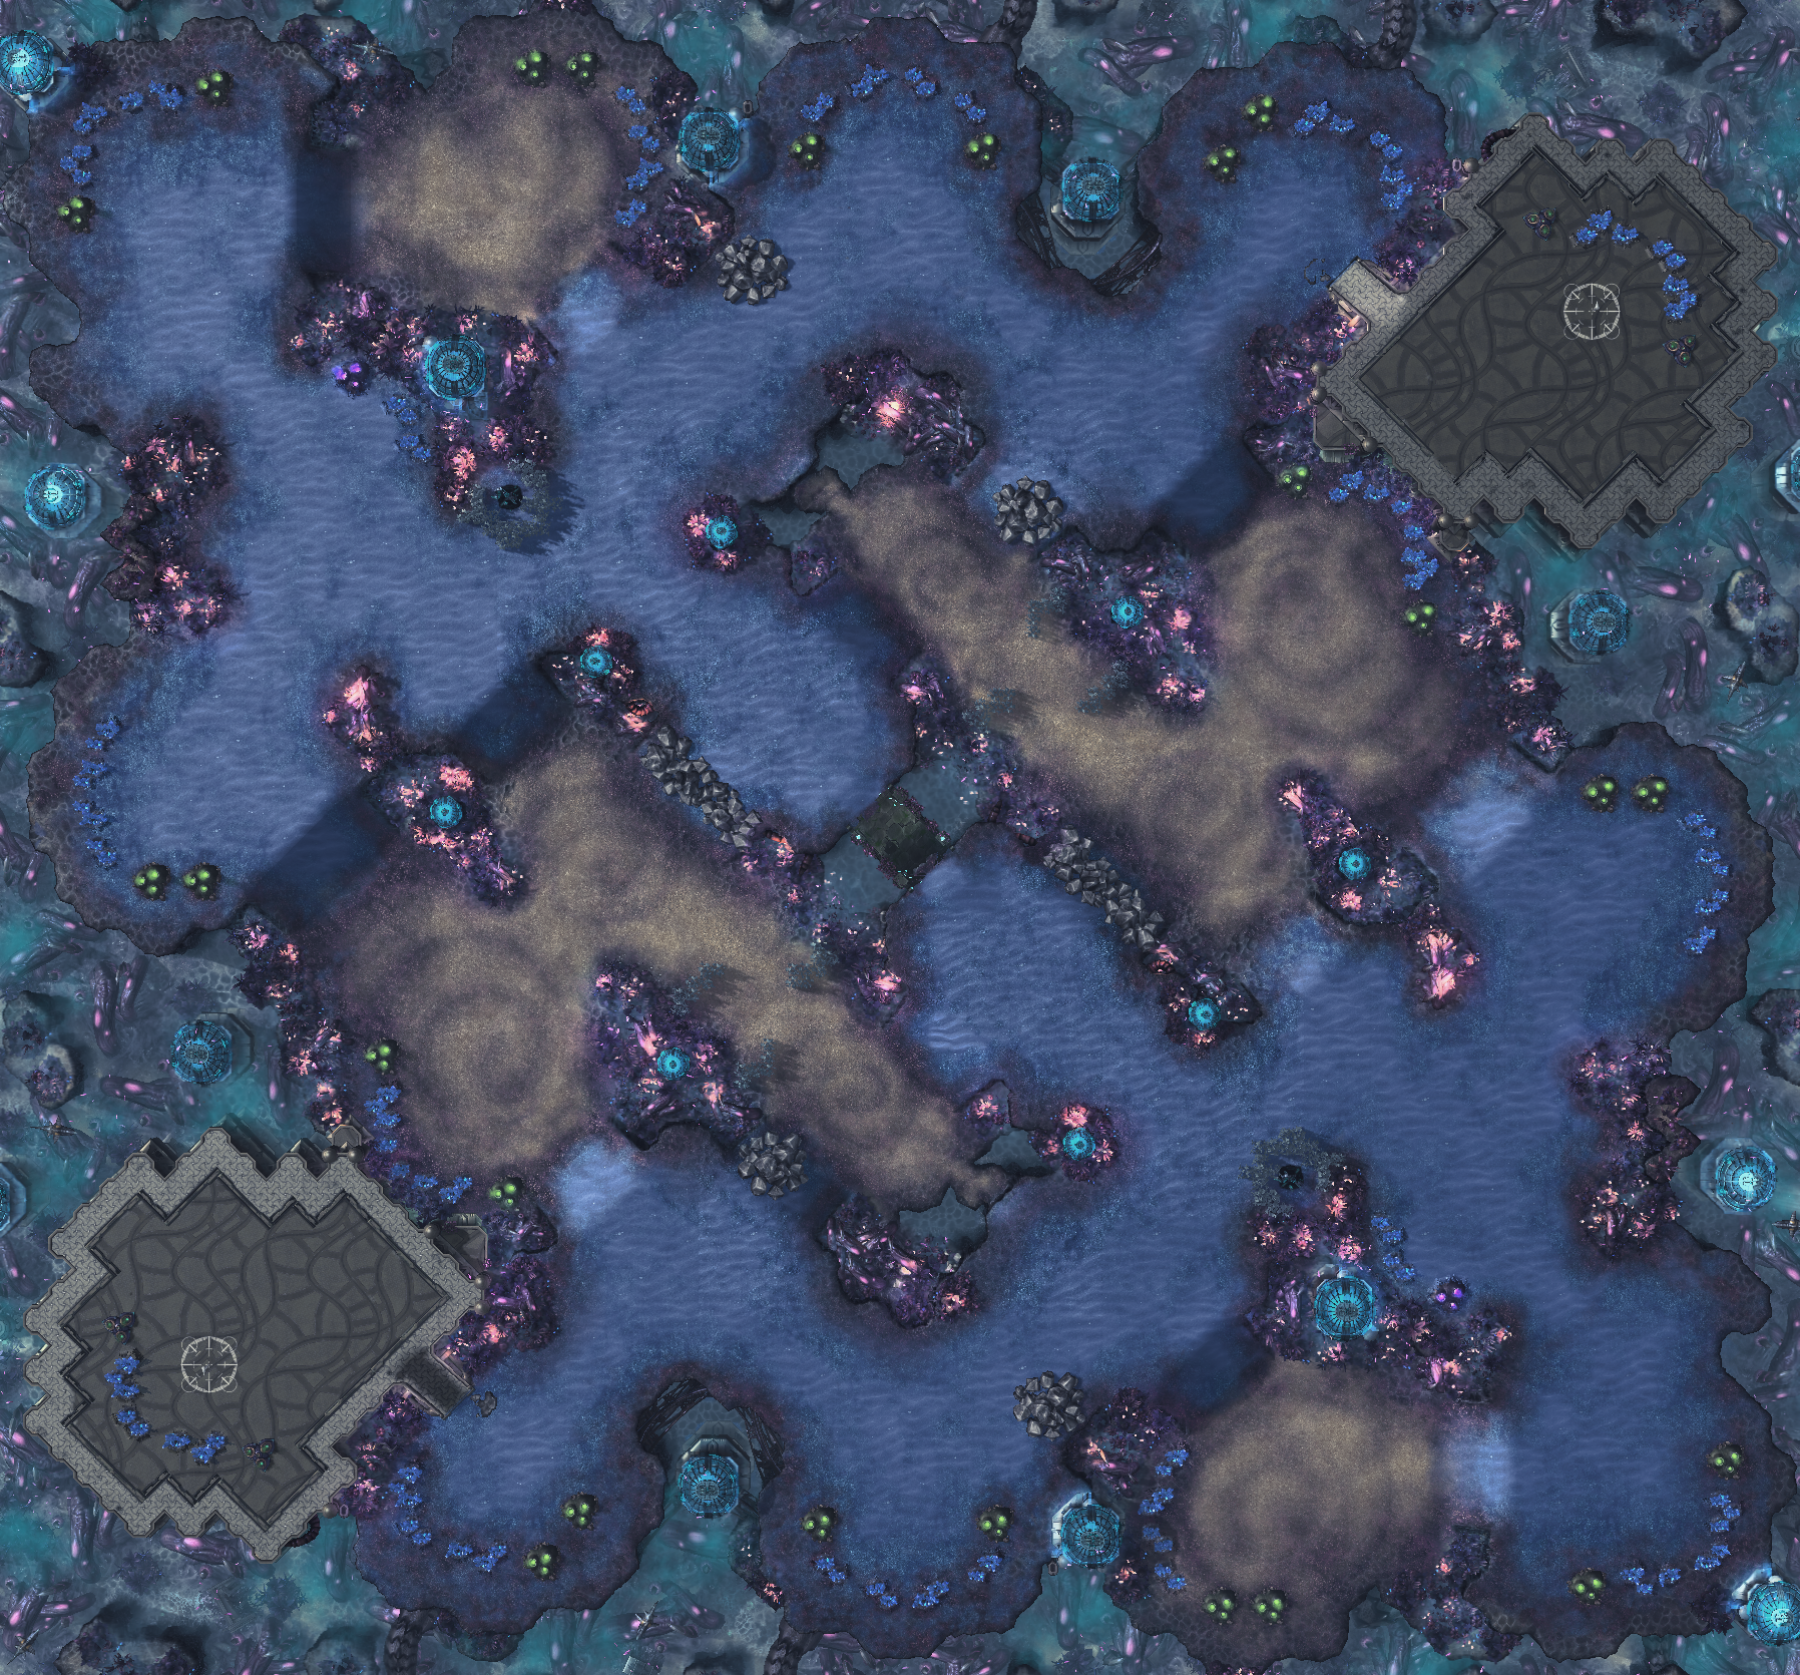 Battle for survival on the seabed of this luminous alien planet.
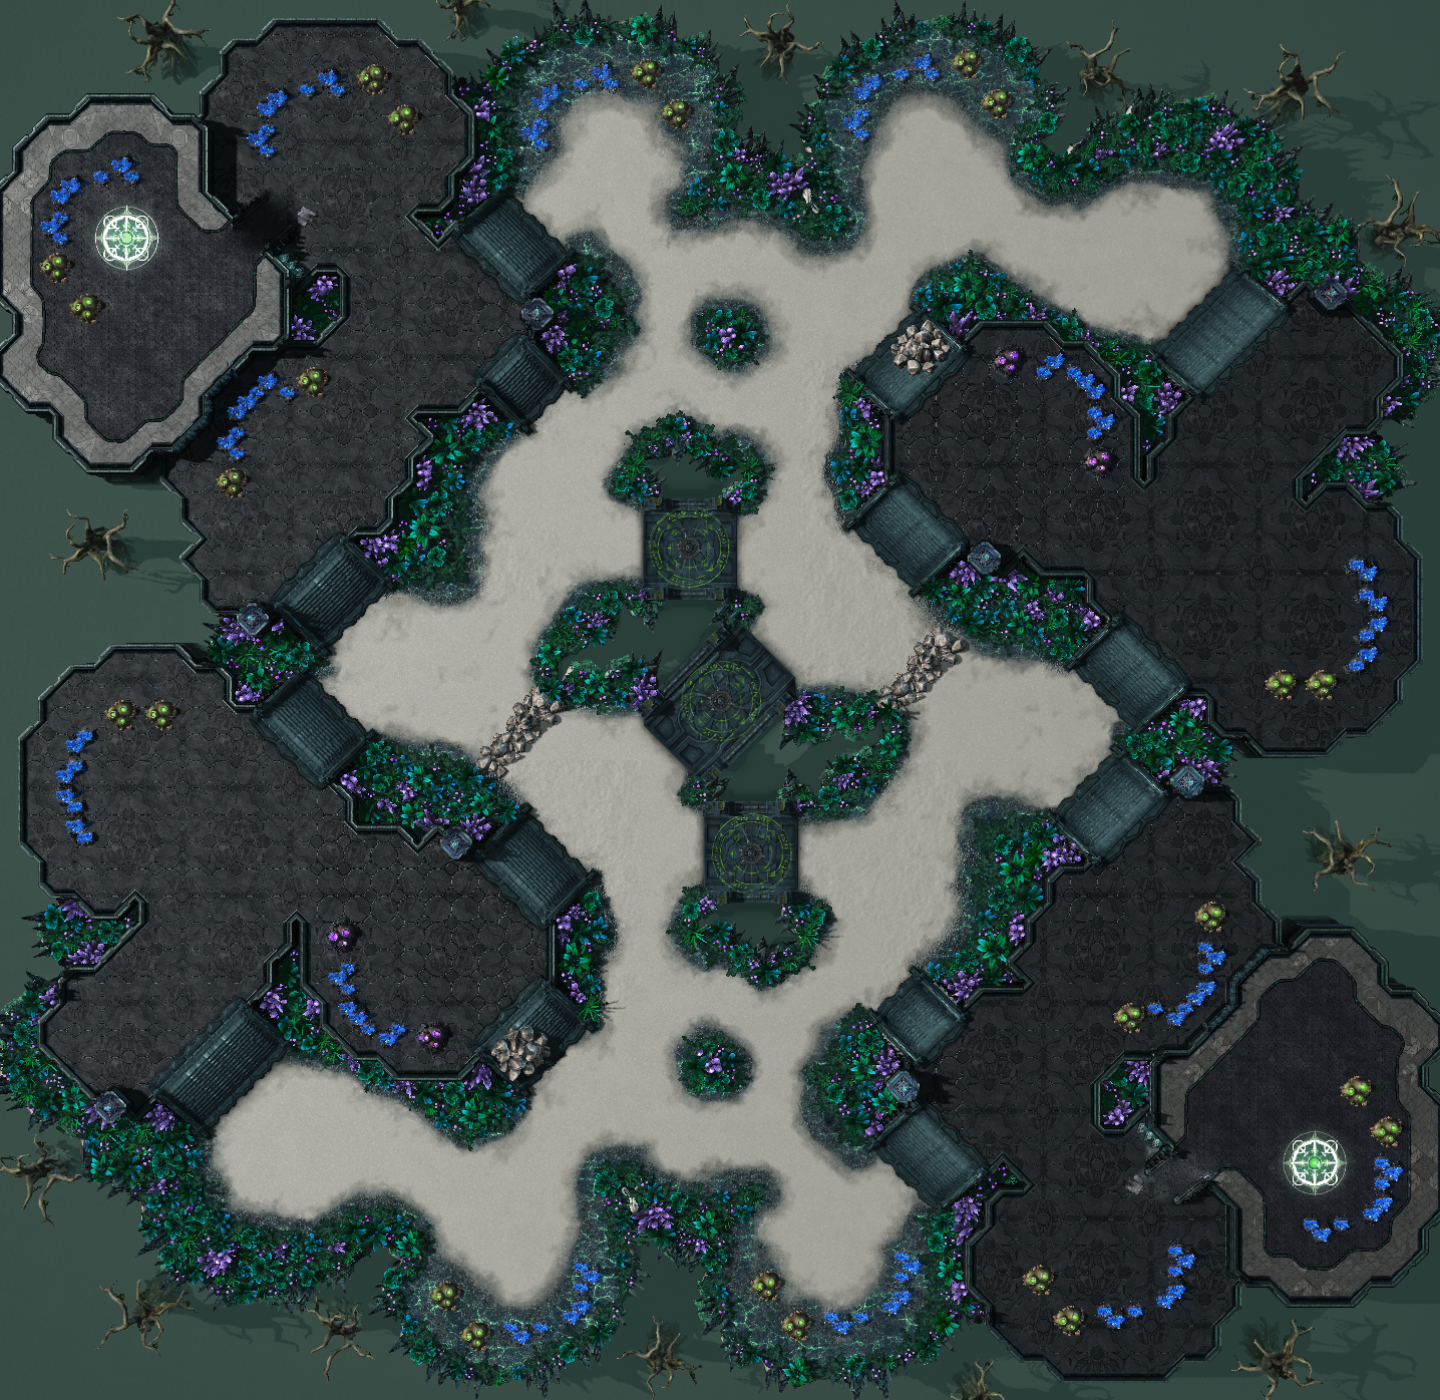
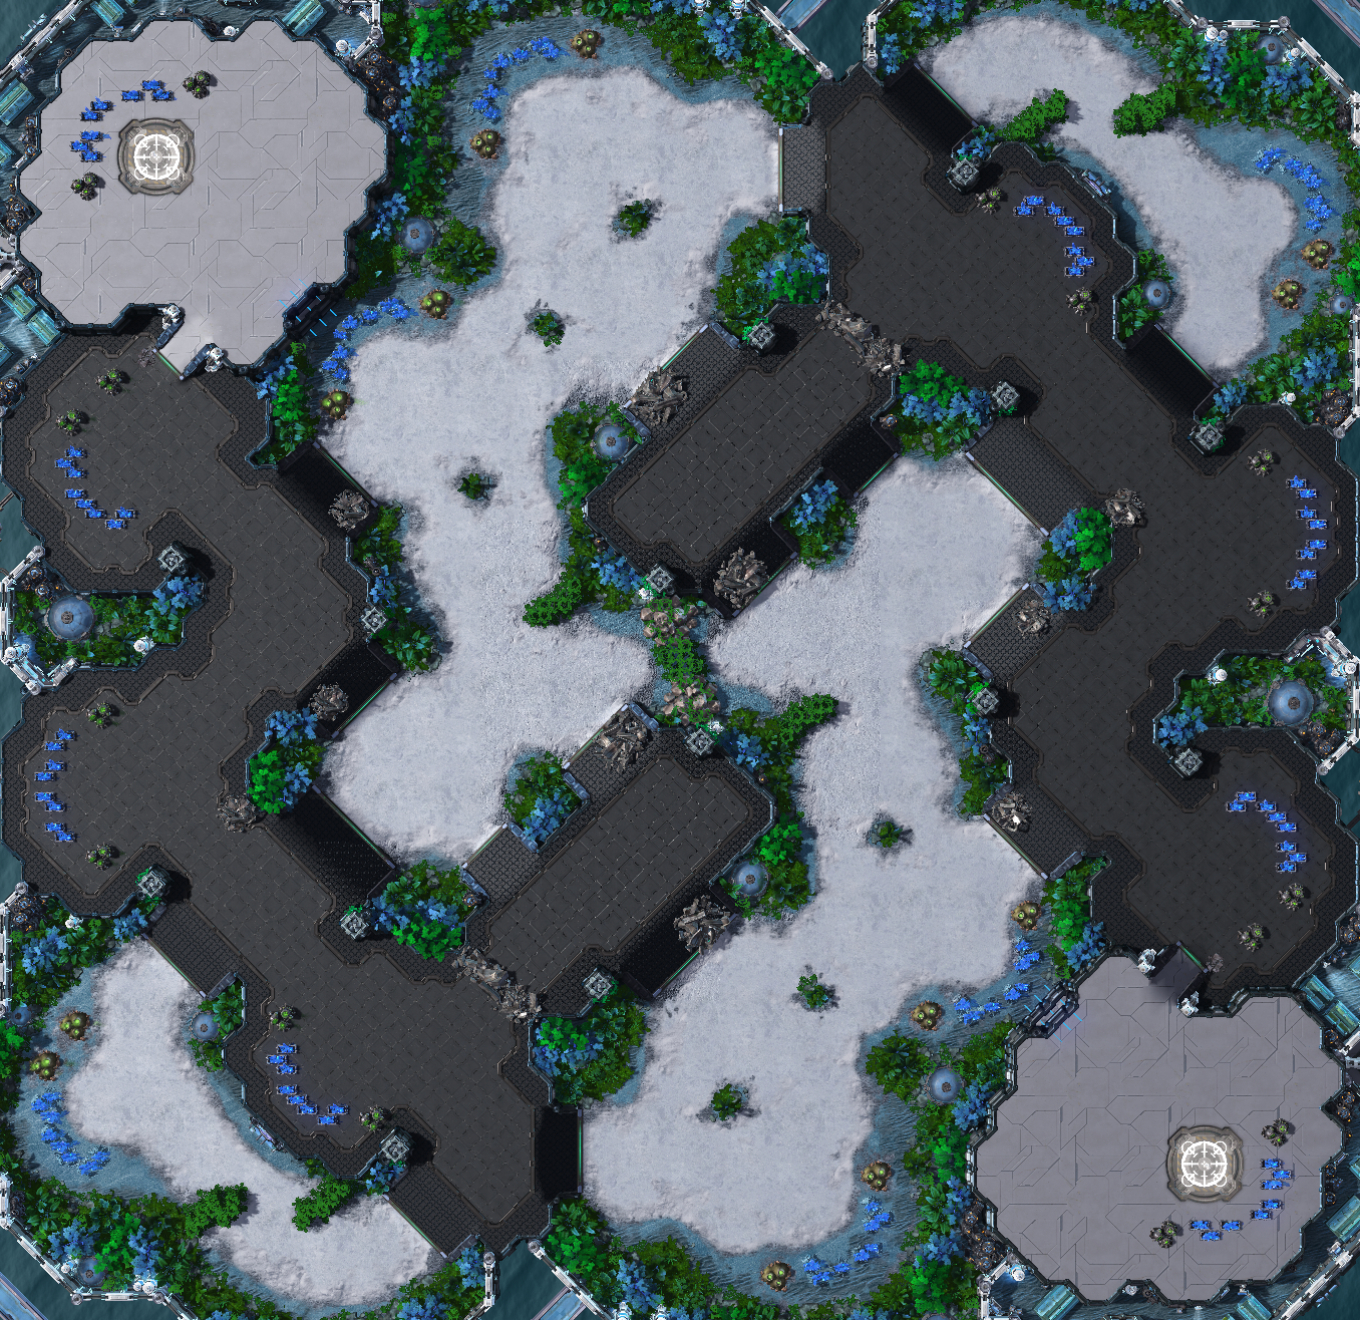 Lightshade is a typical standard map with two third base options and 7 bases per player, and can support a wide variety of playstyles. The destroyable debris and rocks give players a bit of security early on, and destroying them makes it easier to maneuver armies around the map.
Features 14 blue bases in total, line of sight blockers in the middle area and in the corner paths, debris on many of the ramps making them initially smaller until cleared up, also rocks at the direct center path, one set of large debris is dividing the central part of the high ground from the high ground near the corner, basic rake base layout (similar to e.g. Acropolis and Simulacrum), all in all, a very standard map
 The player can secure the base in a stable manner. At 3 and 9, the base is very easy to defend, but since the space with water is impossible to build, it is easy to attempt unit drop or air-to-ground attacks.
 Large armies attacking through the shortest path will ride the struggle bus to the enemy. Outside paths are much more spacious.
A mineral wall protects your 3rd/4th base. Each patch has 10 minerals. If you take the central base by the mineral wall, your workers will automatically mine the wall. This is intentional!
 Choose between an open third and safer fourth, or safer third and open fourth.
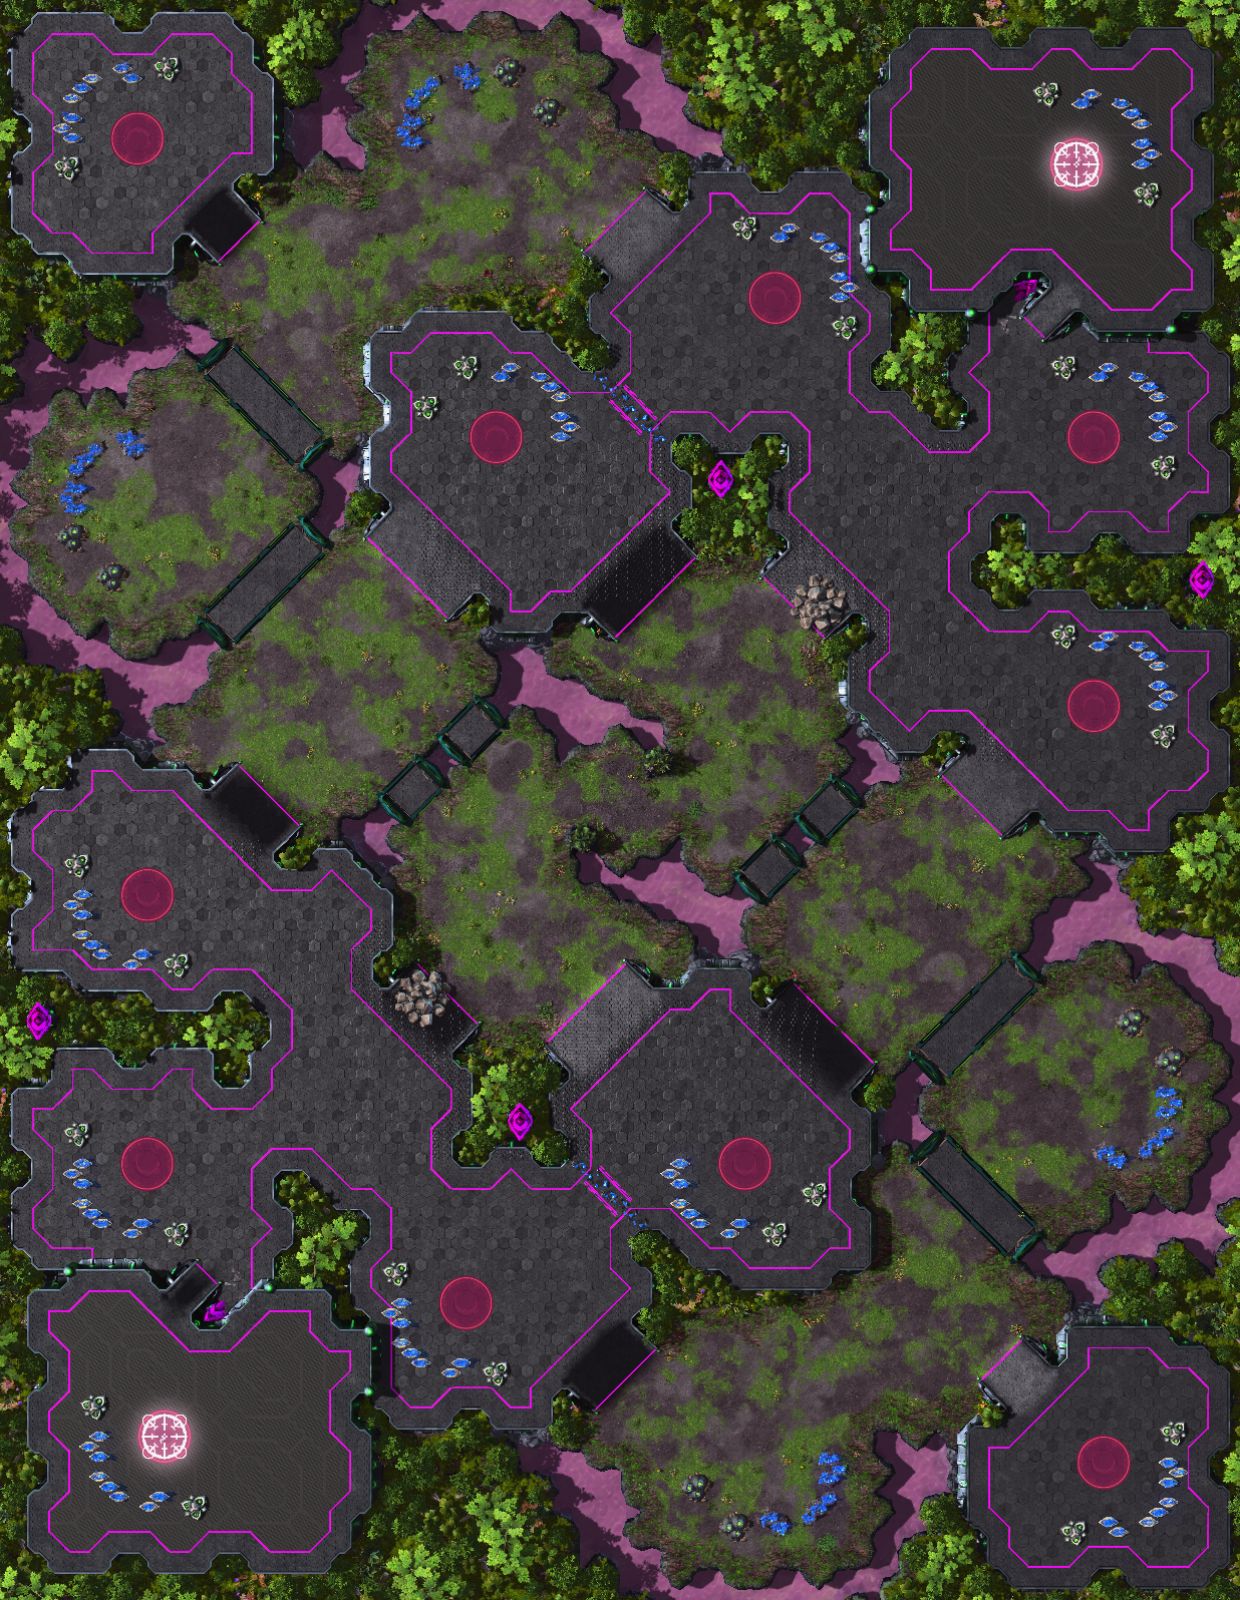
 Romanticide is a macro map with a slightly shorter rush distance than normal. The “maze” of rocks and line of sight blockers in the middle path offer a lot of positional opportunities. The mineral wall node values are at 10.
Features 16 blue bases of which the forward ones have a single rich vespene geyser. There’s a mineral wall between the triangle third and the base with the rich gas and also mineral patches with a rock on the ramp leading from that base towards the opponent. The mineral value in these is 10. There’s also some bridges on the map and plenty of line of sight blockers and rocks.
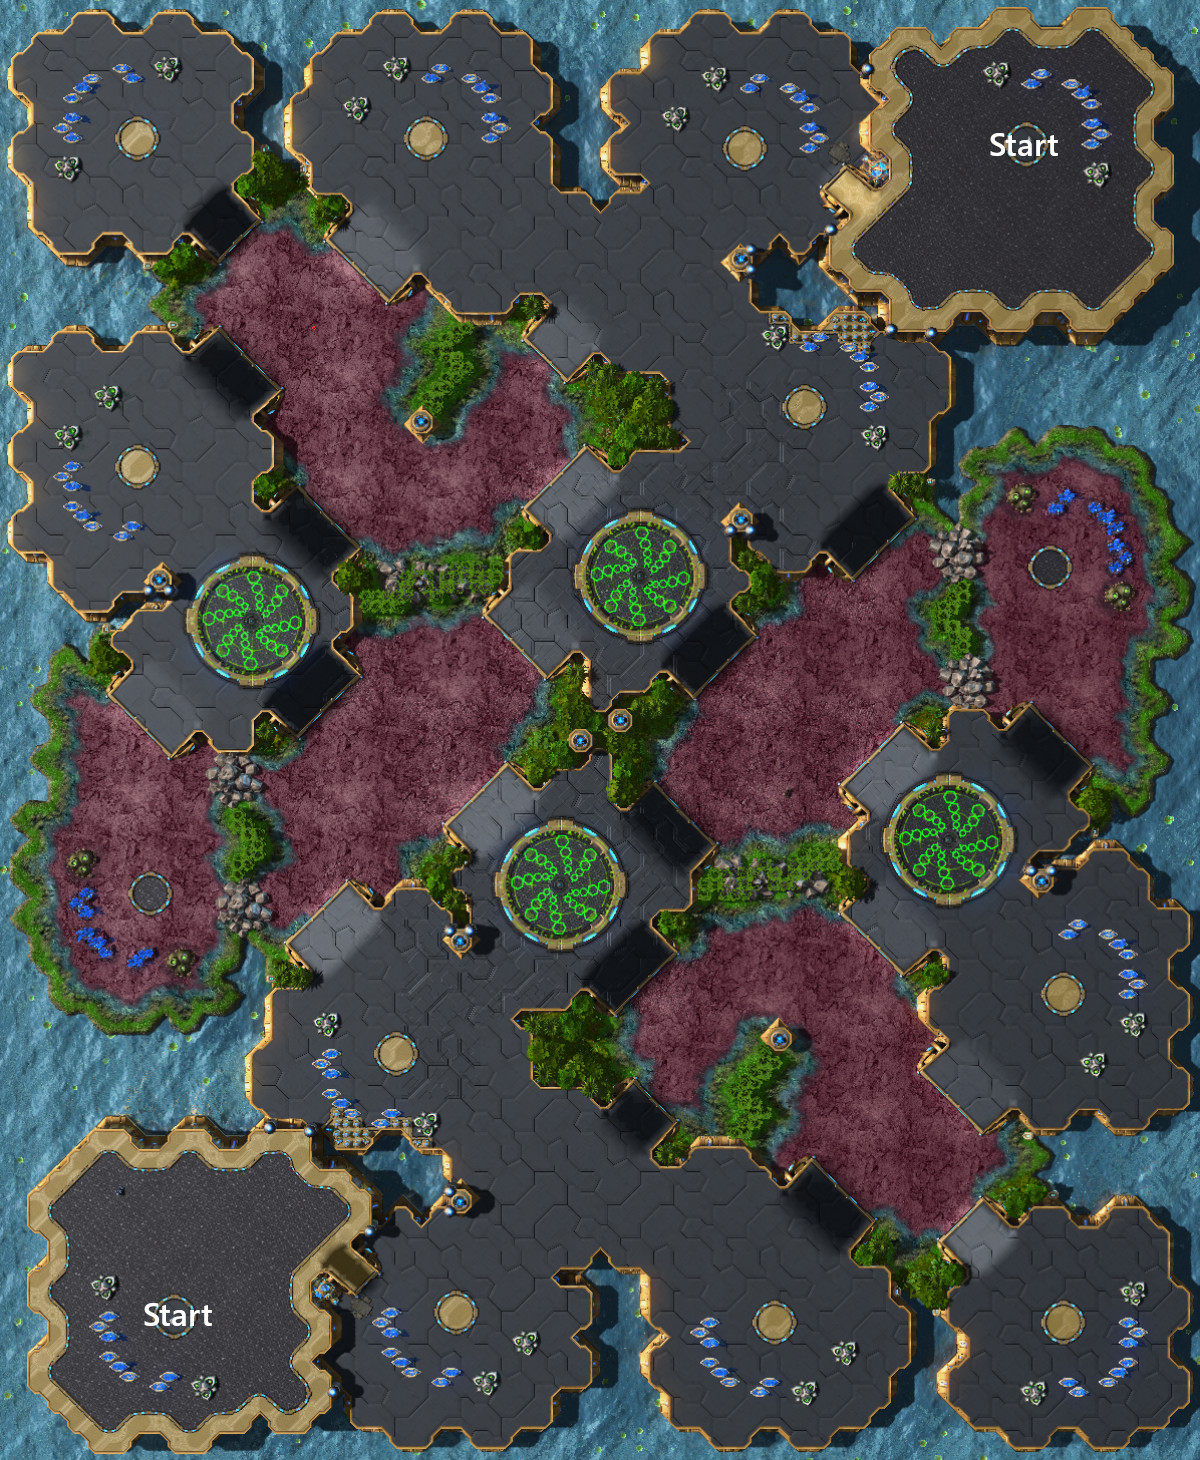
 The plant life on this space station adds a lot to the atmosphere, and not just the artificial one if you know what I mean. A large map with long routes and various expansion options, make use of the high ground and out-position your opponent.
Features a somewhat open low grounds contrasted by slightly a more constricted high ground that snakes in a reverse s-shape across the map.
and various close by expansion options.
 At one of the many forgotten temples at auir, two armies stand ready to fight. With a rocky highway through mid, armies must be careful and think about other ways to fight.
 A smaller map with rocks that lengthen attack routes early game. Fast nat to nat timing and map becomes high tension once the rocks are down.
 Rather small and agressive map with fewer bases. Altough small, the layout is still rather standard, so it allows for all kinds of strategies. The short straight forward attack path is choked off by rocks.
 Discover Moebius' gruesome experiments on this abandoned station. Ground and air distances between opponents is relatively short, but inhibitor zones may slow players down. Strong forward positions and risky high yield bases encourage aggressive play.
Inhabitor Zones in the bottom center. Inhabitor Zones around main to slow down air units and possible elevator play. Inhabitor Zones at the 12 o'clock base to easier defend it from ground attacks. Destructible debris in the center, next to high yield base and to the neutral bottom base.
The High Yield Base is risky and vulnerable from the back but close to the natural and if the player can secure their central high ground pod it is possible to defend.
 This is an aggressive map which uses the new acceleration zone generators to decrease the rush distance, although this path is vulnerable to defenders positioned on the nearby high ground cliff.
 Accelerator Zones are placed in four strategic locations to allow players to quickly change paths. The layout was carefully constructed with the help of Twitch chat.
Large rocks full block paths between the Accelerator Zones. Another path outside a late game expansion is partially blocked by rocks.
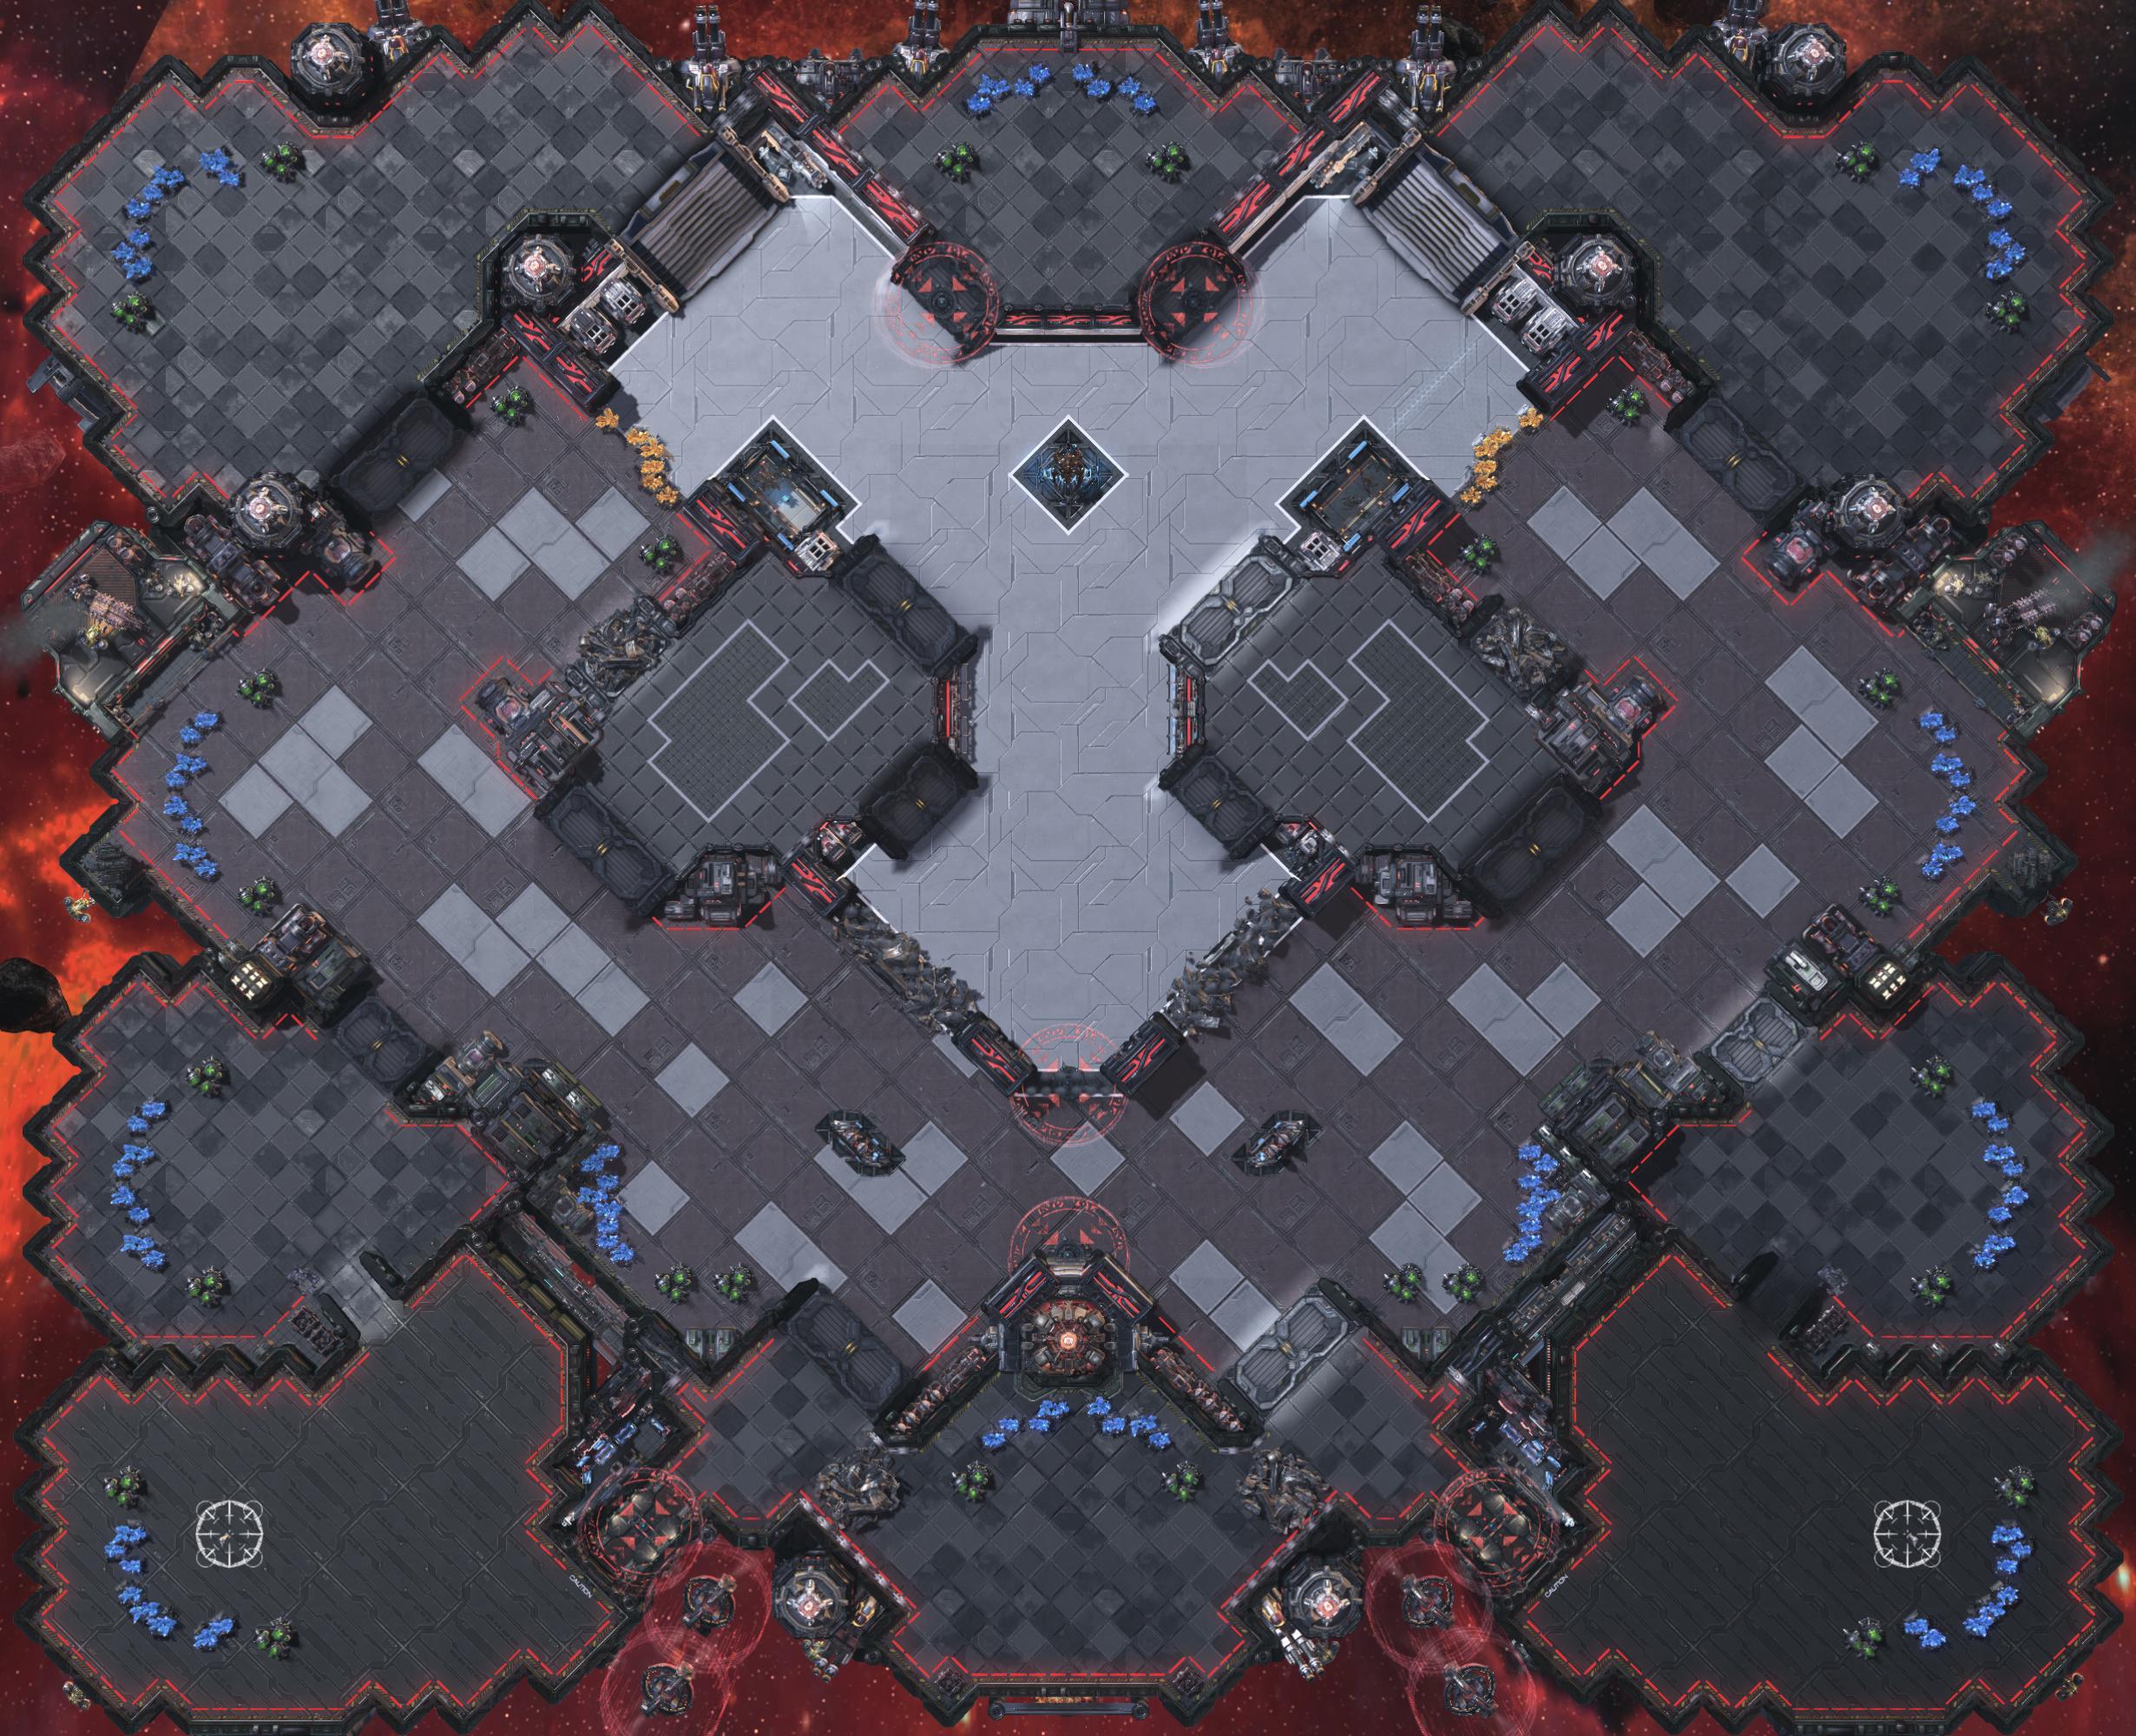
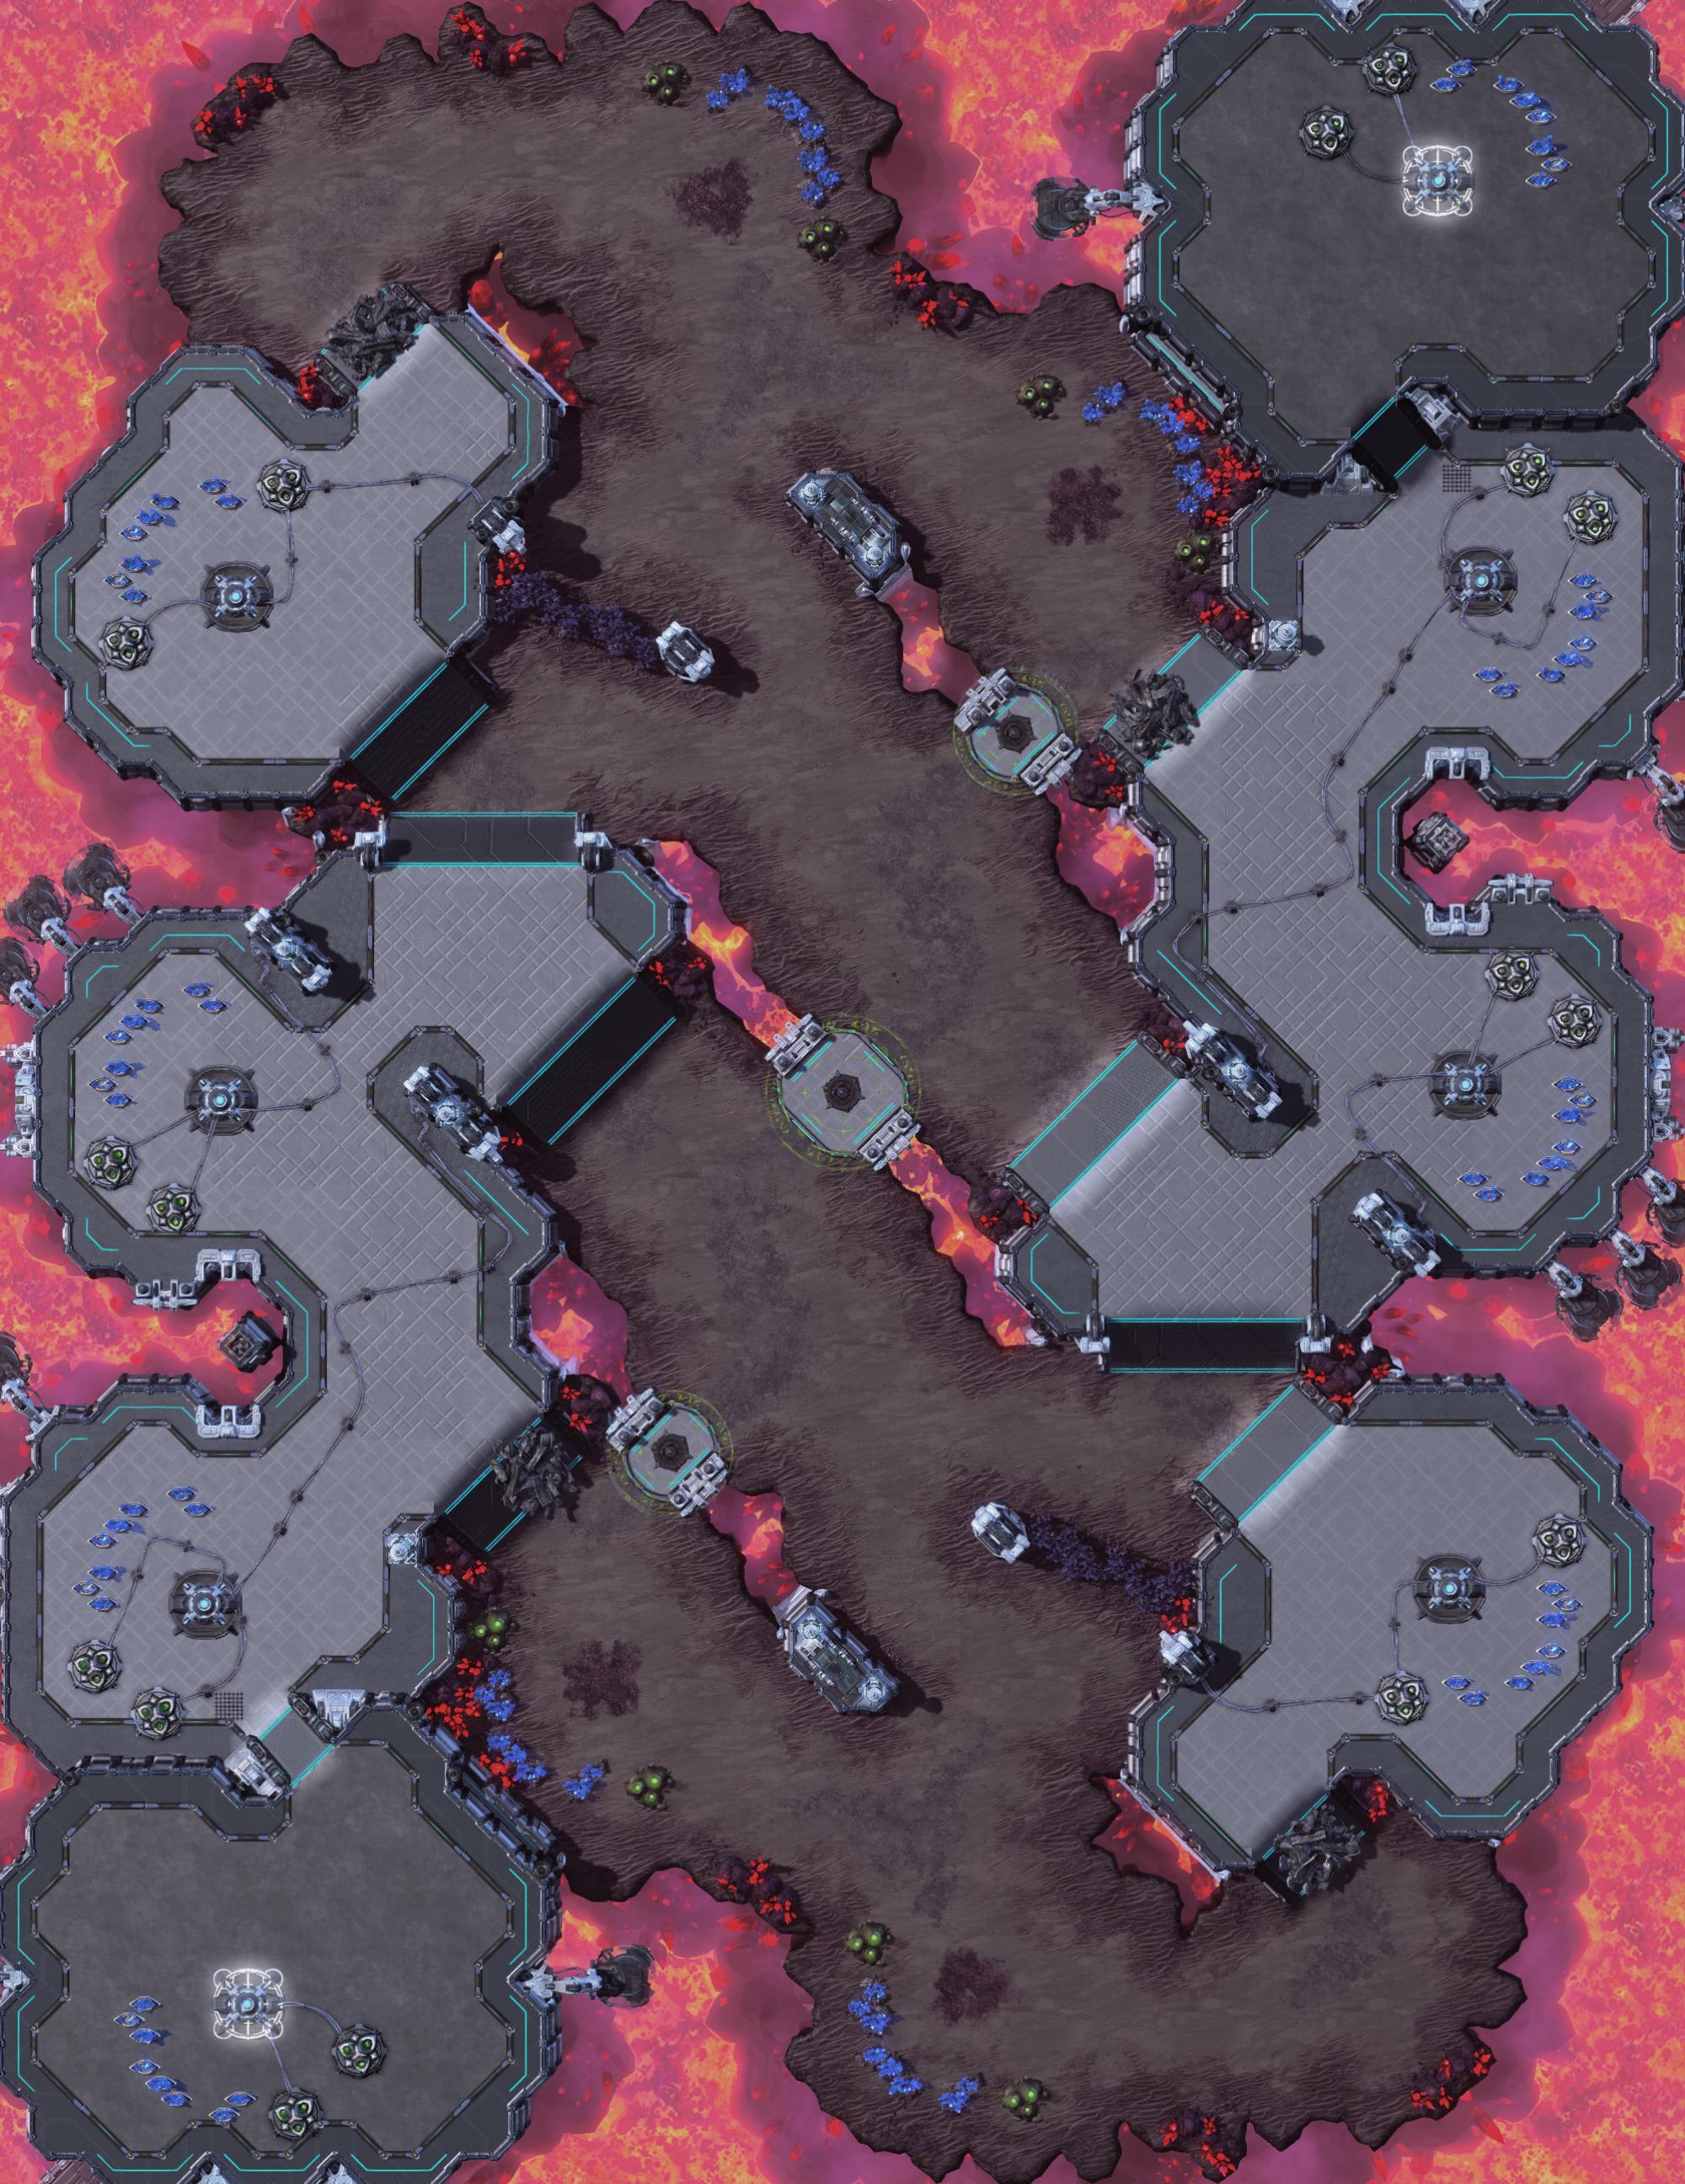
 Deathaura features the new Acceleration Zone Generators that increase the movement speed of units. These zones are situated on the three bridges in the middle. The most forward bases have two rich gas geysers.
14 blue bases in total, of which the forward ones have two rich vespene geysers. The Acceleration Zone Generators are situated on the bridges in the middle. The scouting path goes through these in a zigzag shape. There is also plenty of airspace.
 Beckett Industries feature three Acceleration Zone Generators(AZG) placed on small bridges in the middle area. While being very tight, these choke points are still a valid attack path.
3 AZGs are placed on tight chokes in the middle. These chokes have a higher unit throughput while keeping an easy concave setting for the defender. The line thirds are very close to each other while the triangle third is very far away from each other. The line thirds have a very small chokepoint because of the short distance between them.
While we're ready to announce the results, please note that the maps are not yet uploaded! We are still finishing off QA for the TLnet Map Contest Tournament that will start tomorrow, Tuesday, the 11th of February. Make sure you tune in!
Ok, we've delayed this for long enough. Time to announce the results! Just remember that the order the maps are listed in is not the same as the order they finished in the voting. We took the list of the category finalists and randomized it.
Standard
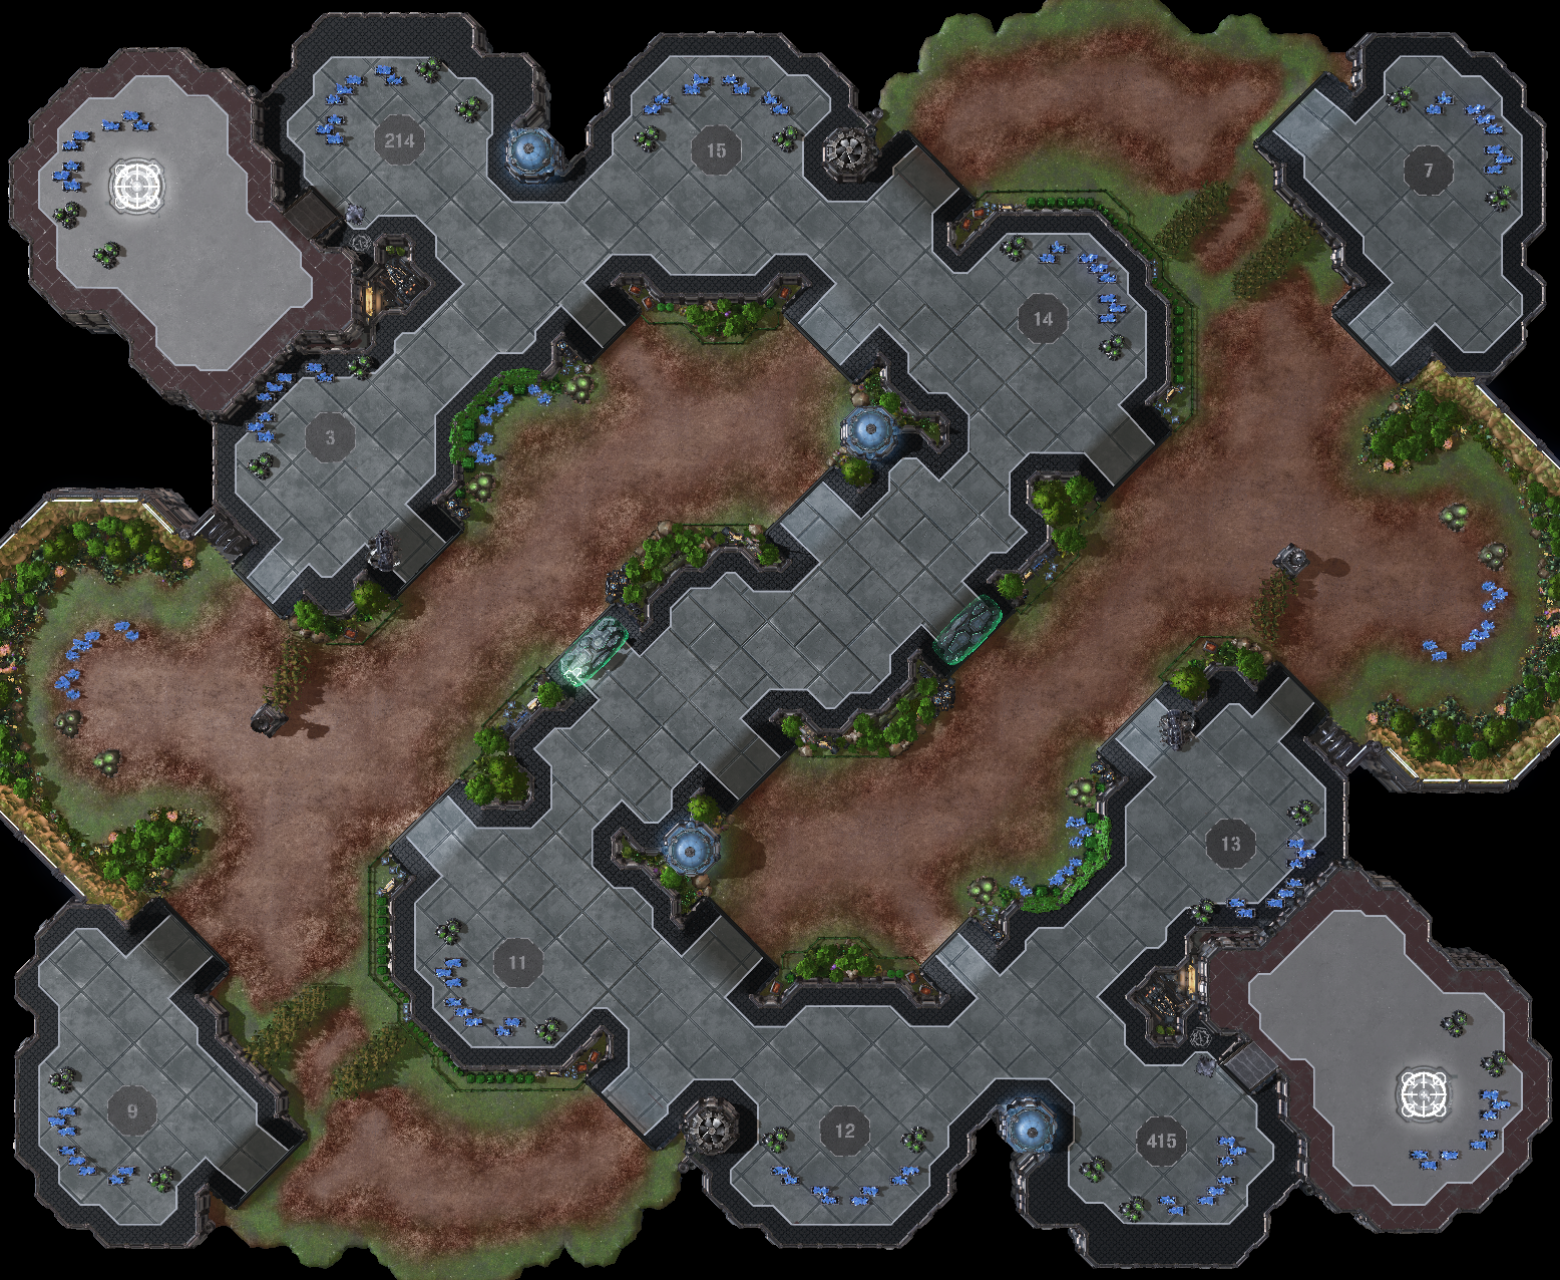
Category guidelines: Medium sized map. Players tend to have more flexibility on these maps to open with a wider variety of strategies and/or builds. Suggested rush distance: 33-38sPillars of Gold
By: AgatonTerran prospectors have reported that they’ve seen structures in the distance that soared up to the sky like pillars of gold. The Protoss settlement consists of 14 bases, where the linear third is further away from the opponent compared to the triangular third but in return, the high grounds surrounding it must be taken into consideration. No matter in which direction you go, there’ll be a fourth waiting for you. The corner bases will prove valuable as vantage points and to help control the base located below it.2000 Atmospheres
By: themusic246Battle for survival on the seabed of this luminous alien planet.Lightshade
By: MarrasLightshade is a typical standard map with two third base options and 7 bases per player, and can support a wide variety of playstyles. The destroyable debris and rocks give players a bit of security early on, and destroying them makes it easier to maneuver armies around the map.Features 14 blue bases in total, line of sight blockers in the middle area and in the corner paths, debris on many of the ramps making them initially smaller until cleared up, also rocks at the direct center path, one set of large debris is dividing the central part of the high ground from the high ground near the corner, basic rake base layout (similar to e.g. Acropolis and Simulacrum), all in all, a very standard map
Hard Rain
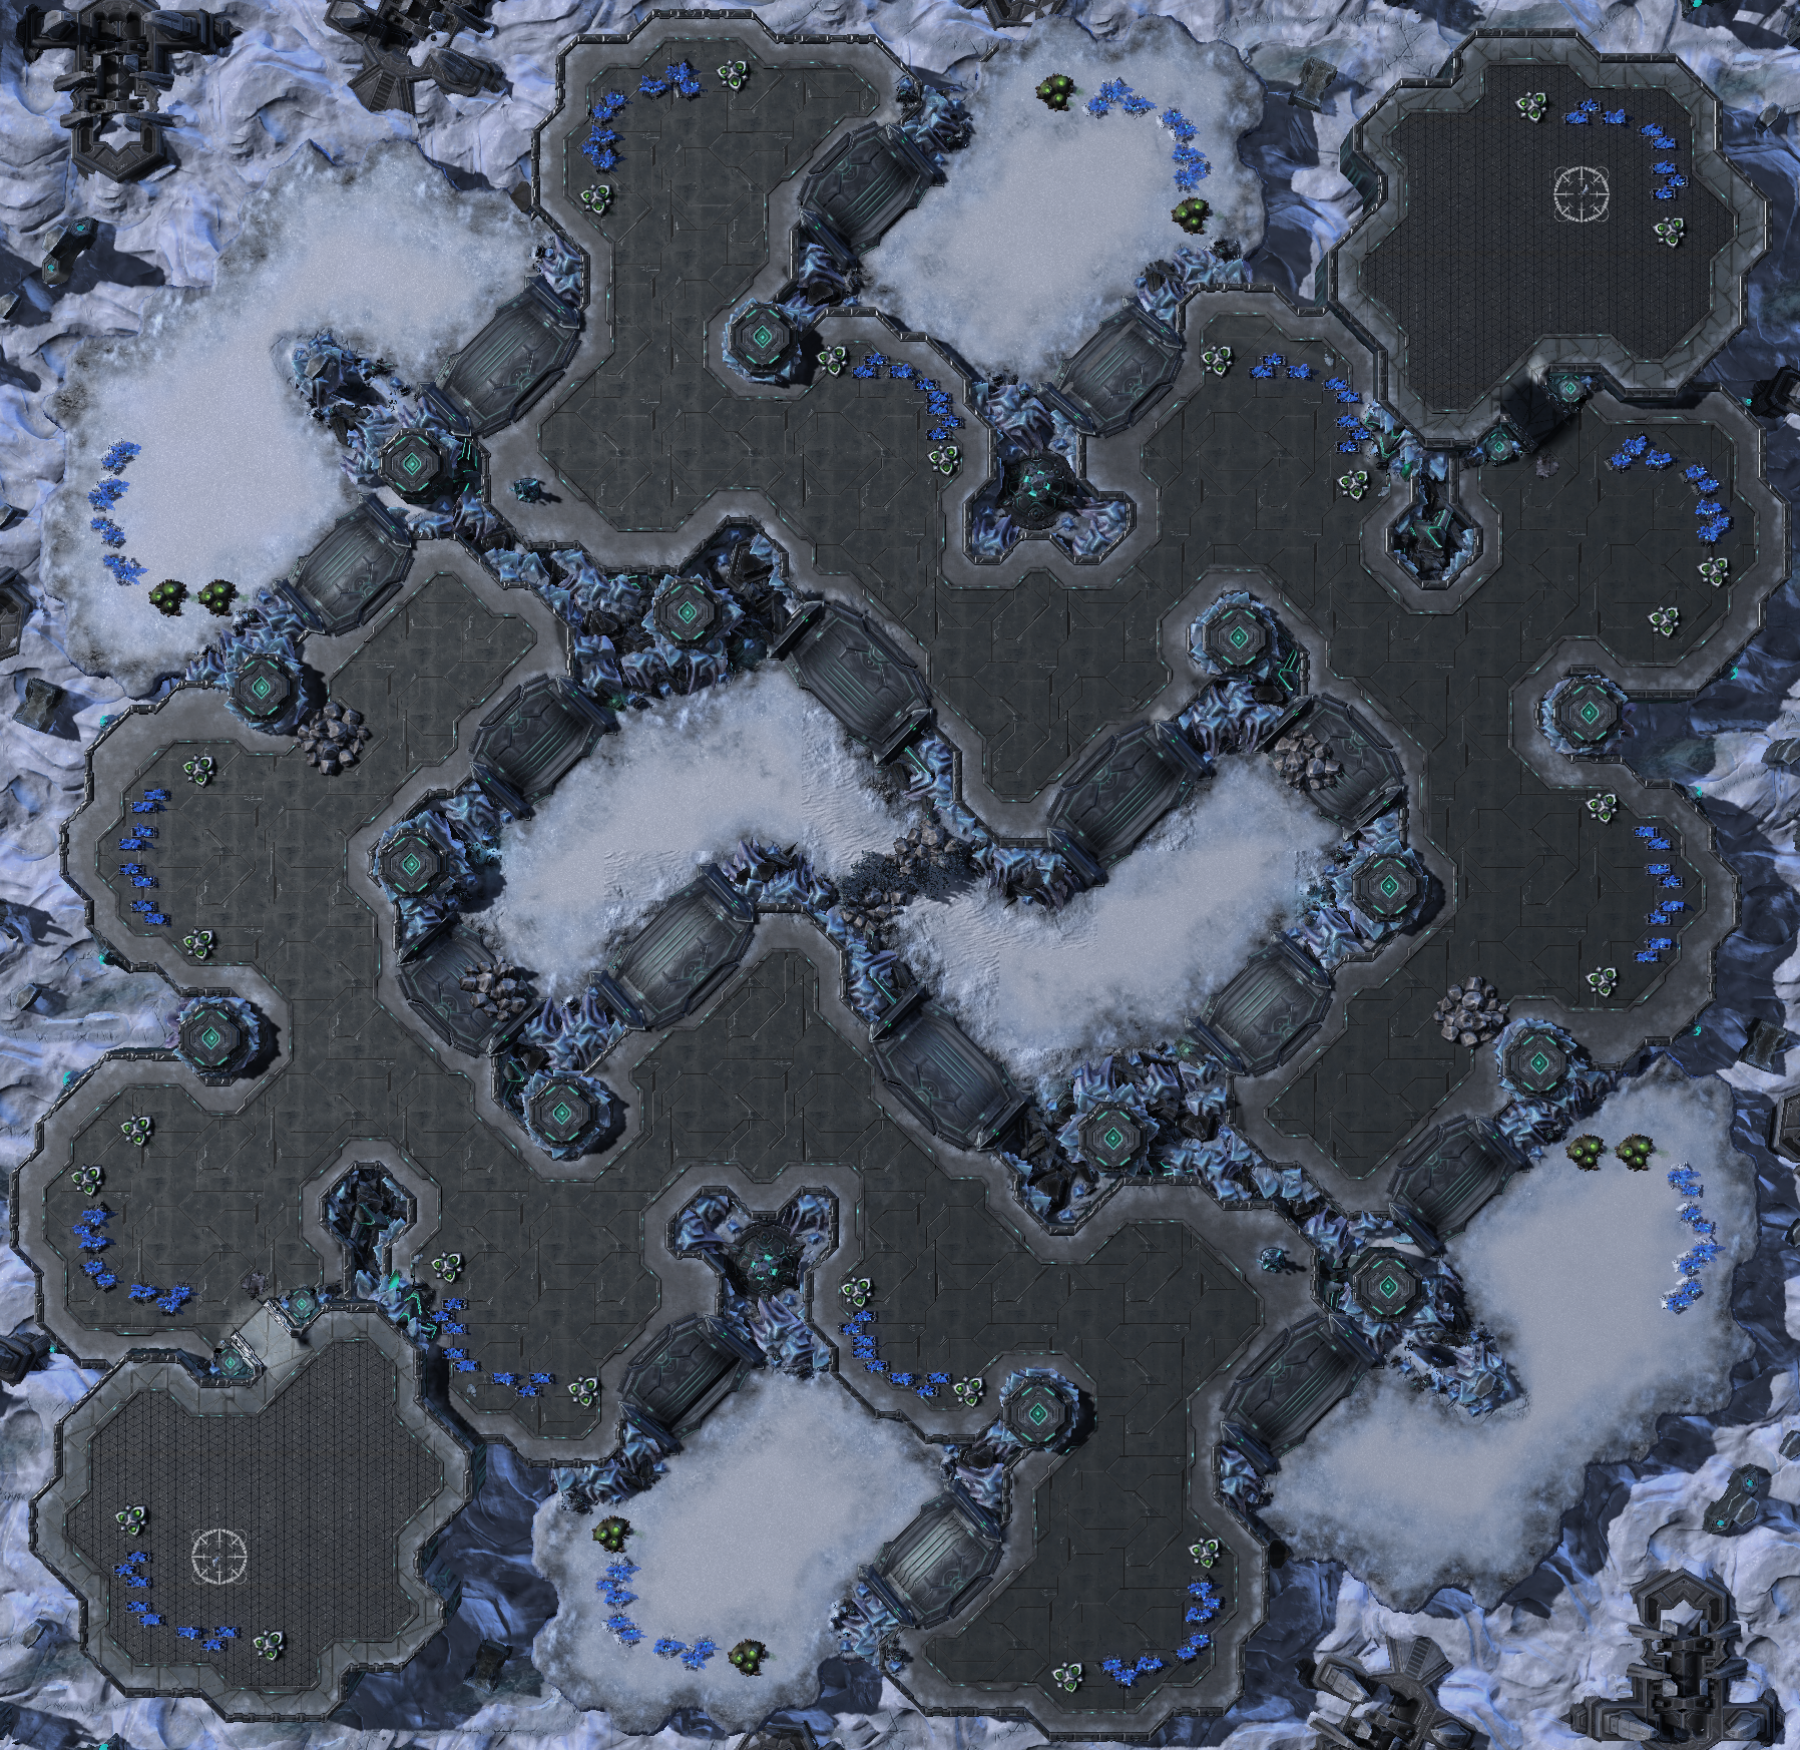
By: ATTx The player can secure the base in a stable manner. At 3 and 9, the base is very easy to defend, but since the space with water is impossible to build, it is easy to attempt unit drop or air-to-ground attacks.Macro
Category guidelines: A map that favors defensive play and encourages players to reach end game unit compositions. Suggested rush distance: 38-43sBamboozle
By: ObsidianScabbardLarge armies attacking through the shortest path will ride the struggle bus to the enemy. Outside paths are much more spacious.A mineral wall protects your 3rd/4th base. Each patch has 10 minerals. If you take the central base by the mineral wall, your workers will automatically mine the wall. This is intentional!
Ice and Chrome
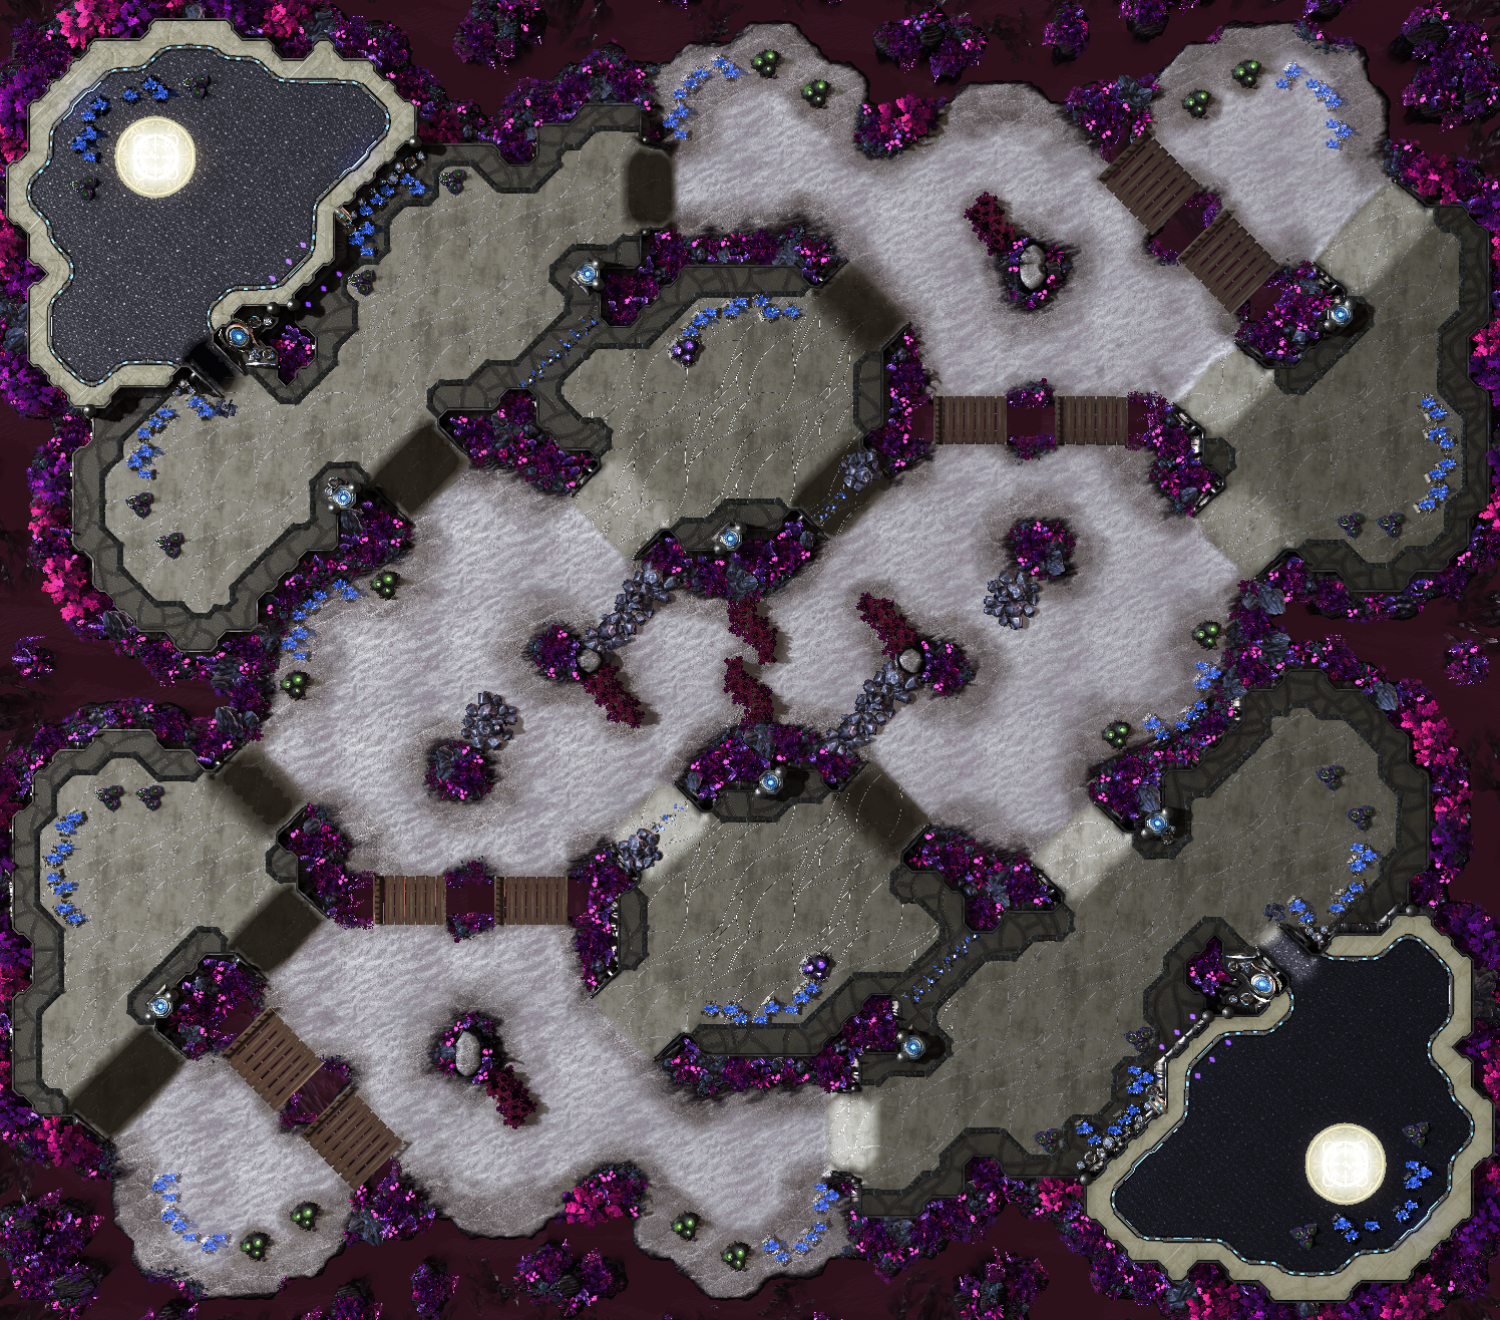
By: themusic246Choose between an open third and safer fourth, or safer third and open fourth.Romanticide
By: MarrasRomanticide is a macro map with a slightly shorter rush distance than normal. The “maze” of rocks and line of sight blockers in the middle path offer a lot of positional opportunities. The mineral wall node values are at 10.Features 16 blue bases of which the forward ones have a single rich vespene geyser. There’s a mineral wall between the triangle third and the base with the rich gas and also mineral patches with a rock on the ramp leading from that base towards the opponent. The mineral value in these is 10. There’s also some bridges on the map and plenty of line of sight blockers and rocks.
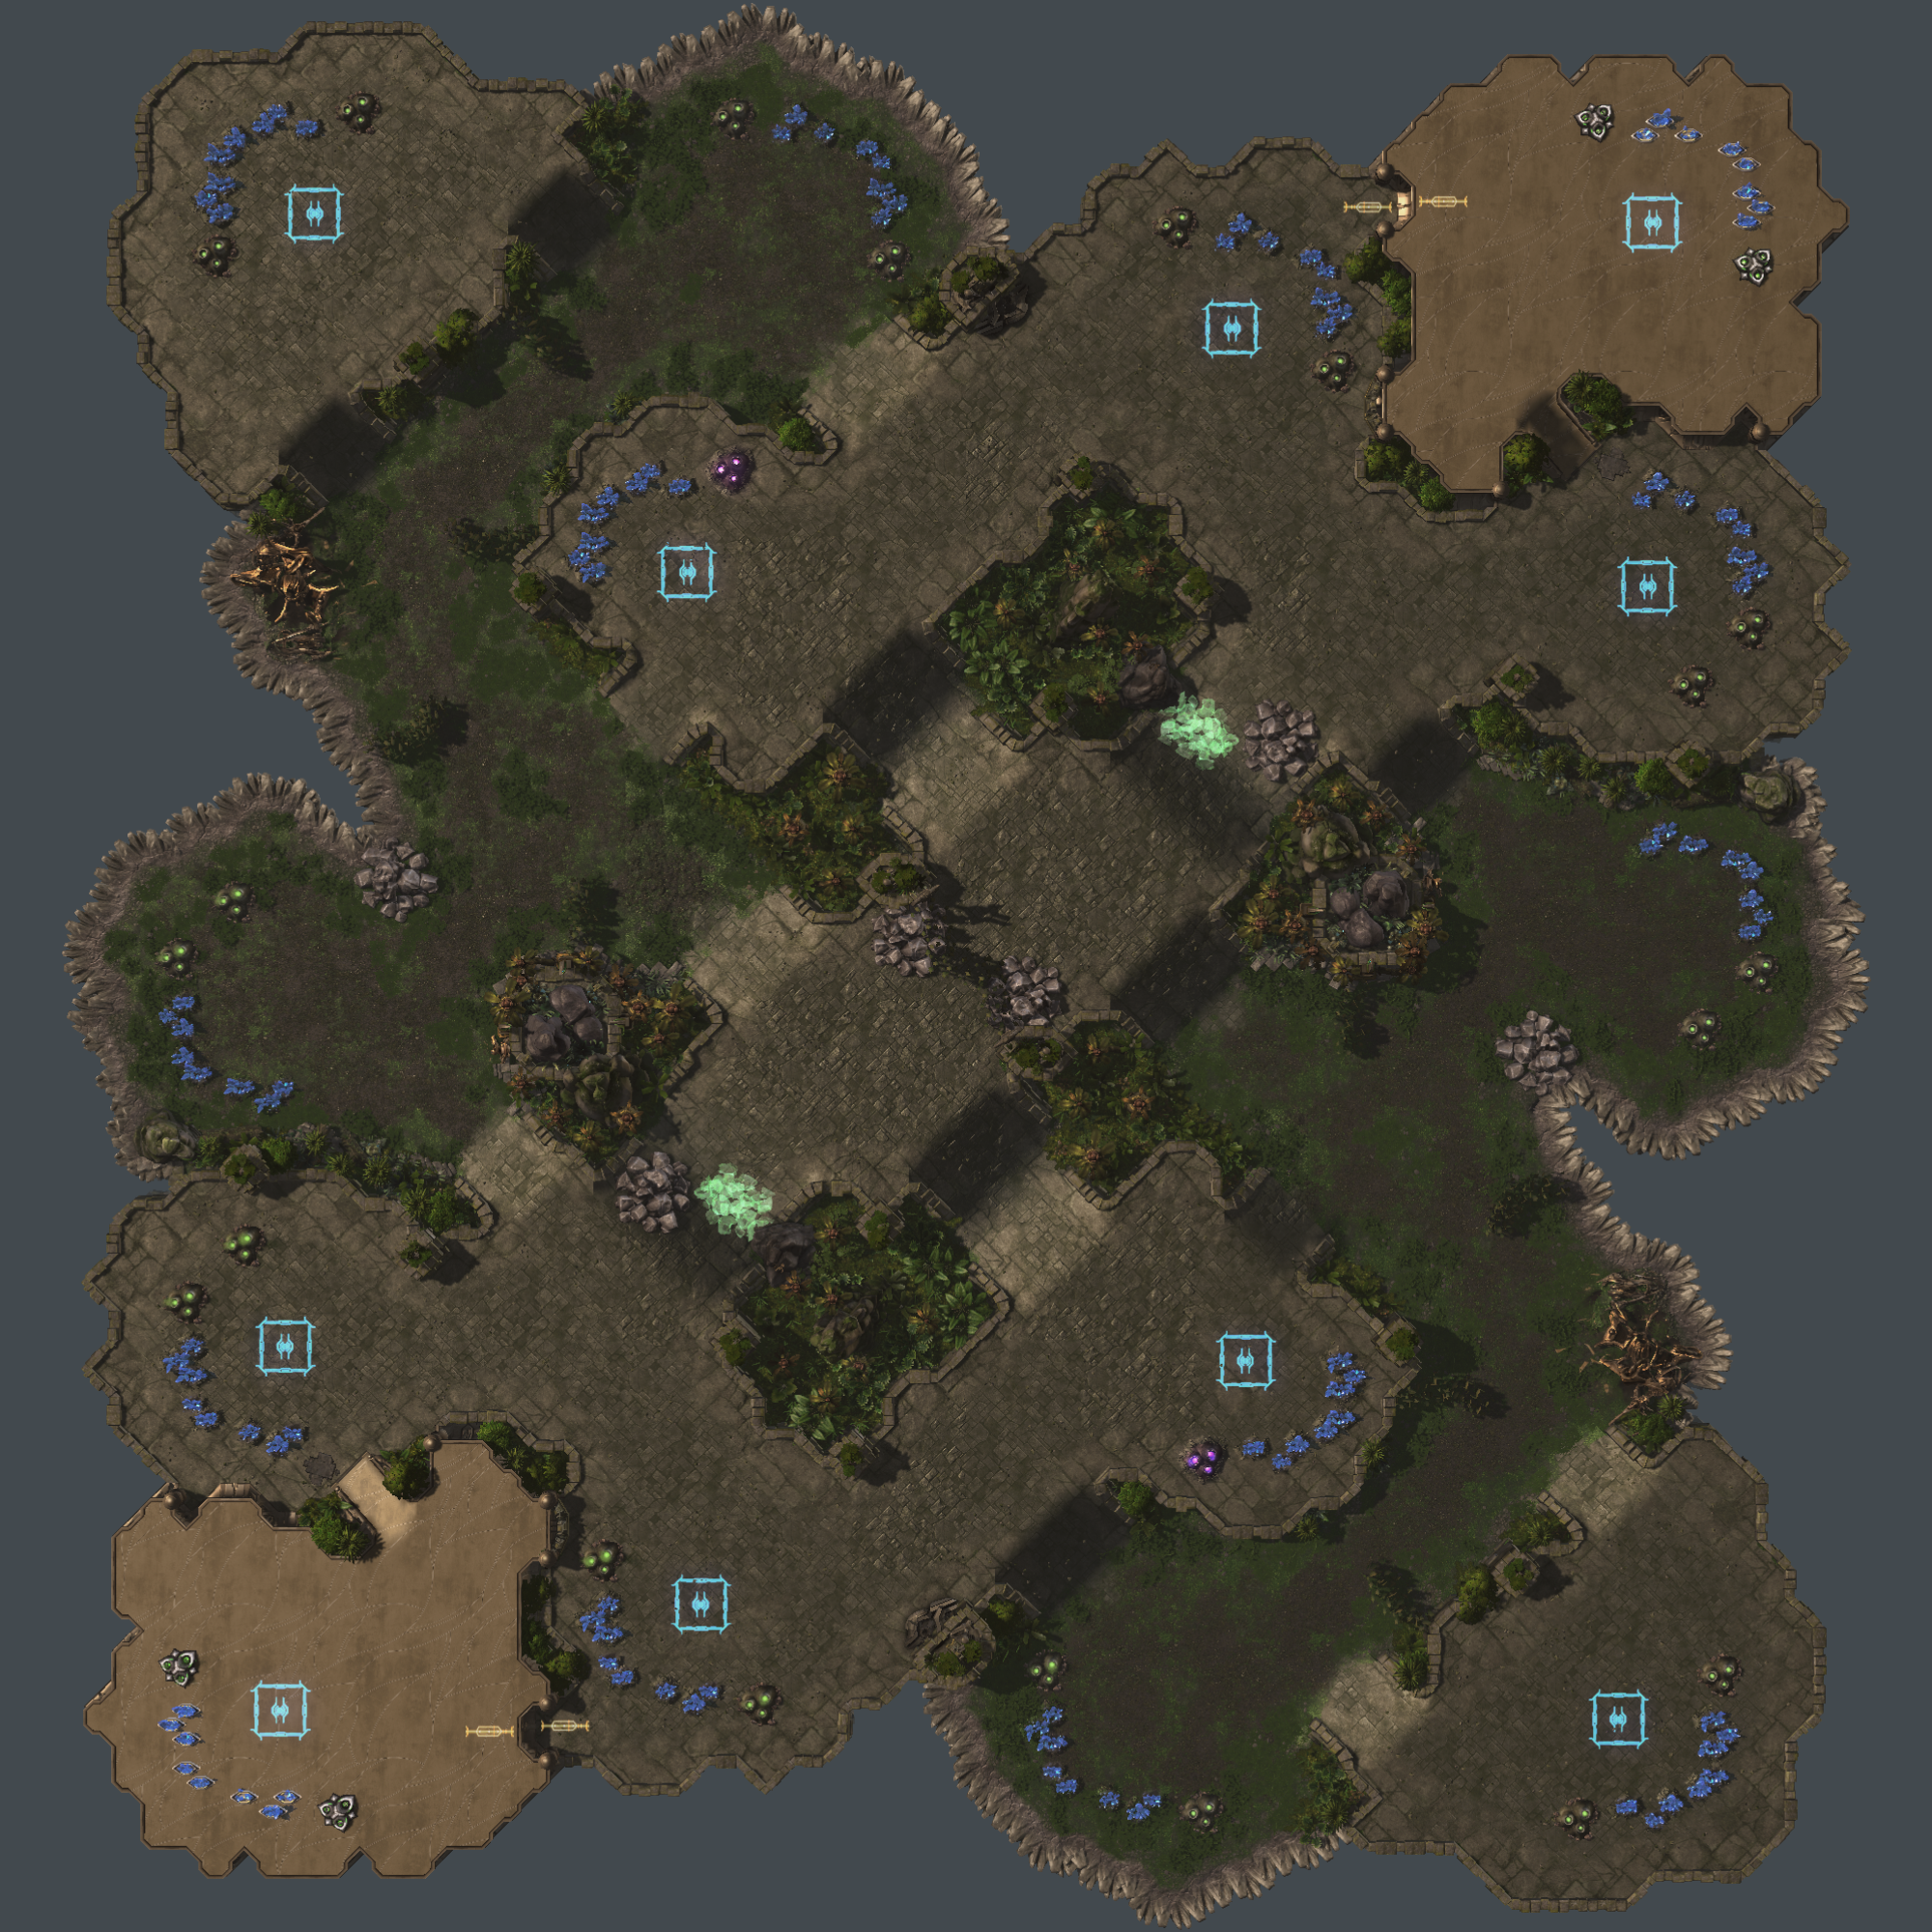
Ecostation
By: CharactRThe plant life on this space station adds a lot to the atmosphere, and not just the artificial one if you know what I mean. A large map with long routes and various expansion options, make use of the high ground and out-position your opponent.Features a somewhat open low grounds contrasted by slightly a more constricted high ground that snakes in a reverse s-shape across the map.
and various close by expansion options.
Rush
Category guidelines: Map favors early aggression and offensive play. Suggested rush distance: 33s or lessOld Forgotten Temple
By: robengAt one of the many forgotten temples at auir, two armies stand ready to fight. With a rocky highway through mid, armies must be careful and think about other ways to fight.Oxide
By: themusic246A smaller map with rocks that lengthen attack routes early game. Fast nat to nat timing and map becomes high tension once the rocks are down.Submarine
By: ZweckRather small and agressive map with fewer bases. Altough small, the layout is still rather standard, so it allows for all kinds of strategies. The short straight forward attack path is choked off by rocks.Blackburn
By: Insidioussc2 Discover Moebius' gruesome experiments on this abandoned station. Ground and air distances between opponents is relatively short, but inhibitor zones may slow players down. Strong forward positions and risky high yield bases encourage aggressive play.Inhabitor Zones in the bottom center. Inhabitor Zones around main to slow down air units and possible elevator play. Inhabitor Zones at the 12 o'clock base to easier defend it from ground attacks. Destructible debris in the center, next to high yield base and to the neutral bottom base.
The High Yield Base is risky and vulnerable from the back but close to the natural and if the player can secure their central high ground pod it is possible to defend.
Challenge – “Adrenaline Rush”
Category guidelines: Design a map making use of the “Acceleration Zone Generator” structure. The Acceleration Zone Generator is a neutral indestructible structure that increases the movement speed of units in its area of effect and can be placed anywhere on the map, including ramps.Impostor
By: insidious_bombardierThis is an aggressive map which uses the new acceleration zone generators to decrease the rush distance, although this path is vulnerable to defenders positioned on the nearby high ground cliff.Jagannatha
By: Timmay Accelerator Zones are placed in four strategic locations to allow players to quickly change paths. The layout was carefully constructed with the help of Twitch chat.Large rocks full block paths between the Accelerator Zones. Another path outside a late game expansion is partially blocked by rocks.
Deathaura
By: Marras Deathaura features the new Acceleration Zone Generators that increase the movement speed of units. These zones are situated on the three bridges in the middle. The most forward bases have two rich gas geysers.14 blue bases in total, of which the forward ones have two rich vespene geysers. The Acceleration Zone Generators are situated on the bridges in the middle. The scouting path goes through these in a zigzag shape. There is also plenty of airspace.
Beckett Industries
By: SuperoumanBeckett Industries feature three Acceleration Zone Generators(AZG) placed on small bridges in the middle area. While being very tight, these choke points are still a valid attack path.3 AZGs are placed on tight chokes in the middle. These chokes have a higher unit throughput while keeping an easy concave setting for the defender. The line thirds are very close to each other while the triangle third is very far away from each other. The line thirds have a very small chokepoint because of the short distance between them.


