
Creator starts the TSL finals at the bottom right position, while Life takes the only other position at top left. Creator opens FFE as he always does while Life goes for pool-hatch-gas, instead of the very standard pool-hatch-hatch play. It is clear from this point that Life will either be attempting to cheese Creator or that he will be using some 2 base macro play. Fortunately for Creator, he scouts this out and prepares accordingly: walling off his base, adding a cannon, and building a stargate. Unfortunately for him, however, a total of three lings are able to run past his cannon defense, and cause moderate damage in his main for a full three minutes. Not only is Life able to delay mining, he keeps Creator's zealot in his own base so that it's unable to pressure, and scout's Creator's sentry, which clearly denotes a passive play.
Both players' tech choices are eventually revealed as Life begins his infestation pit while Creator makes a voidray followed up by a few phoenix. Thanks to Life's excellent queen usage and his fungals, he takes almost no damage from the Protoss air force. Creator, meanwhile, is content to take his third behind cannons and blink tech, while transitioning into colossi.
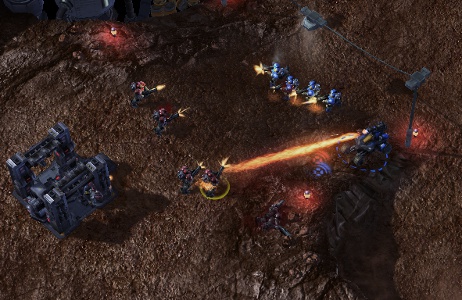
While most players have either infestor timings or fast broodlords in mind when opening 2 base infestor, Life has an entirely different idea: drops. Life employs his infestors to clear the skies of phoenixes that could potentially scout his plan, and then goes for a doom drop into Creator's main. Life's 6 overlord drop full of 2-1 lings catches Creator completely off-guard, and he loses his nexus, unable to even rebuild it for a while due to burrowed lings.
![[image loading]](/staff/Plexa/TSL4/Finals/cl1.jpg)
48 lings + alive nexus = dead nexus
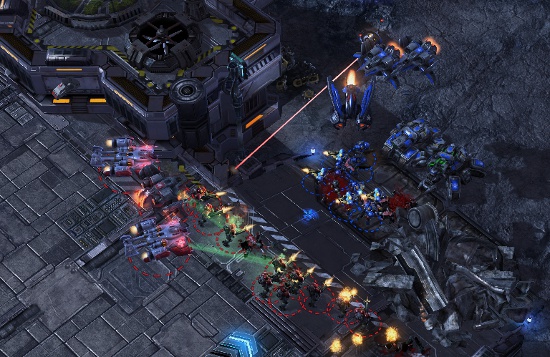
From this point forward, Creator has to be very careful about drops, and he subsequently plays the rest of this game much like a PvT, adding cannons to all his bases and always splitting his army in case of more drop play or multi-pronged attacks.
![[image loading]](/staff/Plexa/TSL4/Finals/cl2.jpg)
The second attempt is denied.
Fortunately for Creator, Life has delayed his hive tech, and the threat of broodlords is nowhere near, so Creator has a lot of time to recuperate. But Creator still deems himself behind, so when behind....dark shrine (with warp prisms). Creator sends 3 dts to Life's fourth, which all get fungaled and killed immediately. However, this is enough of a distraction that Creator's warp prism in Life's main does substantial damage, with the help of a cute zealot ramp block.
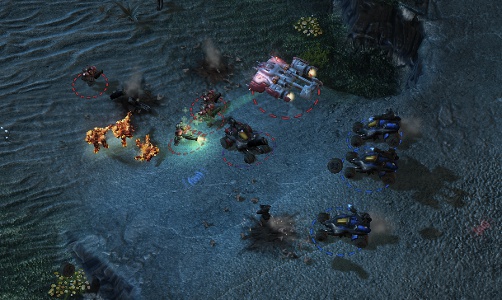
Creator's harass is also enough to allow him to take a fourth base while teching up to the mothership he'll eventually need. Meanwhile, a third attempt at a drop by Life is stopped, and both players begin heading into the late-late game. Creator begins researching warp prism speed, zealot legs and storm, and adds both a mothership and archons into his army. Life starts broodlords with double spire upgrades, double evolution chamber upgrades, and mass spines. Creator then attempts a warp-in of 10 zealots, but they all get caught by a huge mass of lings and infestors.
![[image loading]](/staff/Plexa/TSL4/Finals/cl3.jpg)
Just a mineral sink
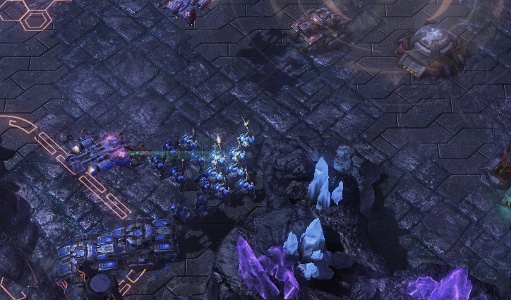
While jostling for position over Life's potential fifth base, the two armies almost finally collide, but it turns out to be a tease from players. Meanwhile, Life has dedicated another four overlords to Creator's main to stir some trouble, but it doesn't do nearly the amount of damage it should have due to an impeccable sim city.
![[image loading]](/staff/Plexa/TSL4/Finals/cl4.jpg)
Excellent sim-city allows 2 cannons to hold off 32 lings. Imbalance?
Life has had enough and pushes far enough to force the first fight of the game. Unfortunately for him, he doesn't split nearly enough as Creator's only vortex gets a large chunk of units. Funnily enough, Life chains four neural parasites on Creator's mothership, effectively cloaking all his corruptors when they pop out of the vortex, protecting them all from the archons that normally would have devastated him..
![[image loading]](/staff/Plexa/TSL4/Finals/cl5.jpg)
The mothership keeps changing hands, and as neither side has detection at this point, each side has to retreat when the other side gains control of the mothership. But when the dust settles, Creator is critically able to kill all of Life's broodlords and completely annihilate Life's entire infestor count. While Creator is eventually held off by a combination of spines, reinforcing lings, and morphing broodlords, the damage seems to already have been done. Life is still only on four bases and has just lost all his gas units; he will be starved soon.
Life tries to take his fifth base, but Creator is able to deny it with a few zealots while Life's army is far far away. Meanwhile, Life attempts a few runbys into Creator's fifth to snipe the nexus, but just barely just doesn't manage to kill it each time due to the cannon/templar combo plus a few warp-ins.
![[image loading]](/staff/Plexa/TSL4/Finals/cl6.jpg)
Are we sure this isn't BW?
Life sees that he cannot deny Creator's fifth, so he's forced to attempt to take his own fifth once again. He moves his entire army over near the fifth, but doesn't see the slowly moving mothership creeping towards his army, signaling its doom.
![[image loading]](/staff/Plexa/TSL4/Finals/cl7.jpg)
We all know where this is going.
Life hastens to split his army, but it's too late. The vast majority of Life's force is caught in the vortex and Creator has a total of seven archons with which to eviscerate whatever comes out. The results is carnage and the end of the game. As Life was forced on four bases the entire game, he no longer has a bank to replace the army, so he's forced to GG out.
Creator 1:0 Life
In this game, Life tries to employ drops, but after the first drop which kills the nexus, all future attempts are easily shut down with great army positioning and tight sim city. After both an unusual early and mid game, both players even out on 4 bases with their desired tech, Life with infestor/broodlord, and Creator with a mothership plus a solid ground army. However, Creator pressures extremely efficiently in the late game, and manages to pull Life left and right while a few stalkers reduce Life's creep spread. Life is never able to take a fifth base during all this pressure, and over-clumps his air army in two key fights. Although he's able to remax with his bank after the first fight, he's not so lucky after the second.
On Entombed Valley, Creator gets bottom right while Life spawns right on top of him in the top right. Creator opens FFE while Life decides to be more tame this game, opting for a three base play. However, in the same fashion as game 2, two lings run up Creator's ramp and cause some minor damage before they are dispatched. Creator goes for a 2 zealot, 1 stalker poke, but is quickly shut down by almost 30 lings. Life once again is teching to lair without a roach warren while Creator is going for the newly popular stargate into hide the mass phoenix strategy.
Creator reveals his phoenix at a very late 9:30, but still, without scouting, Life is unprepared. Creator gets a queen and then has an all-you-can-lift drone buffet all to himself. Life repeatedly pokes Creator's natural with his 50 ling force, and while it does not cause many casualties from Creator, Life is successful at delaying Creator's third base. The game continues without much action as Life once again chooses the ling/infestor composition while Creator once again picks the colossi transition.
At the 15 minute mark, Creator moves out with a small force, in what Life sees as an attempt to take his fourth. However, Creator's true plan is an all-in push, as he has been adding gateways the entire time and has hidden a large chunk of his army, mostly chargelots, in his base.
![[image loading]](/staff/Plexa/TSL4/Finals/cs8.jpg)
Chargelots are pretty good against Life's ling heavy force.
Creator's surprising colossi/chargelot/archon based force does quite well against Life's ling heavy army, but the sheer amount of infested terrans and spines is too much for Creator to break through. However, Creator swings around to find a weak spot in Life's defense, and tries to mount an attack from there. By this time, however, Life has figured out Creator's chargelot/archon strategy and has fully switched to roaches. However, the Protoss warp-in mechanic allows for Creator to immediately switch up his unit composition to stalkers, and for a second, it looks like Creator will break Life or at least his fourth base.
![[image loading]](/staff/Plexa/TSL4/Finals/cs9.jpg)
What? Is Creator actually doing it?
But Life's reinforcements off of 6 hatcheries is too much and eventually the sheer numbers of the Zerg forces Creator back. This is compounded by the fact that Creator's warp prism is shot down by leftover corruptors, and Creator no longer has any means with which to reinforce his army. With a second to breathe, Life begins morphing in broodlords to seal Creator's fate. Creator musters a final battalion in his last attempt to break Life, but against seven broodlords, this attempt is futile. So confident is Life that he will win this fight that he actually attacks into Creator's force. He eventually has to use his lagging broodlords, but once those sky fortresses enter the fight, it's all but over.
![[image loading]](/staff/Plexa/TSL4/Finals/cs10.jpg)
Creator 1:1 Life
Life opens up this game not with 2 base ling/infestor play, but 3 base ling/infestor play. Creator chooses to go for a gateway pressure into some hidden phoenix. This does some good damage, but both players end up fairly even afterwards. Creator see's Life's very ling heavy army consisting of no roaches, and decides for a colossi/chargelot/archon all-in before broodlords pop. Although Creator's army is theoretically cost effective, he just runs into too many spines and infested terrans which stop the advance of his push. Life switches to roaches while Creator counters with stalkers, but eventually, Creator is overwhelmed by the sheer might of the Zerg economy.
This time, Creator spawns top right and Life spawns bottom left on Daybreak. Life opens with a 3 hatch play, and for the third game in a row, Creator opts for the stargate play. As Creator builds 3 additional gateways and a robotics facility, he also moves out with a paltry gateway force, hoping to take an early third. However, Life would have none of it, as 22 speedlings comes from left field and trap these poor units right outside of Creator's base.
![[image loading]](/staff/Plexa/TSL4/Finals/cs11.jpg)
Hey, those speedlings aren't supposed to be there...
Creator's total losses include four sentries, a zealot, and a stalker. Thus, Creator must stay on two bases for a while longer, but he still doesn't skimp on tech, adding both a twilight council and a robotics bay while he's stuck on these two bases. At the same time, Life is, once again, choosing lings and infestors as his main unit composition. Finally, at a very delayed 11:20, Creator finally begins taking this third base.
Life, seeing Creator's zealot and colossi heavy army, begins transitioning into roaches and corruptors, preparing for a huge ling/roach/infestor/corruptor attack. When Life finishes maxing out with 10 corruptors, it's time for him to attack. Creator lacks unit count, economy, and force fields at this point, so the battle predictably goes to Life.
![[image loading]](/staff/Plexa/TSL4/Finals/cs12.jpg)
Life's ground force tanks while the corruptors finish off all the colossi.
Creator barely manages to hang on once Life initially runs out of ground units, but he's left with only a small group of stalkers. Life's second max comes to reinforce once again, and once again Creator manages to hold on by the skin of his teeth due to his great sim city and the fact that 40 of Life's supply is tied up in useless corruptors and low-energy infestors.
![[image loading]](/staff/Plexa/TSL4/Finals/cs13.jpg)
Round two, fight!
But while Creator has had to devote all his resources to defending, Life has been teching behind his attacks, going all the way to broodlords. As Creator knows that broodlords are coming after scouting the timing of Life's lair, he chooses to hit a timing before broodlords can be morphed. Creator fights the best battle he could have hoped for in the position he was in; Life's maxed army full of still low-energy infestor and still corruptors meets Creator's stalker heavy force outside of Creator's base and the two collide. For the first time in this game, Creator "wins" a fight, but Life's intention was never to win here. By fighting outside of Creator's base, Life has bought time for his greater spire to morph and has whittled down Creator's army in order for yet another max to be able to crush it. Life retreats with all his important units, his infestors and corruptors, in order to fight another day.
Creator gives chase, but without a proxy pylon, he cannot push into Zerg territory. Life, on the other hand, has realized his greater spire is about to finish, but he's maxed on too many lings and roaches. He throws all of these excess units into the Protoss army, and actually trades quite well against the entirety of the Protoss forces.
![[image loading]](/staff/Plexa/TSL4/Finals/cs14.jpg)
If only that were all of them...
While the battle is going on, Life's twelve corruptors become twelve broodlords, and without any form of area of effect damage or a mothership, Creator's fate is sealed.
![[image loading]](/staff/Plexa/TSL4/Finals/cs15.jpg)
Life took an early lead in this game and never looked back.
Creator 1:2 Life
Life took an early lead by killing off Creator's expeditionary force designed to take an expansion. Not only did Creator lose a bunch of units, he lost the ability to take a third for quite a long time. Life took this lead and ran with it. At first, Life increased his economy by adding drones, and then he transitioned into units, all units, waves and waves of units. The Zerg never stopped as Life won battle after battle, stretching his lead even further with each victory. Broodlords finally arrived and Creator knew he had no hope once those were on the field.
On Antiga Shipyard, both players open somewhat standardly with Creator on the bottom right and Life on the top left. Life goes for a three base play with three hatches before a single queen while Creator opens a nexus gateway forge build, perfectly viable on a map where you can fully wall off your ramp. Creator's first decision is to throw down a robotics facility and the question on everyone's mind is whether this will be an immortal all-in or an immortal expand.
It is indeed an immortal expand as Creator opens up with two observers and then a twilight council before adding any gateways. Life pressures with a decently sized roach-ling force, but it is held off easily with some forcefields and excellent micro. Life loses his entire force while Creator only loses two sentries.
![[image loading]](/staff/Plexa/TSL4/Finals/cs16.jpg)
It's not very effective!
From then, both players are able to play freely as they want as Life is unable to punish Creator's third and Creator is unwilling to attack. Life builds up a double-upgraded roach/ling/inefstor force with neural parasite while Creator begins to add a dark shrine and a warp prism for dark templar harass. Life begins maxing out and tries to put on the pressure again, knowing that if Creator is able to hit a close-to-maxed timing while Life still on lair tech, he'll be in a lot of trouble. But after taking out the rocks at Creator's third, and taking a few peeks at his army, Life determines that's Creator's entrenched position is unbreakable and retreats into a defensive position. Good thing too as he's able to intercept the first warp prism right before it's about to warp dts into a defenseless main. Life immediately suspects dts after killing the prism and begins preparing with spores and overseers at each base.
Creator's initial early robo, early twilight, early expansion build has put him in an excellent position at this point. With a large 170 supply 3-3 army consisting of five immortals and four dts, Creator begins pushing out into the map. Life's only option at this point is to engage it immediately, try to kill half of it off, and then kill the other half with a remax. The dts do their fair share of damage before overseers arrive and a large portion of Life's army is caught behind forcefields.
![[image loading]](/staff/Plexa/TSL4/Finals/cs17.jpg)
Let us in!
When the battle ends, all the heavy hitters including all five immortals and all four dark templar remain alive and the infestors have used most of their energy. While Creator is still down 195 to 162 supply, it does not look good for the Zerg player with much lower tech. As Creator chases Life up the middle, Life seizes his own opportunity to abuse the narrow choke and attempts to fungal most of Creator's units on the ramp. While he succeeds in killing all the dark templar as Creator's ranged units are stuck on the ramp, he eventually completely runs out of fungals, and it will be roach/ling versus stalker/immortal/zealot from this point on. Creator eventually wins this second battle and takes the all-important high ground position in the middle of the map, overlooking Life's fourth base.
![[image loading]](/staff/Plexa/TSL4/Finals/cs18.jpg)
Kill of the Hill
Now that Creator has denied mining at Life's fourth, Life seems to have run out of advantages. His large bank is gone and he now has equal income, but inferior army quality to Creator. Creator pushes down the high ground in order to deal the final blow and Life is powerless to stop him.
Creator 2:2: Life
Creator opened with a relatively safe robotics expand and Life went for a half-hearted attack with the units he made defensively, in case of an attack from Creator. Life traded incredibly inefficiently, so he was unable to to punish Creator's expansion for a long time. His plan was to amass a large amount of heavily upgraded lair units and eventually overwhelm Creator with waves and waves of Zerg reinforcements. This did not work, however, as Creator beat down three full maxes on his way to the Zerg base with his superior army to win the game.
On the rather long Metropolis, Creator spawns at 6 o'clock while Life spawns opposite him at 12 o'clock. Life once again opens three bases and Creator once again opens FFE into robotics facility. For the moment, it seems as if we're heading into a similar game as game 4. Creator makes one observer and then switches to immortal production. Afterwards, he adds three gateways. If you've read my blurb about scouting in the previous game, you'll easily identify this as an immortal expansion build. So does Life as his overlord spots everything that we see, in addition to seeing Creator tearing down his rocks to get his third. Life's response is a very unusual double upgrade pure zergling build designed to render immortals useless. Life attacks with 50 zerglings but Creator's 9 sentries and 2 immortals are able to hold this off without any loses. Creator then throws down his nexus and at this point, Life is convinced that it's an immortal expand. In response, he takes a fourth, adds an additional hatchery, begins taking gases, and morphs a round of drones in order to set himself up for the late game.
![[image loading]](/staff/Plexa/TSL4/Finals/cs19.jpg)
Yep, that's definitely an immortal expand.
But it was not to be! Creator has hidden three additional gateways inside his base and cancels his nexus. We have an immortal all-in, folks! Knowing that Life only has zerglings, Creator makes nothing but zealots in his attack. Life, seeing this attack coming, knows his only option is to counterattack with his large zergling force. Although he ravages Creator's natural, Creator has more than accounted for this possibility and has his main perfectly defended.
![[image loading]](/staff/Plexa/TSL4/Finals/cs20.jpg)
Creator seems to have prepared for this possibility from the beginning with this sim-city.
Meanwhile, Creator has reached Life's bases and just begins marching into the main. Although Life initially tries to resist, he eventually realizes this is futile. He gives up both his main and natural and begins spines in an effort for a last stand at his third. He also begins a spire, seeing that Creator's zealot/sentry heavy army isn't that well equipped to deal with mutalisks. However, only six mutalisks and two spines finish, and Creator quickly warps in two rounds of stalkers to deal with the supposed lack of anti-air problem. Life desperately tries to transfuse individual mutalisks, but this is not enough as he crumbles to the might of Creator.
![[image loading]](/staff/Plexa/TSL4/Finals/cs21.jpg)
This will not end well for the Zerg.
Creator 3:2 Life
Creator did everything in his power to sell the idea that he was immortal expanding. Life bought it and thus played too greedily against the incoming immortal-allin. Life's only hope was for a base trade, but Creator had already prepared carefully for this expected response, so this was shut down as well. Nothing Life had was able to stop the marauding Protoss army and Creator takes the lead in this series.
Creator spawns bottom left while Life gets the top right position on Cloud Kingdom. As with games 2 and 3, this game becomes a battle of Life's 3 base hatch play versus Creator's FFE into stargate play. Creator's air-based army doesn't do much harassment damage this game as he focuses more on scouting rather than harassment.
Once again, it became double evo ling/infestor play from Life against a relatively fast third base from Creator. Life tries two separate ling-focused attacks into Creator's third, but with good forcefields, Life loses a lot more than he gains from these exchanges. Meanwhile, Creator has both a twilight and a robotics bay, and heavily upgraded units supported by colossi seem to be in the cards for him once again.
The first interesting point of the game occurs when Life pops a nydus worm next to Creator's third. Creator's sim city and army composition are perfect against Life's attack, but what is vulnerable is Creator's mineral line. While most all of Creator's army survives, he loses nine probes, so Life actually trades well in the fight.
![[image loading]](/staff/Plexa/TSL4/Finals/cs22.jpg)
A surprise attack!
However, while Life has invested great amounts of gas into his infestors, upgrades, and nydus, he ignores higher tech: the all important spire and hive for broodlords. By 15 minutes into the game, Creator is beginning to move out for his pre-broodlord timing, and at this time, Life has 92 drones, 12 infestors, a handful of lings, and no spines or hive in the works. But once Creator reaches Life's fourth, he does not attack. Rather, he stands there, in a concave, waiting for the right moment to strike. In fact, for a full minute and a half, Creator holds the largest SC2 concave we've ever seen until something finally signals him to attack.
![[image loading]](/staff/Plexa/TSL4/Finals/cs23.jpg)
This concave is so large this is the only way we could show you it
As Creator sees spines being built in Life's fourth, he decides now is the time to strike. After taking out the fourth, Creator tries to take the game right there by heading into Life's army stationed at his third. Both armies clash, but Creator's ground army is clearly superior to Life's. Although Life has plenty of infestors and corruptors, his ground army is minuscule due to his investment into both these more specialized units and drones.
![[image loading]](/staff/Plexa/TSL4/Finals/cs24.jpg)
This Protoss army is just too big and the Zerg army is just too small.
Creator easily takes down everything but the corruptors, and is left with about 40 stalkers. And then a very standard PvZ end-game situation occurs. The Protoss has to use only blink stalkers against all of the remaining Zerg reinforcements. But because the Zerg units generally trickle in and blink stalkers can endless micro against trickling units, Protoss can usually take the game with hardly any losses. Unsurprisingly, this is exactly what happens in this game.
Creator 4:2 Life
For the fourth game in this series, it's the battle of a ling/infestor-heavy mid-game versus a stargate expand. Life tries to get cute with a nydus play, but it only does an average amount of damage. Creator then pushes, but delays his push as much as possible while he maxes outside Life's base. Since Life choose to stay on lair, his broodlord tech is very delayed and he won't be able to ever push out. Creator eventually attacks with a maxed army and takes the game to win TSL4.

The first game of the third/fourth playoff had Sting spawning in the bottom left of Antiga and Keen spawning in the top right. Keen begun by walling himself in, while Sting opted for a bold 15 CC build. Keen immediately scouts Sting’s greed, and rather than expanding himself he puts down a factory, and then a starport in preparation of a hellion drop. Meanwhile Sting was wary of the possibility that Keen was going for some kind of hellion opening – and as a result he walled off the top of his ramp (to stop any runbys) and didn’t send any SCVs to his natural despite the CC being done. Keen begun his pressure with a small 5 marine/1 hellion poke.
The poke became a serious problem for Sting as Keen’s constant rally of marines and hellions took control of his natural. Before long hellions were inside Sting’s main killing SCVs – without the assistance of the medivac. With some SCV pulls, Sting was able to – finally – take control of his main and natural. But by now Keen has his own natural up and an SCV lead. Stings only consolation was that he was able to catch Keen’s medivac while it was trying to harass Sting.
Keen decided that he wanted to get more ahead by harassing Sting some more, this time with a banshee. Sting had two vikings waiting for the banshee to arrive, but Sting had no scans to counter the cloak of the banshee. The result? The banshee went on a murdering spree before being killed – netting 9 kills in total. The moment the banshee was killed Sting immediately jumped on the offensive and was able to march, uncontested, all the way to Keen’s natural where he could siege up. The timing could not have been better for Sting as Keen’s siege had not yet completed, nor had stim pack or combat shields.
![[image loading]](/staff/Plexa/TSL4/Finals/ks2.jpg)
But with a good SCV pull and some of Sting’s army still en route, Keen successfully held off Sting’s advances. Sting then backed off, and both players worked towards getting their third bases up. The game was, for the most part, even. However a key difference between Keen and Sting was that Keen kept up his SCV production and diligently transferred workers to his third base, whereas Sting kept his SCV count in the low 50’s and didn’t transfer anything to his third. Sting then tried to make something big happen by attempting to do a doom drop in Keens main.
![[image loading]](/staff/Plexa/TSL4/Finals/ks3.jpg)
The drop almost worked out for Sting. He was able to equalise the worker count but had traded his tanks for this giving Keen the stronger army. But while the attack was ongoing, Keen had sent a small squad of marines to Sting’s third – which ended up killing the CC before being killed. This gave Keen the economic advantage which he would ride to the end of the game.
Keen’s slim tank majority advantage was soon extended to a tank and marine advantage as his economy allowed him to power way ahead of Sting. After both sides exchanged some marines, Keen dropped into Sting’s base and with the diminished marine count he was able to do a lot of damage. But more importantly, he was able to drag Sting’s forces inside his main which allowed his tanks to gain a better position. The rest of the battle was a routine exercise in breaking tank lines with marines – and Sting was forced to tap out as units from all directions destroyed the last fragments of his army.
![[image loading]](/staff/Plexa/TSL4/Finals/ks4.jpg)
Keen 1-0 Sting
Despite it being scary at a couple points, Keen held an advantage throughout nearly the entire game, and Sting’s attacks never did quite enough damage to justify the damage he had been taking all game long. Sting’s efforts to fight back with scrappy attacks may have been enough had he completely stemmed the economic damage earlier, but losing the third command center was just something he could not afford after already being behind.
On Daybreak, Sting spawned in the bottom left while Keen spawned in the top right. Keen opened up once again with a wall indicating his desire to tech. But this time Sting also went with a tech build. Both players teched to starport and got themselves a banshee. While Sting had his banshee first, he kept it around his base after he ran into one of Keen’s hellions on the map. This meant that Keen would be the first person to harass, but without cloak and a viking out the banshee was only able to nab three kills before being eliminated.
While dispatching the banshee, Sting had his natural CC finish up while Keen’s was behind by a small bit as he was focusing on getting a quicker siege mode. What this meant is that as each side approached 70 supply, Keen’s army was far better prepared for a battle. And indeed, Keen moved out and was able to defeat Sting’s technologically inferior army and set up a semi-contain on Sting’s natural.
Keen crushes Sting's army
Frantically, Sting pulled all his natural SCVs and tried to break Keen’s position – but failed. This allowed Keen to move in range of Sting’s natural CC and begin attacking it. With tanks nowhere in sight, Sting was forced to retreat everything back to his main. Sting had multiple attempts at breaking Keen’s contain, and only on the third attempt was he able to break it. But by then he was so far behind it didn’t really matter.
![[image loading]](/staff/Plexa/TSL4/Finals/ks6.jpg)
Sting finally breaks the contain
Sting tried another doom drop to try and make something happen, but Keen was all over it the moment the medivacs were in sight. The remainder of the game was a routine exercise in closing out a won game.
Keen 2-0 Sting
This game illustrated how powerful siege mode quickly can be. With tanks and ravens to Sting's bio, Keen was easily able to crush Sting's army and set up a contain. Keen's position was difficult to break and resulted in Keen getting a ridiculous advantage which Sting could not overcome.
The third map in the series was Entombed Valley, and had Sting spawn in the bottom right and Keen in the top right. Keen, for the third time, opened with a wall off into factory while Sting followed suit with a virtually identical build. Things deviated when Sting took his second gas while Keen decided it was time to expand. Sting continued with a hellion drop build (similar to Keen’s build in game 1) while Keen sent out his first four hellions from a reactored factory around the back path to Stings base. The result was the Keen suddenly found his hellions were in an amazing position.
How did this happen?
Keen’s hellions not only delayed Sting’s drop harass, but it also alerted him to Sting’s strategy and allowed him to prepare a perfect defense. Indeed, it wasn’t long before Keen’s natural started to pay off and he was able to repel Sting’s army completely. Sting showed no sign of expanding and instead powered units in an effort to break Keen. Keen’s army had now reached a point where he felt comfortable moving out with, so he moved around the back where he ran into Sting’s army.
![[image loading]](/staff/Plexa/TSL4/Finals/ks8.jpg)
Amazingly, with some cute micro Sting was able to exchange armies relatively evenly. But this was still bad news for Sting, as Keen’s far superior economy meant that Keen would be able to reproduce significantly faster. Knowing that he had a slightly better army, Sting decided to set up camp outside Keen’s natural while attempting to expand behind it. Keen realised this and set his natural into a strong defensive formation. After some tank shots were exchanged, it was clear that Sting couldn’t hold the position and he went home.
Much like game 1, Keen now had a better army (more tanks and healthy marine count) and a superior economy. After massing up a bit more (and taking a rather wonky path) his army arrived at Sting’s third base and used his medivacs to push into Sting’s base from the third. Knowing that it would be impossible to dislodge Keen’s superior position, Sting went for a desperate counter attack.
![[image loading]](/staff/Plexa/TSL4/Finals/ks9.jpg)
The attack was crushed, and so was Sting’s hope in this game.
Keen 3-0 Sting
After the opening, Keen basically just had to do the same as in game 1 – stay one step ahead of his opponent and he would surely seal the deal. Again similar to game 1, had Keen not had an advantage at this point, his aggressive play with almost all of his units could have backfired if Sting was actually able to break the front efficiently. In any case, this game was nearly over after Sting’s aggression was completely shut down, but had Sting played perfectly, Keen’s risk-taking could have lost him his lead.
The fourth match of the series was on Cloud Kingdom with Sting on the top right fighting for his tournament life, and Keen in the bottom left one game away from a precious TSL5 seed. As with the three previous games Keen opted for a wall in but this time went for a command center after his barracks. Sting also elected to do a variation of this build – the reaper expand. His reapers, however, were largely ineffective.
Both sides settled into a macro game, with Keen electing to take the quicker third at the price of slightly delayed starport. This gave Sting the initiative to drop with two medivacs. However a defending tank and a quick response from Keen meant that the drop didn’t do much damage.
![[image loading]](/staff/Plexa/TSL4/Finals/ks10.jpg)
With Sting’s attack beaten back, Keen calmly took his third base and continued to mass up. Not long after Sting took his third. As supplies reached 150 Keen finally started to look aggressive and moved out. Both sides jostled for position on the low ground outside Sting’s natural while their supplies climbed ever higher. Eventually, Keen decided he would go around the long way to Stings third and try and make something happen there. Sting spotted this, and both sides sieged up preventing either side from advancing. However, Keen loaded up 5 medivacs and went to drop them in Sting’s main.
The drop was effective and forced Sting to bring back most of his marines into his main. On top of sniping the armory and killing SCVs, the drop allowed Keen to start attacking everywhere and begin to start wearing Sting down.
One of Keen's attacks, this one is on the natural
Keen would attack Sting’s natural, pulling his forces there, only to retreat and re-drop his main. Then attack the third – all while taking his fourth. Keen looked like he was vastly outplaying Sting, but somehow Sting managed to have a similarly sized army after all the harass. Sting tried to counter attack, but met Keen’s army in the middle of the map and with some fortunate exchanges Sting was able to gain a 12 to 4 tank advantage.
![[image loading]](/staff/Plexa/TSL4/Finals/ks12.jpg)
Keen's clever move yields results
This advantage allowed Sting to siege up behind the minerals of Keen’s fourth and it looked like Sting might have enough to force a significant advantage. Then Keen did something very clever; he used the majority of his army to bait the mobile part of Sting’s army away from his sieged tanks – this move gave him enough time to sneak in with well split marines and clean up the sieged tanks. This not only evened up the tank count, but in conjunction with a drop in Sting’s third, Keen had turned the tables and was now firmly in control of the game.
Keen now took control of the center of the map – trading portions of his army with Stings wherever he could. He worked his way into Sting’s third and earned a 40 supply advantage by the time he got there. With Sting’s army horribly out of position, Keen had little difficulty crushing the third base and dealing Sting’s economy a killing blow. From here it was just a matter of Keen picking his engagements carefully, exchanging whatever he could with Sting and claiming his third place check and TSL5 seed.
Keen 4-0 Sting
Keen showed a phenomenal ability to control the tempo of the game and keep Sting on the back foot throughout the series, and that was extremely evident in this game as Keen was nearly always the one making successful tactical plays that allowed his advantages to build up. Sting just couldn't keep up, and as a result fell to Keen without taking a map.
CreatorPrime: Looking Back
For a player of Creator's skill and widespread success, he has relatively few fans. In his fan club on TeamLiquid, he currently only posseses 56 admirers. Compare this with Crank's 74, Keen's 108, Bomber's 213, or MKP's staggering 371 fans. Part of the problem is Creator's lack of presence in foreigner tournaments. In fact the only offline foreigner tournament Creator has attended was IPL4, which he qualified for by virture of being on GSTL finalist team, Prime. (He finished a respectable 9th-12th there among a sea of Code S Koreans.) The issue will be quickly amended, however, as Creator is slated to attend both the WCS Asia finals and the WCS World finals this year, both held in the non-Korean country of China.
What I worry about, however, is that even with all this exposure, potential fans won't be able to appreciate the beauty that is CreatorPrime. Simply put, Creator is not a flashy player. Unlike Huk or Gumiho, he doesn't tend to produce crazy and unpredictable games. And unlike Hero, his play, at least at first glance, is not awe-inspiring. To the average Starcraft viewer, Creator will blend into the sea of the standard Protosses, something like that of an Alicia or Killer. To truly appreciate Creator's less flashy both more cerebral play, you have to both
- a. watch many Creator games and
- b. have a good understanding of Starcraft.
Creator is most notable for three aspects of his play:
- His repeated use of the same openings in each match-up: Yes, every player tends towards certain builds but almost none save perhaps Yonghwa or Stephano are ballsy enough to reuse the same builds over and over again as Creator.
- His late game: More than any player to date, Creator focuses on lasting through the early and mid game and then dominates with his superior knowledge of and experience with the late game.
- Heavy use of forges and upgrades: Wolf once joked that he imagines Creator's arms as two forges and that's what they very well might be based on his use of this usually unnotable building in all match-ups.
Creator v
![[image loading]](http://www.teamliquid.net/staff/Plexa/terrantest.png) : Let me take you back to September 29th, 2011 for an event that many would consider to be Creator's first big splash in the Starcraft scene. Sure, Creator had previously played for Prime in the GSTL and he once dissapointingly lost to MVP in Code A, but on this fateful Thursday, he began turning heads. The scene was the GSTL semi-finals. Prime was down 1-4 against the formindable TSL, and Creator was the only man left standing. Shocking, Creator did the seemingly impossible, turned it all around and brought Prime all the way into the final of that season.
: Let me take you back to September 29th, 2011 for an event that many would consider to be Creator's first big splash in the Starcraft scene. Sure, Creator had previously played for Prime in the GSTL and he once dissapointingly lost to MVP in Code A, but on this fateful Thursday, he began turning heads. The scene was the GSTL semi-finals. Prime was down 1-4 against the formindable TSL, and Creator was the only man left standing. Shocking, Creator did the seemingly impossible, turned it all around and brought Prime all the way into the final of that season.Funnily enough, however, the biggest story of that night was not just of Creator's four-kill, but the manner in which he accomplished it. To achieve these wins, Creator had to plow through three Terrans: Clide, Heart, and aLive. And to do this, Creator used the same exact build in all three games, now forever immortalized as CreatorPrime PvT. This double forge-focused macro build tore threw each Terran, and even though the later two had seen it and knew exactly what was coming, they were powerless against the onslaught.
Creator's games inspired a revolution, and not only did double forge styles become increasingly popular in the next few months, Creator's exact build would be copied to this very date by the best Protoss in the world, including Genius, Hero, Brown, Squirtle, Alicia, Vines, MacSed, Vines, Puzzle, Sage, and most recently, GSTL champion Seed. Still, none of these Protoss titans would be able to use it as well as the master himself, and for the later half of 2011 and most of 2012, Creator was usually sent out against Terrans in team leagues and almost exclusively used this build. To this date, while Creator now uses a better mix of macro builds, the spirit of his original build lives on. Very rarely will you see a Creator macro game that doesn't involve two early forges, and very rarely will you see him lose in this match-up.
Creator v
![[image loading]](http://www.teamliquid.net/staff/Plexa/zergtest.png) : While Creator's PvT was his first claim to fame, Creator is far from a one-match-up pony. For the longest time, Creator struggled alongside his Protoss brethen against the Zergs. While he still prefered macro play over all-ins, he struggled to find a macro-style that worked for him, and consequently often scummbled to the temptation of resorting to standard 2 base all-ining in this match-up. More recently, however, something just seemed to click for the 16 year old. For one thing, as with his PvT, Creator discovered a build that just seemed to work for him, something I will now dub the CreatorPrime PvZ opening, featured here in a Day[9] daily. This build, which focuses on early expanding and fast upgrades just happened to fit perfectly with Creator's style. And as with his PvT build, it would be copied by many other progamers who saw Creator's genius, including Oz, Parting, and Squritle.
: While Creator's PvT was his first claim to fame, Creator is far from a one-match-up pony. For the longest time, Creator struggled alongside his Protoss brethen against the Zergs. While he still prefered macro play over all-ins, he struggled to find a macro-style that worked for him, and consequently often scummbled to the temptation of resorting to standard 2 base all-ining in this match-up. More recently, however, something just seemed to click for the 16 year old. For one thing, as with his PvT, Creator discovered a build that just seemed to work for him, something I will now dub the CreatorPrime PvZ opening, featured here in a Day[9] daily. This build, which focuses on early expanding and fast upgrades just happened to fit perfectly with Creator's style. And as with his PvT build, it would be copied by many other progamers who saw Creator's genius, including Oz, Parting, and Squritle.In addition, Creator has begun to become much more confident in the late game. More than almost every other Protoss player, you'll see Creator head into the late, late game in PvZ, which features motherships, multi-pronged harass, and of course, carriers. An almost textbook display of his PvZ late-game prowess can be found here, played during Creator's TSL4 qualifier run and subsequent win. Most recently, Creator proclaimed PvZ to be his best match-up, and it's no wonder with big wins over top Zergs such as Sniper, Leenock Nerchio, and even DRG himself.
Creator v
![[image loading]](http://www.teamliquid.net/staff/Plexa/protosstest.png) : Unlike another Korean Protoss who shall remain unnamed, Creator has never claimed to be confident at PvP, even going so far as to admit that there's a huge luck factor involved in the match-up. But even before WCS Korea, his PvP was oldly statistically his best match-up at 58%. This would fortell of what was yet to come.
: Unlike another Korean Protoss who shall remain unnamed, Creator has never claimed to be confident at PvP, even going so far as to admit that there's a huge luck factor involved in the match-up. But even before WCS Korea, his PvP was oldly statistically his best match-up at 58%. This would fortell of what was yet to come.As the round of four for the winners bracket of WCS Korea was decided, things looked grim for Creator's life in this tournament. Standing against him were three Protosses, with some of the best PvPs the world had to offer. Squritle and Parting were extremely dominant in PvP, and Seed had just won a GSL finals on the back of his PvP. Creator, although he had recently taken down Hero and Puzzle in this very same tournament, was now facing a whole different level of PvPers. But Creator persevered and actually showed a interesting Creator-esque style of PvP on his way to the top. Throughout this tournament, Creator's PvP results included 2-1 Hero, 2-0 Puzzle, 0-2 Squirtle, 2-1 Rain(By.Sun), 2-1 Parting, and then consecutive 2-0 and 2-1 scores against Squirtle again. This would be enough for a WCS win, his first major tournament win ever and a claim to the title of "best player in Korea".
Just by studying Creator's PvP games in WCS Korea, of which there are eighteen, you'll be able to see a trend in his play consistent with his other match-ups and his general outlook on the game. For the first time in a match-up, Creator borrows some builds from fellow Protoss players instead of creating some for his own. (It's about time they gave something back to Creator). His two most common builds in PvP include a 2 gate expansion build first popularized by Oz and Parting, and a phoenix build, first used by Tails. Both these builds are very macro oriented and adhere to the Creator philsophy of getting into the late game safely, which Creator is immensly confortable with. And as with his other match-ups, Creator builds forges faster than any other player, and focuses on chronoboosting them more frequently than any other player. Against Parting, Creator showcased two relatively novel 3-0 timing attacks in their series, which were only possible due to his diligent chronoboosts.
Some of you will eventually beat the single-player campaign in order(WoL, HotS, LoV), but Creator may very well be the first to conquer multi-player, the first to master all three match-ups, in single-player order, first vanquishing the Terran dominion, then holding off hordes of Zerg, and finally defeating his Protoss brethern to achieve his first title win. Throughout his year-long journey, Creator would grow and mature immensly as a player, but never did he stray far more his roots, his characteristic macro play.
One the most iconic illustrations of Creator's solid play occurred against Squirtle in game 3 of series 2 of the grand finals of WCS Korea, with Creator only one win away from his first major tournament victory. Creator had come a long way that day. After defeating Parting and then Squirtle previously on the same day, Creator was once again put up again Squirtle, and had tied the second series 1-1. In the final game on Daybreak, Creator opened up a harass-based stargate into robotics build while Squirtle opted for an aggressive blink stalker build. When the hands were revealed, Creator had 4 phoenix in Squirtle's base while Squirtle had 10 stalkers in Creator's natural. No one is able to retreat, and although Creator can devastate Squirtle's probe line, he appears to be defenseless with his meager army against Squirtle's onslaught of stalkers. Creator's solution is to force field the ramp.... indefinitely.
Q: In the third game against Squirtle, you were using forcefields to stall for time.
A: When I threw down the first forcefield, I just felt like I already won, and my heart just kept exclaiming. When my phoenix then scouted his strategy, I just felt like I would be able to achieve victory. But if I had messed up the forcefields, even just a little, the game would have ended instantly, so it was quite nail biting.
A: When I threw down the first forcefield, I just felt like I already won, and my heart just kept exclaiming. When my phoenix then scouted his strategy, I just felt like I would be able to achieve victory. But if I had messed up the forcefields, even just a little, the game would have ended instantly, so it was quite nail biting.
We often seen Protoss lose entire games when they miss a single forcefield, especially in season one of GSL. But Creator, in perhaps the most important game of his life, and probably the most nerve-wracking game he's ever played, went on to chain a total of nine forcefields, spanning a total of two entire minutes.

You Shall Not Pass.
In this time, Creator would be able to kill a third of Squirtle's probes, putting him in an all-in position. But only when Creator was sure he had enough to defend his ramp did he let his opponent up, where Squirtle blinked into his death. In this game, Creator showed that he is not afriad to use the same passive builds each game and defend any aggression that comes to him. He showed his well-practiced form, his experience, and his solid play. But most of all, Creator showed that he is a champion... But something was still not quite complete.
Creator's main achievements come from ladder, small online tournaments, GSTL, and WCS Korea, four tournaments with formats that reward skill over preparation. He has been notably absent from the deeper stages of GSL, where preparation and series play are integral to a player's success. Fortunately for him, Creator qualified for TSL4, a tournament which features bo5 and bo7 matches spread over weeks, so he gains a perfect opportunity to prove himself in other formats. In order to win TSL, Creator would have to master new skills outside of the game in addition to utilizing his previous dominance over the game of Starcraft.
Round of 16 and 8- Preparation:
Since each player would have a week to practice on predetermined maps versus a predetermined opponent, researching your opponent and meticulously preparing strategies designed against him is instrumental. And while Creator has traditionally succeeded without much preparation, he certainly showed how powerful he can be when he combines it with his already solid play.
Against CoCa in the round of 16, Creator used the same exact strategy, one we've never seen from him, in two separate games. Creator would open stargate and then transition into a 3 base colossi pre-hive all-in. So refined was this build that Creator built three colossi and then an immortal in each game, deeming that four colossi would take too long to make for the specific timing of his intended push. The result was a clean 3:0 sweep of CoCa.
Hack would be Creator's next opponent in the round of 8. He is known as a player who can use an incredibly diverse set of aggressive builds against his opponents. This is especially dangerous for Creator, as the PvT opening he's generally known for is generally weak to certain timings or early aggression. So to be extra safe, Creator opened with a colossi build in each set, designed to fend off a wide array of aggressive Terran strategies. And so it was that all of Hack's planned aggression was stopped dead in its tracks and Creator would also take this series 4:0.
Round of 4- Adaption:
Creator's opponent for the semifinals was Sting, a player who rivaled, if not surpassed Creator's skills at preparation. Throughout the series, Sting would take extremely greedy risks in each game, abusing Creator's well-known passive tendencies. But by game 6, Creator decided he had had enough. Seeing how blindly risky and greedy Sting had been against him, Creator decided to turn Sting's preparation against him. Predicting that Sting would continue to play in the same fashion, Creator went for an all-in, something he rarely does against Terran. The result? Creator wins this series 4:2 and enters the TSL grand finals.
The Grand Finals-To The Next Level:
In the finals of TSL4, we really saw Creator bring it to completely different level against his opponent, Life. For the largest prize Creator has ever had the chance of playing for, he certainly would be showing us every little trick in his book. While Creator has always been an innovator with his builds, today he will be an innovator of tactics. The stunningly new ways he stretched his units include the following:
- Zealots: Unflinchingly held position on the Zerg's main ramp while dark templar ravaged the Zerg's main
- Stalkers and Observers: Bravely sent out stalker/observer expeditionary forces to clear out creep while he harassed
- Voidrays/Phoenix: Masterfully split all his air units in different directions in order to gain full vision of the map
- Maxed armies: Patiently held position in the largest concave ever seen in SC2 until the time was perfect to strike
- Upgrades: Meticulously chronoboosted a single forge to 3-3-3 upgrades
- Buildings: Miraculously held off 32 lings with just 2 well sim-cited cannons
Creator started the year with few Starcraft viewers even knowing of his existence, but as the year draws to a close, he's on all of our minds. With a solid grasp of skills both outside of and within the game, anything seems possible in this young Protoss player's future.
So I ask: why are you still not a fan of TSL4 Champion CreatorPrime?
Sponsors:


TwitchTV is the world’s largest video game entertainment and chat community. TwitchTV features the top gaming personalities, players, tournaments and commentary, in addition to the most active and interesting discussions around video games. TwitchTV provides publishers and advertisers a platform to create long term engagement and commitment from gamers.
Learn more at www.twitch.tv
Learn more at www.twitch.tv
Razer has been a pioneering supporter of e-Sports since its conception. It is in our blood and we are driven to further the culture of professional gaming in all that we do. We work hand in hand with our pros to forge weaponry for the players who stake their livelihood on podium placements. Our gear is designed to perform flawlessly in high-stress tournament conditions where winning is everything and mistakes cost championships. Those who compete with our equipment will attest – We live by our words: For Gamers. By Gamers.
For more information, please visit www.razerzone.com
For more information, please visit www.razerzone.com
Art by:


